


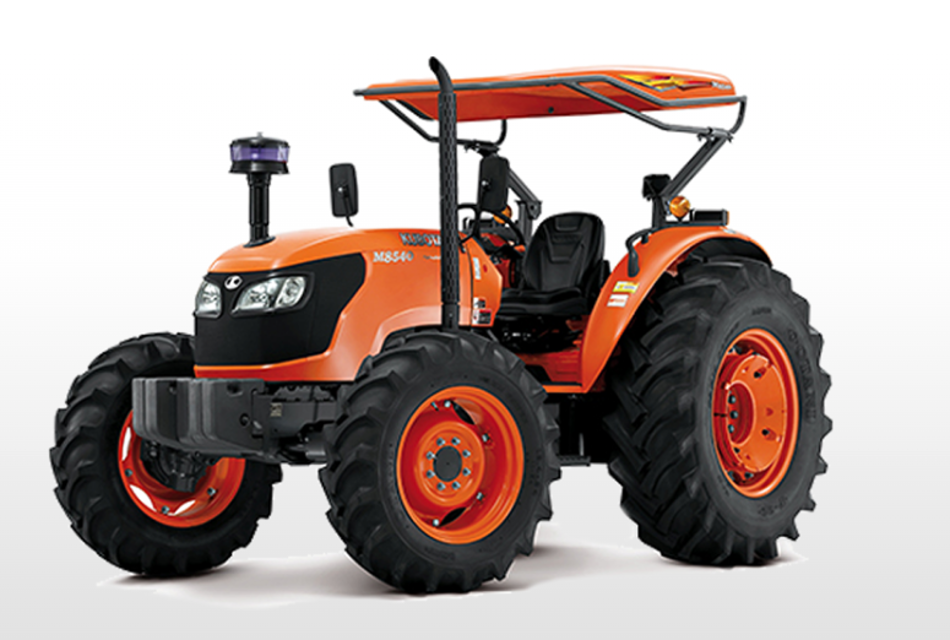
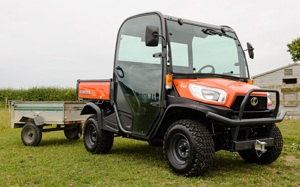
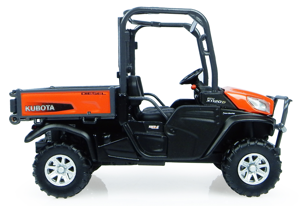
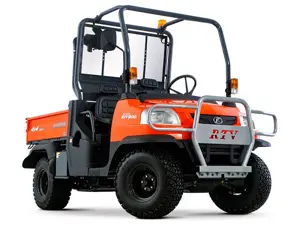
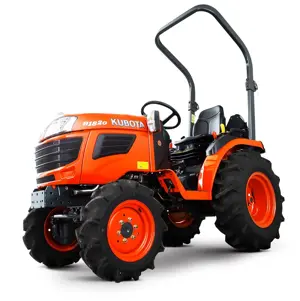
Kubota Tractor M9540
Need answers fast?
Explore the manual using AI.
Turn manuals into instant answers
with your AI-powered assistantTurn manuals into instant answers
with your AI-powered assistant
Manual for Kubota Tractor M9540
Complete asset maintenance, one click away
Get instant access to all the maintenance information you need. Empower technicians to perform preventive maintenance with asset packages, ready to use right out of the box.

Documents & Manuals
Find all the essential guides in one place.
 Tensioning Guide
- Belt-diagram
- C-120 pulleys
+ 13 more

Work Order Templates
Pre-built workflows to keep your asset running smoothly.
- Daily Electrical System Inspection
- Replace Roller and Pulley
- Install Engine B-120
+ 29 more

Procedures
Integrate maintenance plans directly into your work orders.
- Motion Industries
- Applied Industrial Technologies
- Electrical Brothers
+ 5 more

Parts
Access the parts list for your equipment in MaintainX.
- Drive Motor
- B2 Rollers
- Tensioning System
+ 40 more
Kubota Tractor M9540
Create an account to install this asset package.
Maintenance Plans for Kubota Tractor Model M9540
Integrate maintenance plans directly into your work orders in MaintainX.
600 Hourly Front Axle Pivot Adjusting
Warning: Incorrect front axle pivot pin adjustment can cause front wheel vibration
Front axle pivot pin adjustment correct?
Adjusting procedure
Loosen the lock nut
Screw-in the adjusting screw until seated
Tighten the screw with an additional 1/6 turn
Re-tighten the lock nut
Sign off on the front axle pivot adjustment

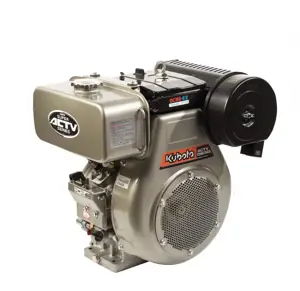
1 Daily Coolant Level Check
CAUTION! To avoid personal injury: Do not remove radiator cap while coolant is hot. When cool, slowly rotate cap to the first stop and allow sufficient time for excess pressure to escape before removing the cap completely.
Check to see that the coolant level is between the 'FULL' and 'LOW' marks of recovery tank.
When the coolant level drops due to evaporation, add soft water only up to the full level.
In case of leakage, add anti-freeze and soft water in the specified mixing ratio up to the full level.
IMPORTANT! If the radiator cap has to be removed, follow the caution above and securely retighten the cap.
Use clean, fresh soft water and anti-freeze to fill the recovery tank.
If water should leak, consult your local KUBOTA Dealer.
Sign off on the coolant level check
Head Lamp Replacement
Warning: Be careful not to drop the bulb, hit anything against the lamp, apply excess force, and get the lamp scratched. If broken, glass may cause injury. Pay more attention to halogen lamps in particular, which have high pressure inside. Before replacing the lamp, be sure to turn off the light and wait until the bulb cools down, otherwise, you may get burned.
Turned off the light and waited until the bulb cooled down?
While pushing the right and left lock buttons, pulled and removed the electrical connector?
Removed the rubber boot?
Removed the clamping fixture and took out the bulb?
Replaced with a new bulb of the specified wattage?
Warning: Never touch the bulb surface (glass) with bare hands. Fingerprints, for example, may break the bulb.
Reinstalled the head lamp assembly in the reverse order without touching the bulb surface with bare hands?
Sign off on the head lamp replacement
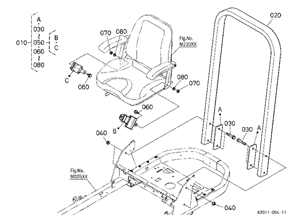
100 Hourly Brake Pedal Adjusting
To avoid personal injury:
Stop the engine and chock the wheels before checking brake pedal.
To prevent uneven braking, the specification must be within the recommended limit.
If found out of the specifications, contact your local KUBOTA Dealer for adjusting the brakes.
Checking the brake pedal free travel
Proper brake pedal free travel - 7 to 14 mm (0.3 to 0.6 in.) on the pedal
Keep the free travel in the right and left brake pedals equal.
1. Set the parking brake.
2. Slightly depress the brake pedals and measure free travel at the top of pedal stroke.
1 Daily Gauges Check
Check indicators
Check gauges
Check meter
Inspect the instrument panel for broken gauge(s)
Inspect the instrument panel for broken meter(s)
Inspect the instrument panel for broken Easy Checker(TM) lamps
Replace if broken
Unlock efficiency
with MaintainX CoPilot
MaintainX CoPilot is your expert colleague, on call 24/7, helping your team find the answers they need to keep equipment running.
Reduce Unplanned Downtime
Ensure your team follows consistent procedures to minimize equipment failures and costly delays.
Maximize Asset Availability
Keep your assets running longer and more reliably, with standardized maintenance workflows from OEM manuals.
Lower Maintenance Costs
Turn any technician into an expert to streamline operations, maintain more assets, and reduce overall costs.
Thousands of companies manage their assets with MaintainX

'%3e%3cpath%20fill='url(%23b)'%20d='M66.008%2080.068c-5.084-.786-9.763-3.834-12.442-8.68a16.942%2016.942%200%200%201-1.87-5.18c1.096.19%202.203.476%203.298.87%206.525%202.333%2010.836%207.68%2011.014%2012.99ZM51.47%2061.576c.488-5.524%203.62-10.716%208.847-13.597a17.132%2017.132%200%200%201%2011.335-1.882c-.798%208.145-7.43%2014.848-16.038%2015.599-1.417.119-2.799.07-4.144-.12Zm28.564-11.478a17.513%2017.513%200%200%201%203.727%204.62c4.608%208.335%201.584%2018.813-6.75%2023.409a16.988%2016.988%200%200%201-4.359%201.679%2019.624%2019.624%200%200%201-3.977-12.776c.346-7.561%204.942-13.931%2011.36-16.932Z'/%3e%3cpath%20fill='%23110F0D'%20fill-rule='evenodd'%20d='M142.831%2048.324h4.977V77.03h-4.977V48.324Zm27.278%2013.002c.322%201.048.453%202.263.453%203.62v12.073h-4.787V66.208c0-.75-.047-1.572-.154-2.143-.453-2.382-1.822-3.572-4.215-3.572-2.31%200-3.882%201.274-4.43%203.476-.143.596-.226%201.405-.226%202.25v10.8h-4.787V56.623h4.477v2.989c1.536-2.5%203.906-3.43%206.371-3.43%203.488%200%206.263%201.68%207.298%205.144Zm24.636%207.323c0%203.882-2.358%206.525-5.763%207.727-1.298.453-2.632.643-4.62.643h-10.169V48.324h9.085c1.691%200%203.156.143%204.049.38%203.465.93%205.727%203.68%205.727%207.335%200%202.441-.81%204.156-2.762%205.644%202.905%201.417%204.453%203.727%204.453%206.966Zm-15.634-8.656h4.584c1.024%200%201.917-.143%202.536-.417%201.215-.548%201.905-1.608%201.905-3.167%200-1.548-.643-2.572-1.845-3.132-.691-.31-1.762-.452-2.763-.452h-4.417v7.168Zm10.716%208.465c0-1.536-.893-3.37-3.227-3.893-.428-.095-1.036-.143-1.571-.143h-5.918v8.085h5.501c.56%200%201.429-.048%201.953-.167%201.94-.453%203.262-1.846%203.262-3.882Zm47.747-11.847-8.097%2020.408h-4.429l-8.109-20.408h5.191l5.192%2014.574%205.108-14.574h5.144Zm-20.218%2010.002c0%20.69-.036%201.262-.155%201.94h-15.943c.631%202.87%202.714%204.728%205.882%204.728%202.131%200%203.607-.882%204.703-2.525h4.87c-1.762%204.144-5.204%206.692-9.657%206.692-6.084%200-10.537-4.858-10.537-10.49%200-6.108%204.524-10.776%2010.335-10.776%206.239%200%2010.442%204.954%2010.502%2010.43Zm-4.763-1.405c-.333-2.846-2.643-4.858-5.691-4.858-2.894%200-5.287%201.929-5.621%204.858h11.312Zm-72.667%203.44c0%204.787-3.287%208.371-9.419%208.371H119.363V64.66c-1.917.274-3.87.69-5.811%201.238l4.537%2011.121h-5.418l-3.596-9.585c-5.144%202.084-10.085%205.216-14.217%209.585h-4.786L101.8%2048.312h4.56l5.68%2013.883a44.112%2044.112%200%200%201%207.323-1.774V48.312h9.084c1.703%200%203.156.143%204.061.393%203.453.929%205.727%203.667%205.727%207.323%200%201.917-.738%204.179-2.81%205.691%203.06%201.56%204.501%204.025%204.501%206.93Zm-15.634-8.667a62.664%2062.664%200%200%201%202.06-.036c1.703.012%203.239.131%204.608.37%201.441-.549%202.357-1.727%202.357-3.537%200-1.941-.881-3.144-2.488-3.667-.548-.18-1.358-.286-2.322-.286h-4.215v7.156Zm-16.55%203.905-3.715-9.894-6.394%2016.502c2.833-2.595%206.263-4.858%2010.109-6.608Zm27.254%204.74c0-2.775-3.131-4.347-8.513-4.418-.715%200-1.441.011-2.191.047v8.252h5.918c2.548%200%204.786-1.37%204.786-3.882Z'%20clip-rule='evenodd'/%3e%3c/g%3e%3cdefs%3e%3clinearGradient%20id='b'%20x1='51.47'%20x2='85.916'%20y1='62.946'%20y2='62.946'%20gradientUnits='userSpaceOnUse'%3e%3cstop%20stop-color='%23CD9F28'/%3e%3cstop%20offset='1'%20stop-color='%23ECD80B'/%3e%3c/linearGradient%3e%3cclipPath%20id='a'%3e%3cpath%20fill='%23fff'%20d='M51.47%2045.728h186.104V80.14H51.47z'/%3e%3c/clipPath%3e%3c/defs%3e%3c/svg%3e)


More from Kubota


Explore Other Assets


© 2026 MaintainX. All rights reserved.