


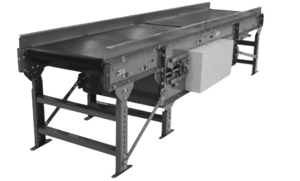
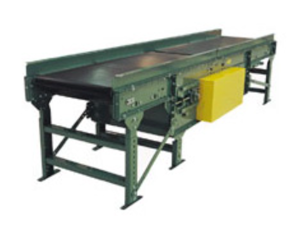
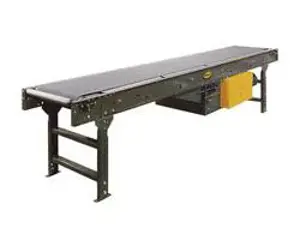
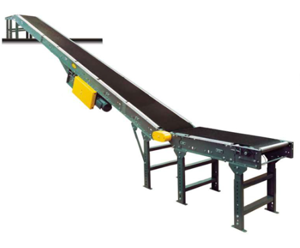
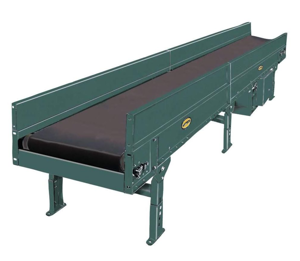
Hytrol Belt Conveyor PROSORTMRT
Need answers fast?
Explore the manual using AI.
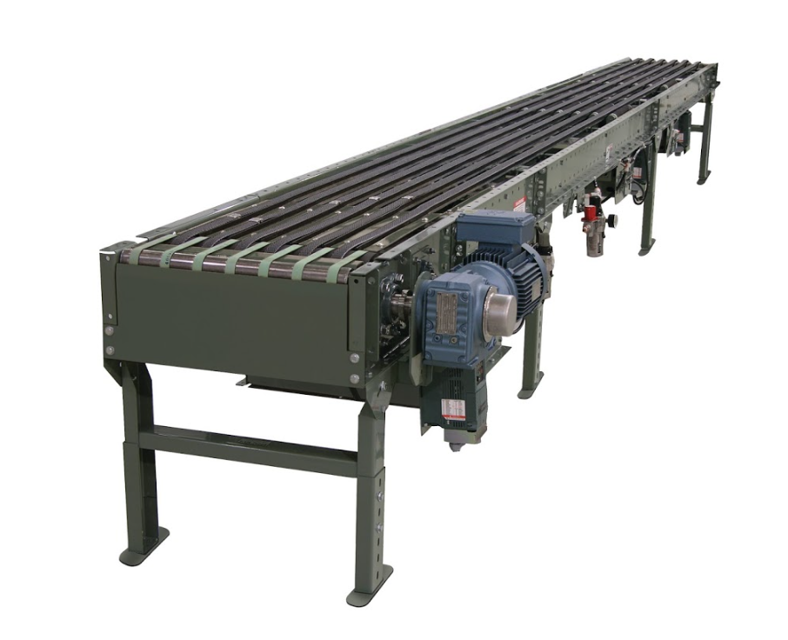
The Hytrol Belt Conveyor PROSORTMRT is a high-performance material handling solution designed for efficient sorting and transportation. This advanced conveyor system enhances productivity in various industrial applications, ensuring reliable operation and minimal downtime. Optimize your workflow with the PROSORTMRT's robust design and innovative features.
Turn manuals into instant answers
with your AI-powered assistantTurn manuals into instant answers
with your AI-powered assistant
Manual for Hytrol Belt Conveyor PROSORTMRT
Complete asset maintenance, one click away
Get instant access to all the maintenance information you need. Empower technicians to perform preventive maintenance with asset packages, ready to use right out of the box.

Documents & Manuals
Find all the essential guides in one place.
 Tensioning Guide
- Belt-diagram
- C-120 pulleys
+ 13 more

Work Order Templates
Pre-built workflows to keep your asset running smoothly.
- Daily Electrical System Inspection
- Replace Roller and Pulley
- Install Engine B-120
+ 29 more

Procedures
Integrate maintenance plans directly into your work orders.
- Motion Industries
- Applied Industrial Technologies
- Electrical Brothers
+ 5 more

Parts
Access the parts list for your equipment in MaintainX.
- Drive Motor
- B2 Rollers
- Tensioning System
+ 40 more
Hytrol Belt Conveyor PROSORTMRT
Create an account to install this asset package.
Maintenance Plans for Hytrol Belt Conveyor Model PROSORTMRT
Integrate maintenance plans directly into your work orders in MaintainX.
HyPower Cabling Replacement
WARNING: Do not disconnect or connect any HyPower Cabling Components while under power!
All cabling connections are to be made without power on the system.
Connect three-phase electrical service to disconnect box. A single-sided disconnect requires a 15 Amp service, double-sided disconnect requires a 30 Amp service.
From the disconnect box connect the HyPower Extension Cable(s) to the HyPower T-Connector.
Connect the HyPower T-Connector to the Male HyPower Cable that is pre-wired to the VFD.
Connect the Female HyPower Cable on the VFD to the Male HyPo Cable pre-wired to the divert motor.
Connect the remaining Female connection on the T-Connector to the next divert zone on the conveyor and repeat steps 3 & 4 for each divert location.
WARNING! Electrical controls shall be installed and wired by a qualified electrician. Wiring information for the motor and controls are furnished by the equipment manufacturer.
IMPORTANT NOTE: Electrical Code: All motor controls and wiring shall conform to the National Electrical Code (Article 670 or other applicable articles) as published by the National Fire ;Protection Association and as approved by the American Standards Institute, Inc. Subject to local code and local customer acceptance.

Transfer Adjustment
Transfer Height Adjustment
Is the height of the transfer preset at factory?
Enter the current height of the transfer
Did you loosen the 3/8 in. bolts holding the cylinder-mounting channel?
Did you adjust the height using jack bolts?
Did you tighten the 3/8 in. bolts?
Drive Belt Tension
Did you loosen the 3/8” locknut holding take-up idler?
Did you tension the belt by pushing take-up idler down?
Belt Replacement
WARNING: Do not replace belt with power on, remove air to take-up.
Remove (4) bolts holding wear strip support channel in place and remove channel by sliding toward discharge end of conveyor.
Remove top belt tran angle holding rollers in place
Remove 1-3/8” dia. rollers
Remove bearing support channel and bearing by removing hardware securing bearing support channel to drive channel. Next loosen set screw securing bearing to drive pulley shaft. Remove support channel and bearing
Thread belt around pulley.
Unroll belt while inserting into the bottom cut out of bed spacer and into the belt guide at top. Green conveying surface should be showing at top. Make sure belt is not twisted in the process.
Continue inserting belt from discharge to infeed. At infeed end remove bolt attaching belt guard to infeed idler weldment, loosen bolt holding top flat belt idler to belt guard this will allow the guard to pivot which will make room for the belt to be wrapped around the top flat belt idler and snub over the bottom flat belt idler. Add bolt to belt guard and tighten top flat belt idler bolt
Assemble 1-3/8” dia. Rollers along with top belt tran angle
Parts for Hytrol Belt Conveyor PROSORTMRT
Access the parts list for your equipment in MaintainX.
Mounting Angle For Fiter/Regulator #094.194
B-11302
Belt - 15/16 In. Wide Aramide Power Transmission Belt
069.7265
Ployurethane Tubing - 1/2 In. Od Black (Specity Length)
094.11495
Brass Union Tee - 1/2 In. Plastic-1/2 In. Plastic
094.14089
Air Line Filter/Regulator Wbracket
094.194
Mounting Angle For Fiter/Regulator #094.194
B-11302
Belt - 15/16 In. Wide Aramide Power Transmission Belt
069.7265
Ployurethane Tubing - 1/2 In. Od Black (Specity Length)
094.11495
Brass Union Tee - 1/2 In. Plastic-1/2 In. Plastic
094.14089
Air Line Filter/Regulator Wbracket
094.194
Mounting Angle For Fiter/Regulator #094.194
B-11302
Belt - 15/16 In. Wide Aramide Power Transmission Belt
069.7265
Ployurethane Tubing - 1/2 In. Od Black (Specity Length)
094.11495
Brass Union Tee - 1/2 In. Plastic-1/2 In. Plastic
094.14089
Air Line Filter/Regulator Wbracket
094.194
Unlock efficiency
with MaintainX CoPilot
MaintainX CoPilot is your expert colleague, on call 24/7, helping your team find the answers they need to keep equipment running.
Reduce Unplanned Downtime
Ensure your team follows consistent procedures to minimize equipment failures and costly delays.
Maximize Asset Availability
Keep your assets running longer and more reliably, with standardized maintenance workflows from OEM manuals.
Lower Maintenance Costs
Turn any technician into an expert to streamline operations, maintain more assets, and reduce overall costs.
Thousands of companies manage their assets with MaintainX

'%3e%3cpath%20fill='url(%23b)'%20d='M66.008%2080.068c-5.084-.786-9.763-3.834-12.442-8.68a16.942%2016.942%200%200%201-1.87-5.18c1.096.19%202.203.476%203.298.87%206.525%202.333%2010.836%207.68%2011.014%2012.99ZM51.47%2061.576c.488-5.524%203.62-10.716%208.847-13.597a17.132%2017.132%200%200%201%2011.335-1.882c-.798%208.145-7.43%2014.848-16.038%2015.599-1.417.119-2.799.07-4.144-.12Zm28.564-11.478a17.513%2017.513%200%200%201%203.727%204.62c4.608%208.335%201.584%2018.813-6.75%2023.409a16.988%2016.988%200%200%201-4.359%201.679%2019.624%2019.624%200%200%201-3.977-12.776c.346-7.561%204.942-13.931%2011.36-16.932Z'/%3e%3cpath%20fill='%23110F0D'%20fill-rule='evenodd'%20d='M142.831%2048.324h4.977V77.03h-4.977V48.324Zm27.278%2013.002c.322%201.048.453%202.263.453%203.62v12.073h-4.787V66.208c0-.75-.047-1.572-.154-2.143-.453-2.382-1.822-3.572-4.215-3.572-2.31%200-3.882%201.274-4.43%203.476-.143.596-.226%201.405-.226%202.25v10.8h-4.787V56.623h4.477v2.989c1.536-2.5%203.906-3.43%206.371-3.43%203.488%200%206.263%201.68%207.298%205.144Zm24.636%207.323c0%203.882-2.358%206.525-5.763%207.727-1.298.453-2.632.643-4.62.643h-10.169V48.324h9.085c1.691%200%203.156.143%204.049.38%203.465.93%205.727%203.68%205.727%207.335%200%202.441-.81%204.156-2.762%205.644%202.905%201.417%204.453%203.727%204.453%206.966Zm-15.634-8.656h4.584c1.024%200%201.917-.143%202.536-.417%201.215-.548%201.905-1.608%201.905-3.167%200-1.548-.643-2.572-1.845-3.132-.691-.31-1.762-.452-2.763-.452h-4.417v7.168Zm10.716%208.465c0-1.536-.893-3.37-3.227-3.893-.428-.095-1.036-.143-1.571-.143h-5.918v8.085h5.501c.56%200%201.429-.048%201.953-.167%201.94-.453%203.262-1.846%203.262-3.882Zm47.747-11.847-8.097%2020.408h-4.429l-8.109-20.408h5.191l5.192%2014.574%205.108-14.574h5.144Zm-20.218%2010.002c0%20.69-.036%201.262-.155%201.94h-15.943c.631%202.87%202.714%204.728%205.882%204.728%202.131%200%203.607-.882%204.703-2.525h4.87c-1.762%204.144-5.204%206.692-9.657%206.692-6.084%200-10.537-4.858-10.537-10.49%200-6.108%204.524-10.776%2010.335-10.776%206.239%200%2010.442%204.954%2010.502%2010.43Zm-4.763-1.405c-.333-2.846-2.643-4.858-5.691-4.858-2.894%200-5.287%201.929-5.621%204.858h11.312Zm-72.667%203.44c0%204.787-3.287%208.371-9.419%208.371H119.363V64.66c-1.917.274-3.87.69-5.811%201.238l4.537%2011.121h-5.418l-3.596-9.585c-5.144%202.084-10.085%205.216-14.217%209.585h-4.786L101.8%2048.312h4.56l5.68%2013.883a44.112%2044.112%200%200%201%207.323-1.774V48.312h9.084c1.703%200%203.156.143%204.061.393%203.453.929%205.727%203.667%205.727%207.323%200%201.917-.738%204.179-2.81%205.691%203.06%201.56%204.501%204.025%204.501%206.93Zm-15.634-8.667a62.664%2062.664%200%200%201%202.06-.036c1.703.012%203.239.131%204.608.37%201.441-.549%202.357-1.727%202.357-3.537%200-1.941-.881-3.144-2.488-3.667-.548-.18-1.358-.286-2.322-.286h-4.215v7.156Zm-16.55%203.905-3.715-9.894-6.394%2016.502c2.833-2.595%206.263-4.858%2010.109-6.608Zm27.254%204.74c0-2.775-3.131-4.347-8.513-4.418-.715%200-1.441.011-2.191.047v8.252h5.918c2.548%200%204.786-1.37%204.786-3.882Z'%20clip-rule='evenodd'/%3e%3c/g%3e%3cdefs%3e%3clinearGradient%20id='b'%20x1='51.47'%20x2='85.916'%20y1='62.946'%20y2='62.946'%20gradientUnits='userSpaceOnUse'%3e%3cstop%20stop-color='%23CD9F28'/%3e%3cstop%20offset='1'%20stop-color='%23ECD80B'/%3e%3c/linearGradient%3e%3cclipPath%20id='a'%3e%3cpath%20fill='%23fff'%20d='M51.47%2045.728h186.104V80.14H51.47z'/%3e%3c/clipPath%3e%3c/defs%3e%3c/svg%3e)


More from Hytrol


Explore Other Assets


© 2026 MaintainX. All rights reserved.