


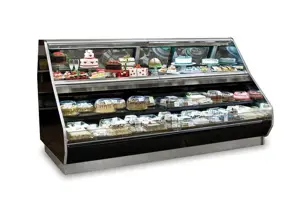
Hussmann Island and Multi-deck Island RI2
Need answers fast?
Explore the manual using AI.

Turn manuals into instant answers
with your AI-powered assistantTurn manuals into instant answers
with your AI-powered assistant
Complete asset maintenance, one click away
Get instant access to all the maintenance information you need. Empower technicians to perform preventive maintenance with asset packages, ready to use right out of the box.

Documents & Manuals
Find all the essential guides in one place.
 Tensioning Guide
- Belt-diagram
- C-120 pulleys
+ 13 more

Work Order Templates
Pre-built workflows to keep your asset running smoothly.
- Daily Electrical System Inspection
- Replace Roller and Pulley
- Install Engine B-120
+ 29 more

Procedures
Integrate maintenance plans directly into your work orders.
- Motion Industries
- Applied Industrial Technologies
- Electrical Brothers
+ 5 more

Parts
Access the parts list for your equipment in MaintainX.
- Drive Motor
- B2 Rollers
- Tensioning System
+ 40 more
Hussmann Island and Multi-deck Island RI2
Create an account to install this asset package.
Maintenance Plans for Hussmann Island and Multi-deck Island Model RI2
Integrate maintenance plans directly into your work orders in MaintainX.
Drain Fitting Replacement
Warning: Always disconnect the electrical power at the main disconnect when servicing or replacing any electrical component. This includes, but is not limited to, such items as fans, heaters, thermostats and lights.
Drill with a 17/8-in. (48 mm) hole saw to drill out the bottom of the drain fitting. Be sure to drill completely through fitting and bottom liner.
Apply teflon tape to threaded end of adapter and screw into threaded end of tee.
Apply an ABS and PVC compatible primer and sealer to adapter and inside of drain. Insert adapter into drain fitting.
Sign off on the drain fitting replacement

Mirrors Cleaning
Warning: Mirrors are sheets of clear glass that have very thin reflective and protective coatings applied to one side. These coatings are susceptible to deterioration if certain cleaning solutions and even water are allowed to come in contact with them.
Every precaution should be taken to keep all liquids away from the coated side of the mirrors.
IF LIQUIDS ARE ALLOWED TO FLOW ALONG THE FACE SIDE OF THE MIRROR TO ITS EDGE, THE LIQUID CAN SEEP UP BETWEEN THE COATING AND THE GLASS, CAUSING SERIOUS DAMAGE.
To Help Prolong the Life of the Mirrors:
Select the cleaning products used
Did you spray liquids on the mirrors?
Did you wipe water from the mirrors immediately to prevent difficult to remove water spots and also to prevent the water from reaching the mirror's edge?
Did you use dirty cloths, scrapers or any other abrasive materials for cleaning?
Sign off on the mirror cleaning
Electronic Ballasts Replacement
WARNING: Always disconnect the electrical power at the main disconnect when servicing or replacing any electrical component. This includes, but is not limited to, such items as fans, heaters, thermostats and lights.
Power to the merchandiser disconnected
Side splashguard and base panels removed
Ballast replaced
Parts reassembled in reverse order
Electrical power reconnected
Sign off on the ballast replacement
Plexiglass and Acrylic Parts Maintenance
PLEXIGLASS AND ACRYLIC CARE
DO NOT USE AMMONIA-BASED PRODUCTS TO CLEAN ACRYLIC PARTS. NEVER USE ABRASIVE CLEANSERS OR SCOURING PADS.
Cleaning
Clean with nonabrasive detergent and lukewarm water, using the bare hand to feel and dislodge any caked-on dirt. A soft, grit-free cloth, sponge or chamois may be used, but only as a means of carrying the water to the plastic.
Dry with a clean damp chamois or clean soft cloth such as cotton flannel. Do not use hard, rough cloth or paper towels as they will scratch the acrylic.
Waxing
Wax should be applied in a thin even coat, and brought to a high polish by rubbing lightly with a clean, dry soft cloth, such as a cotton flannel.
Excessive rubbing may cause scratching and/or build up an electrostatic charge which attracts contaminants. Remove an electrostatic charge by blotting with a clean damp cloth.
Anti-static Coatings
12 Monthly Center Air Discharge Tower Cleaning
Warning: This procedure should be performed by a trained technician only to prevent damage to the coil or electrical components.
Product removed to cooler?
Electrical power to the merchandiser disconnected?
Shelves, display racks, deck pans, CAD gusset, and canopy light channel removed?
Panels attached to CAD tower removed?
Waste outlets verified open and drip piping not blocked? Loose debris removed?
Unpressurized stream of water used to wash baffles in the CAD tower? Water not introduced faster than drain can handle?
Coil and fans cleaned as necessary?
All surfaces clean and dry, reassembled in reverse order?
Unlock efficiency
with MaintainX CoPilot
MaintainX CoPilot is your expert colleague, on call 24/7, helping your team find the answers they need to keep equipment running.
Reduce Unplanned Downtime
Ensure your team follows consistent procedures to minimize equipment failures and costly delays.
Maximize Asset Availability
Keep your assets running longer and more reliably, with standardized maintenance workflows from OEM manuals.
Lower Maintenance Costs
Turn any technician into an expert to streamline operations, maintain more assets, and reduce overall costs.
Thousands of companies manage their assets with MaintainX

'%3e%3cpath%20fill='url(%23b)'%20d='M66.008%2080.068c-5.084-.786-9.763-3.834-12.442-8.68a16.942%2016.942%200%200%201-1.87-5.18c1.096.19%202.203.476%203.298.87%206.525%202.333%2010.836%207.68%2011.014%2012.99ZM51.47%2061.576c.488-5.524%203.62-10.716%208.847-13.597a17.132%2017.132%200%200%201%2011.335-1.882c-.798%208.145-7.43%2014.848-16.038%2015.599-1.417.119-2.799.07-4.144-.12Zm28.564-11.478a17.513%2017.513%200%200%201%203.727%204.62c4.608%208.335%201.584%2018.813-6.75%2023.409a16.988%2016.988%200%200%201-4.359%201.679%2019.624%2019.624%200%200%201-3.977-12.776c.346-7.561%204.942-13.931%2011.36-16.932Z'/%3e%3cpath%20fill='%23110F0D'%20fill-rule='evenodd'%20d='M142.831%2048.324h4.977V77.03h-4.977V48.324Zm27.278%2013.002c.322%201.048.453%202.263.453%203.62v12.073h-4.787V66.208c0-.75-.047-1.572-.154-2.143-.453-2.382-1.822-3.572-4.215-3.572-2.31%200-3.882%201.274-4.43%203.476-.143.596-.226%201.405-.226%202.25v10.8h-4.787V56.623h4.477v2.989c1.536-2.5%203.906-3.43%206.371-3.43%203.488%200%206.263%201.68%207.298%205.144Zm24.636%207.323c0%203.882-2.358%206.525-5.763%207.727-1.298.453-2.632.643-4.62.643h-10.169V48.324h9.085c1.691%200%203.156.143%204.049.38%203.465.93%205.727%203.68%205.727%207.335%200%202.441-.81%204.156-2.762%205.644%202.905%201.417%204.453%203.727%204.453%206.966Zm-15.634-8.656h4.584c1.024%200%201.917-.143%202.536-.417%201.215-.548%201.905-1.608%201.905-3.167%200-1.548-.643-2.572-1.845-3.132-.691-.31-1.762-.452-2.763-.452h-4.417v7.168Zm10.716%208.465c0-1.536-.893-3.37-3.227-3.893-.428-.095-1.036-.143-1.571-.143h-5.918v8.085h5.501c.56%200%201.429-.048%201.953-.167%201.94-.453%203.262-1.846%203.262-3.882Zm47.747-11.847-8.097%2020.408h-4.429l-8.109-20.408h5.191l5.192%2014.574%205.108-14.574h5.144Zm-20.218%2010.002c0%20.69-.036%201.262-.155%201.94h-15.943c.631%202.87%202.714%204.728%205.882%204.728%202.131%200%203.607-.882%204.703-2.525h4.87c-1.762%204.144-5.204%206.692-9.657%206.692-6.084%200-10.537-4.858-10.537-10.49%200-6.108%204.524-10.776%2010.335-10.776%206.239%200%2010.442%204.954%2010.502%2010.43Zm-4.763-1.405c-.333-2.846-2.643-4.858-5.691-4.858-2.894%200-5.287%201.929-5.621%204.858h11.312Zm-72.667%203.44c0%204.787-3.287%208.371-9.419%208.371H119.363V64.66c-1.917.274-3.87.69-5.811%201.238l4.537%2011.121h-5.418l-3.596-9.585c-5.144%202.084-10.085%205.216-14.217%209.585h-4.786L101.8%2048.312h4.56l5.68%2013.883a44.112%2044.112%200%200%201%207.323-1.774V48.312h9.084c1.703%200%203.156.143%204.061.393%203.453.929%205.727%203.667%205.727%207.323%200%201.917-.738%204.179-2.81%205.691%203.06%201.56%204.501%204.025%204.501%206.93Zm-15.634-8.667a62.664%2062.664%200%200%201%202.06-.036c1.703.012%203.239.131%204.608.37%201.441-.549%202.357-1.727%202.357-3.537%200-1.941-.881-3.144-2.488-3.667-.548-.18-1.358-.286-2.322-.286h-4.215v7.156Zm-16.55%203.905-3.715-9.894-6.394%2016.502c2.833-2.595%206.263-4.858%2010.109-6.608Zm27.254%204.74c0-2.775-3.131-4.347-8.513-4.418-.715%200-1.441.011-2.191.047v8.252h5.918c2.548%200%204.786-1.37%204.786-3.882Z'%20clip-rule='evenodd'/%3e%3c/g%3e%3cdefs%3e%3clinearGradient%20id='b'%20x1='51.47'%20x2='85.916'%20y1='62.946'%20y2='62.946'%20gradientUnits='userSpaceOnUse'%3e%3cstop%20stop-color='%23CD9F28'/%3e%3cstop%20offset='1'%20stop-color='%23ECD80B'/%3e%3c/linearGradient%3e%3cclipPath%20id='a'%3e%3cpath%20fill='%23fff'%20d='M51.47%2045.728h186.104V80.14H51.47z'/%3e%3c/clipPath%3e%3c/defs%3e%3c/svg%3e)


More from Hussmann


Explore Other Assets


© 2026 MaintainX. All rights reserved.