


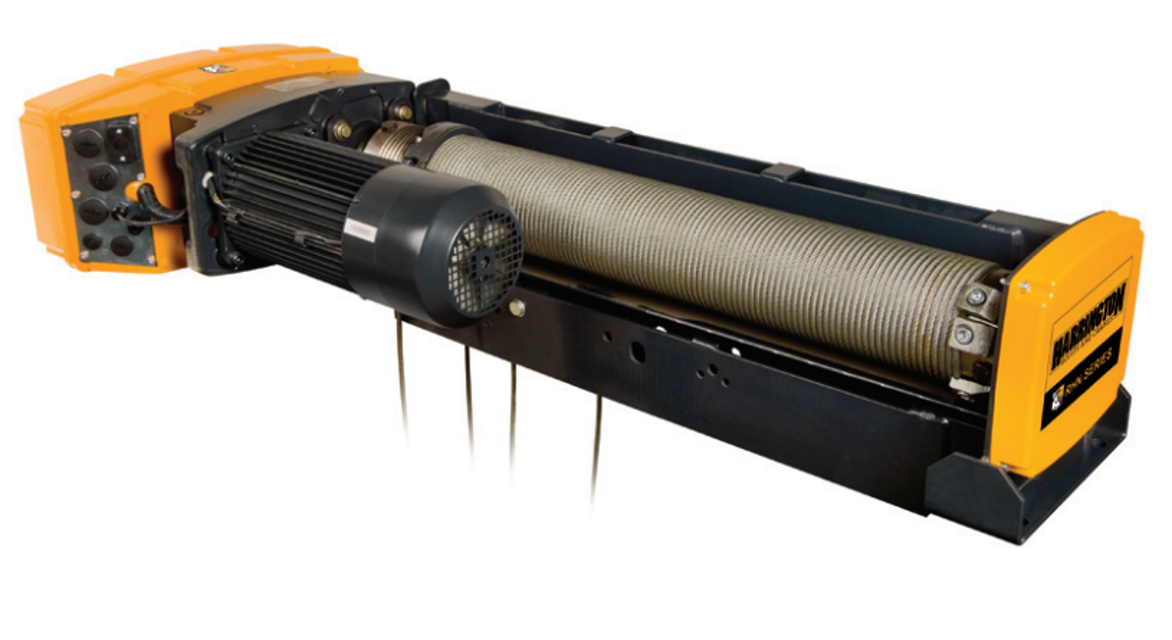
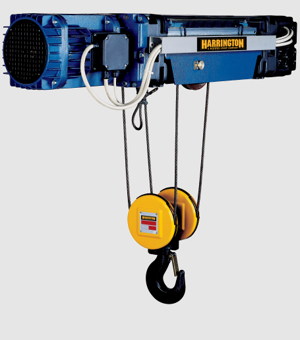
HARRINGTON Hoist RHN02D-33A-20D-1
Need answers fast?
Explore the manual using AI.
Turn manuals into instant answers
with your AI-powered assistantTurn manuals into instant answers
with your AI-powered assistant
Complete asset maintenance, one click away
Get instant access to all the maintenance information you need. Empower technicians to perform preventive maintenance with asset packages, ready to use right out of the box.

Documents & Manuals
Find all the essential guides in one place.
 Tensioning Guide
- Belt-diagram
- C-120 pulleys
+ 13 more

Work Order Templates
Pre-built workflows to keep your asset running smoothly.
- Daily Electrical System Inspection
- Replace Roller and Pulley
- Install Engine B-120
+ 29 more

Procedures
Integrate maintenance plans directly into your work orders.
- Motion Industries
- Applied Industrial Technologies
- Electrical Brothers
+ 5 more

Parts
Access the parts list for your equipment in MaintainX.
- Drive Motor
- B2 Rollers
- Tensioning System
+ 40 more
HARRINGTON Hoist RHN02D-33A-20D-1
Create an account to install this asset package.
Maintenance Plans for HARRINGTON Hoist Model RHN02D-33A-20D-1
Integrate maintenance plans directly into your work orders in MaintainX.
Wire Rope Removal
Lubrication and Cleaning – Refer to Section 6-2.
WARNING: Be certain that the replacement wire rope is obtained from Harrington Hoists, Inc. and is the correct wire rope for the hoist.
WARNING: Twisting in the rope prejudices safety and service life. Remove any twists!
CAUTION: The hoist must be properly powered and operational in order to perform the following procedures.
CAUTION: When replacing Wire Rope, check for wear on mating parts, i.e. Drum, Sheaves, Hook Block Sheaves and replace if necessary.
Lower the Hook Block to the lowest possible position without touching the floor or ground.
Remove the Wire Rope Clamp (G) and loosen the Wire Rope until the Terminal Wedge (H) can be removed from the Anchorage Assembly (F) (see Figure 6-4).
Remove (unreeve) the Wire Rope from the Bottom Block and all Sheaves.
Remove the rope guide

1 Daily Hoist Inspection
Warning: This inspection requires a designated or qualified person.
Initial Inspection
New, re-installed, altered, or modified hoists/trolleys inspected for compliance?
Frequent Inspection
All functional operating mechanisms checked for maladjustment and unusual sounds?
Hoist and trolley checked in accordance with ANSI/ASME B30.16?
All limit switches and associated components operational?
Upper limit devices checked in accordance with ANSI/ASME B30.16?
Hoist/trolley braking system operational?
Hoist Motor Brake Check
DANGER: Before proceeding, ensure that the electrical supply for the hoist or trolley has been de-energized (disconnected). Lock out and tag out in accordance with ANSI Z244.1 “Personnel Protection –Lockout/Tagout of Energy Sources”. The hoist must be unloaded and the bottom hook block set down.
Fan cover removed
Plug removed
Measure air gap with feeler gauge
Feeler gauge pushed in at least as far as depth 'a' and does not catch on shoulder
Max. permissible air gap (S) has been reached
Brake disc (brake rotor) needs to be replaced
Sign off on the hoist motor brake check
Hoist Lubrication
6.2.1 Wire Rope:
For proper performance the Wire Rope must be maintained in a clean and well lubricated condition.
The rope should be lubricated every 3 months (more frequently for heavier usage or severe conditions).
To lubricate the rope, first remove any dirt, grime, moisture or other accumulations of contaminates. Then coat the Wire Rope with grease in Table 6-1. Ensure that the lubricant is applied to the entire surface of the rope over its entire length.
For dusty environments, dry lubricants are suggested.
For conditions not permitting lubricant to fall off the wire rope, consider using non-dripping lubricant.
6.2.2 Wire Rope Drum, Hook Block and Sheaves:
The drum, hook block and sheaves should be lubricated every 3 months (more frequently for heavier usage or severe conditions).
Lubricate the Drum, Hook Block and Sheaves with grease in Table 6-1.
Hoist Motor Brake Check
DANGER: Before proceeding, ensure that the electrical supply for the hoist or trolley has been de-energized (disconnected). Lock out and tag out in accordance with ANSI Z244.1 “Personnel Protection –Lockout/Tagout of Energy Sources”. The hoist must be unloaded and the bottom hook block set down.
Fan cover removed
Plug removed
Measure air gap (S) with feeler gauge (F). When measuring, ensure that the feeler gauge is pushed in at least as far as depth 'a' and does not catch on shoulder.
If the max. permissible air gap (S) has been reached, the brake disc (brake rotor) must be replaced.
Sign off on the hoist motor brake check
Parts for HARRINGTON Hoist RHN02D-33A-20D-1
Access the parts list for your equipment in MaintainX.
Hoist Motor, Dual Speed 1V, 2V
RHN0702
Hoist Motor, Dual Speed 4V
RHN0356
Hoist Motor, Dual Speed 5V
RHN0703
Brake Assembly 1V, 2V, 4V
RHN0358
Brake Assembly 5V
RHN0359
Hoist Motor, Dual Speed 1V, 2V
RHN0702
Hoist Motor, Dual Speed 4V
RHN0356
Hoist Motor, Dual Speed 5V
RHN0703
Brake Assembly 1V, 2V, 4V
RHN0358
Brake Assembly 5V
RHN0359
Hoist Motor, Dual Speed 1V, 2V
RHN0702
Hoist Motor, Dual Speed 4V
RHN0356
Hoist Motor, Dual Speed 5V
RHN0703
Brake Assembly 1V, 2V, 4V
RHN0358
Brake Assembly 5V
RHN0359
Unlock efficiency
with MaintainX CoPilot
MaintainX CoPilot is your expert colleague, on call 24/7, helping your team find the answers they need to keep equipment running.
Reduce Unplanned Downtime
Ensure your team follows consistent procedures to minimize equipment failures and costly delays.
Maximize Asset Availability
Keep your assets running longer and more reliably, with standardized maintenance workflows from OEM manuals.
Lower Maintenance Costs
Turn any technician into an expert to streamline operations, maintain more assets, and reduce overall costs.
Thousands of companies manage their assets with MaintainX

'%3e%3cpath%20fill='url(%23b)'%20d='M66.008%2080.068c-5.084-.786-9.763-3.834-12.442-8.68a16.942%2016.942%200%200%201-1.87-5.18c1.096.19%202.203.476%203.298.87%206.525%202.333%2010.836%207.68%2011.014%2012.99ZM51.47%2061.576c.488-5.524%203.62-10.716%208.847-13.597a17.132%2017.132%200%200%201%2011.335-1.882c-.798%208.145-7.43%2014.848-16.038%2015.599-1.417.119-2.799.07-4.144-.12Zm28.564-11.478a17.513%2017.513%200%200%201%203.727%204.62c4.608%208.335%201.584%2018.813-6.75%2023.409a16.988%2016.988%200%200%201-4.359%201.679%2019.624%2019.624%200%200%201-3.977-12.776c.346-7.561%204.942-13.931%2011.36-16.932Z'/%3e%3cpath%20fill='%23110F0D'%20fill-rule='evenodd'%20d='M142.831%2048.324h4.977V77.03h-4.977V48.324Zm27.278%2013.002c.322%201.048.453%202.263.453%203.62v12.073h-4.787V66.208c0-.75-.047-1.572-.154-2.143-.453-2.382-1.822-3.572-4.215-3.572-2.31%200-3.882%201.274-4.43%203.476-.143.596-.226%201.405-.226%202.25v10.8h-4.787V56.623h4.477v2.989c1.536-2.5%203.906-3.43%206.371-3.43%203.488%200%206.263%201.68%207.298%205.144Zm24.636%207.323c0%203.882-2.358%206.525-5.763%207.727-1.298.453-2.632.643-4.62.643h-10.169V48.324h9.085c1.691%200%203.156.143%204.049.38%203.465.93%205.727%203.68%205.727%207.335%200%202.441-.81%204.156-2.762%205.644%202.905%201.417%204.453%203.727%204.453%206.966Zm-15.634-8.656h4.584c1.024%200%201.917-.143%202.536-.417%201.215-.548%201.905-1.608%201.905-3.167%200-1.548-.643-2.572-1.845-3.132-.691-.31-1.762-.452-2.763-.452h-4.417v7.168Zm10.716%208.465c0-1.536-.893-3.37-3.227-3.893-.428-.095-1.036-.143-1.571-.143h-5.918v8.085h5.501c.56%200%201.429-.048%201.953-.167%201.94-.453%203.262-1.846%203.262-3.882Zm47.747-11.847-8.097%2020.408h-4.429l-8.109-20.408h5.191l5.192%2014.574%205.108-14.574h5.144Zm-20.218%2010.002c0%20.69-.036%201.262-.155%201.94h-15.943c.631%202.87%202.714%204.728%205.882%204.728%202.131%200%203.607-.882%204.703-2.525h4.87c-1.762%204.144-5.204%206.692-9.657%206.692-6.084%200-10.537-4.858-10.537-10.49%200-6.108%204.524-10.776%2010.335-10.776%206.239%200%2010.442%204.954%2010.502%2010.43Zm-4.763-1.405c-.333-2.846-2.643-4.858-5.691-4.858-2.894%200-5.287%201.929-5.621%204.858h11.312Zm-72.667%203.44c0%204.787-3.287%208.371-9.419%208.371H119.363V64.66c-1.917.274-3.87.69-5.811%201.238l4.537%2011.121h-5.418l-3.596-9.585c-5.144%202.084-10.085%205.216-14.217%209.585h-4.786L101.8%2048.312h4.56l5.68%2013.883a44.112%2044.112%200%200%201%207.323-1.774V48.312h9.084c1.703%200%203.156.143%204.061.393%203.453.929%205.727%203.667%205.727%207.323%200%201.917-.738%204.179-2.81%205.691%203.06%201.56%204.501%204.025%204.501%206.93Zm-15.634-8.667a62.664%2062.664%200%200%201%202.06-.036c1.703.012%203.239.131%204.608.37%201.441-.549%202.357-1.727%202.357-3.537%200-1.941-.881-3.144-2.488-3.667-.548-.18-1.358-.286-2.322-.286h-4.215v7.156Zm-16.55%203.905-3.715-9.894-6.394%2016.502c2.833-2.595%206.263-4.858%2010.109-6.608Zm27.254%204.74c0-2.775-3.131-4.347-8.513-4.418-.715%200-1.441.011-2.191.047v8.252h5.918c2.548%200%204.786-1.37%204.786-3.882Z'%20clip-rule='evenodd'/%3e%3c/g%3e%3cdefs%3e%3clinearGradient%20id='b'%20x1='51.47'%20x2='85.916'%20y1='62.946'%20y2='62.946'%20gradientUnits='userSpaceOnUse'%3e%3cstop%20stop-color='%23CD9F28'/%3e%3cstop%20offset='1'%20stop-color='%23ECD80B'/%3e%3c/linearGradient%3e%3cclipPath%20id='a'%3e%3cpath%20fill='%23fff'%20d='M51.47%2045.728h186.104V80.14H51.47z'/%3e%3c/clipPath%3e%3c/defs%3e%3c/svg%3e)


More from HARRINGTON

Explore Other Assets


© 2026 MaintainX. All rights reserved.