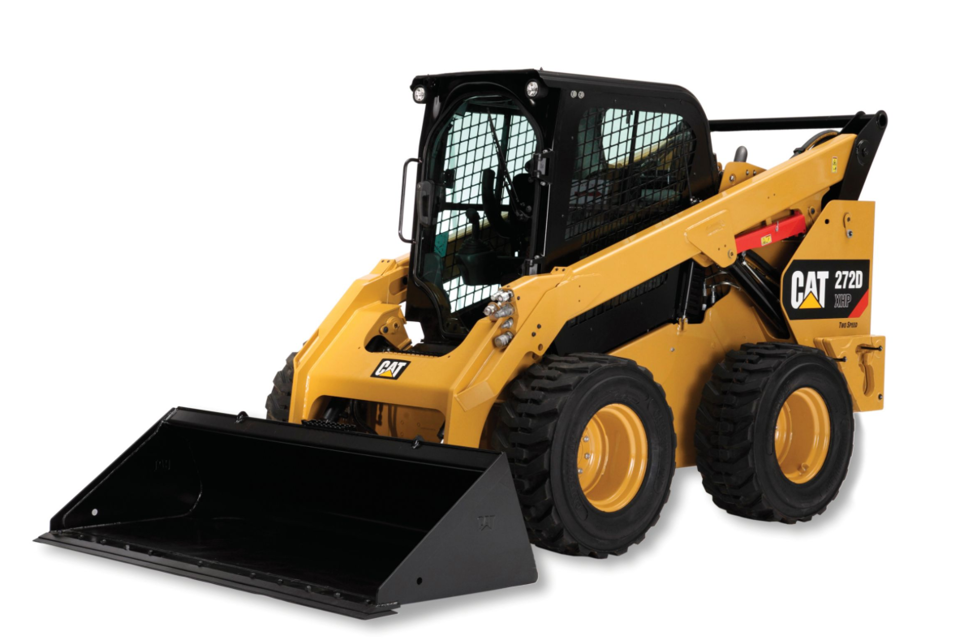

The Caterpillar Skid Steer Loader 272D XHP is a versatile and powerful machine designed for various construction and landscaping tasks. Known for its robust performance and reliability, this model excels in tight spaces, making it ideal for urban job sites and demanding environments.
Turn manuals into instant answers
with your AI-powered assistantTurn manuals into instant answers
with your AI-powered assistant
Complete asset maintenance, one click away
Get instant access to all the maintenance information you need. Empower technicians to perform preventive maintenance with asset packages, ready to use right out of the box.
Documents & Manuals
Find all the essential guides in one place.
Tensioning Guide
Belt-diagram
C-120 pulleys
+ 13 more
Work Order Templates
Pre-built workflows to keep your asset running smoothly.
Daily Electrical System Inspection
Replace Roller and Pulley
Install Engine B-120
+ 29 more
Procedures
Integrate maintenance plans directly into your work orders.
Motion Industries
Applied Industrial Technologies
Electrical Brothers
+ 5 more
Parts
Access the parts list for your equipment in MaintainX.
Drive Motor
B2 Rollers
Tensioning System
+ 40 more

Caterpillar Skid Steer Loader 272D XHP
Create an account to install this asset package.
Maintenance Plans for Caterpillar Skid Steer Loader Model 272D XHP
Integrate maintenance plans directly into your work orders in MaintainX.
Initial 250 Hours Skid Steer Loader Maintenance
Final Drive Oil - Change
Position one final drive so that the oil fill/drain plug is at the bottom
Remove the oil plugs and allow the oil to drain into a suitable container
Check the drained oil for large metal chips or a significant number of metal particles
Clean the plugs and inspect the plugs. Replace a worn plug or a damaged plug
Position the final drive so that the oil fill/drain plug is at the top
Add oil through the opening of the oil fill/drain plug that is now at the top
Fill the final drive to the bottom of the opening for the oil check plug
Install the two oil plugs. Tighten the oil plugs to a torque of 27 ± 1 N·m
Initial 100 Hours Skid Steer Loader Maintenance
Track (Steel) - Inspect/Adjust
Inspect the track visually for damage or missing fasteners
Replace any grousers that are damaged
Replace any fasteners that are missing
Track Adjustment
Loosen the greaser with an appropriate wrench or socket to relax the tension on the track
Tighten the greaser to tighten the tension on the track
Apply grease to the greaser until the proper tension is achieved
Track Bolts - Check
Initial 50 Hours Skid Steer Loader Maintenance
Track (Steel) - Inspect/Adjust
Inspect the track visually for damage or missing fasteners
Replace any grousers that are damaged
Replace any fasteners that are missing
Track Adjustment
Loosen the greaser with an appropriate wrench or socket to relax the tension on the track
Tighten the greaser and apply grease to achieve proper tension
Track Bolts - Check
Check the torque for the track grouser bolts and the master link bolts. Torque to the required value of 280 ± 15 N·m (206 ± 11 lb ft)
1500 Hourly Skid Steer Loader Maintenance
Engine Crankcase Breather - Replace
Note: Only applies to engines with aftertreatment.
Open the engine access door. Refer to Operation and Maintenance Manual, “Access Doors and Covers”.
Tilt the radiator upward. Refer to Operation and Maintenance Manual, “Radiator Tilting”.
The breather is located in the engine compartment on the right-hand side of engine. There is cap on the breather and a replaceable element inside.
Note: This service may be performed without removing the housing from the engine.
Remove the breather cap and remove the filter element.
Note: The C2.2 and C3.3B are equipped with cap on bottom portion of the canister. Use a wrench to remove the breather cap. The C3.8 is equipped with cap on top of canister, remove cap by applying downward pressure on the cap while turning.
Clean the housing and the cap for the breather.
Radiator Tilting
Note: All models except for 226D, 232D, 239D, and 249D.
Open the engine access door. Refer to Operation and Maintenance Manual, “Access Doors and Covers”.
The release latch for the guard is located on the rear of the radiator. Pull the rubber T-handle down to release the guard. Tilt the guard upward.
To raise the radiator, remove the two bolts.
Raise the radiator. As the radiator raises, the latch will move (1).
Raise the radiator until the latch moves over the catch pin (2).
To lower the radiator downward, push up on the radiator. Move the latch to unlatch the lock. Lower the radiator.
Install the two bolts to secure the radiator.
To lower the radiator guard, move the support rod to the storage position and lower the guard.
Parts for Caterpillar Skid Steer Loader 272D XHP
Access the parts list for your equipment in MaintainX.
Refractometer
360-0774
Refractometer
360-0774
Refractometer
360-0774
Unlock efficiency
with MaintainX CoPilot
MaintainX CoPilot is your expert colleague, on call 24/7, helping your team find the answers they need to keep equipment running.
Reduce Unplanned Downtime
Ensure your team follows consistent procedures to minimize equipment failures and costly delays.
Maximize Asset Availability
Keep your assets running longer and more reliably, with standardized maintenance workflows from OEM manuals.
Lower Maintenance Costs
Turn any technician into an expert to streamline operations, maintain more assets, and reduce overall costs.
Thousands of companies manage their assets with MaintainX


