


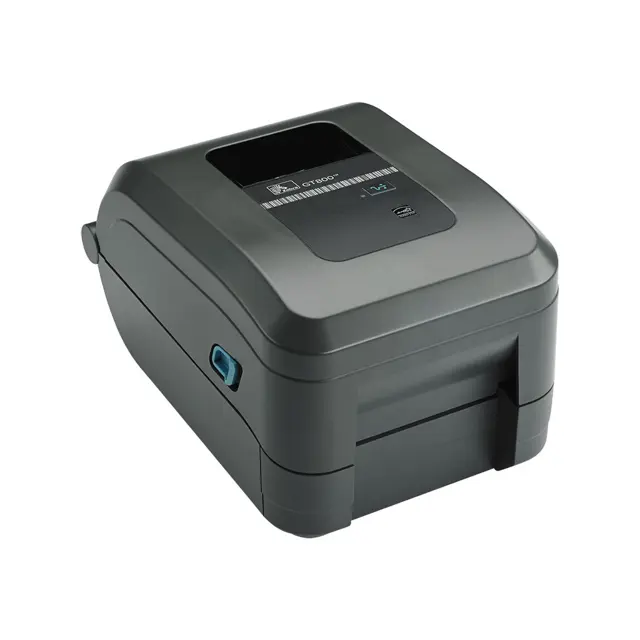
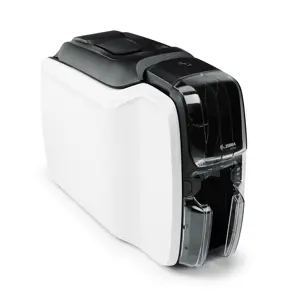
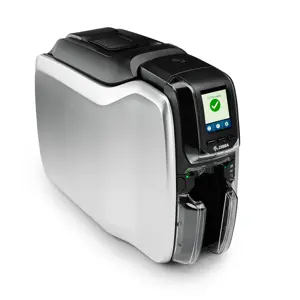
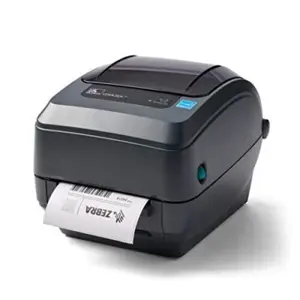
Zebra Printer GT800
Need answers fast?
Explore the manual using AI.
Turn manuals into instant answers
with your AI-powered assistantTurn manuals into instant answers
with your AI-powered assistant
Manual for Zebra Printer GT800
Complete asset maintenance, one click away
Get instant access to all the maintenance information you need. Empower technicians to perform preventive maintenance with asset packages, ready to use right out of the box.

Documents & Manuals
Find all the essential guides in one place.
 Tensioning Guide
- Belt-diagram
- C-120 pulleys
+ 13 more

Work Order Templates
Pre-built workflows to keep your asset running smoothly.
- Daily Electrical System Inspection
- Replace Roller and Pulley
- Install Engine B-120
+ 29 more

Procedures
Integrate maintenance plans directly into your work orders.
- Motion Industries
- Applied Industrial Technologies
- Electrical Brothers
+ 5 more

Parts
Access the parts list for your equipment in MaintainX.
- Drive Motor
- B2 Rollers
- Tensioning System
+ 40 more
Zebra Printer GT800
Create an account to install this asset package.
Maintenance Plans for Zebra Printer Model GT800
Integrate maintenance plans directly into your work orders in MaintainX.
Printhead Replacement
Caution: Prepare your work area by protecting against static discharge. Your work area must be static-safe and include a properly grounded conductive cushioned mat to hold the printer and a conductive wrist strap for yourself.
Caution: Turn the printer power off and unplug the power cord before replacing the printhead.
Before following the steps in this procedure, open the printer by pulling the release latches forward then lifting the top cover.
Open the printer. Remove any transfer ribbon from the printer.
Grasp the right side of the printhead’s cover bracket and gently pull the bracket way from the printhead.
Use the printhead cover’s the left side’s short guide arm to release the printhead from the ribbon frame.
Use a Phillips screwdriver to remove the screw that holds the ground (green) wire.
Disconnect the two printhead cables from the printhead assembly by slowly and gently pulling them straight out of the connector.
Connect the two printhead cables to the printhead.

Printhead Cleaning
Caution: The printhead becomes hot while printing. To protect from damaging the printhead and risk of personal injury, avoid touching the printhead. Use only the cleaning pen to perform maintenance.
Printhead cooled down for a minute?
New cleaning pen used for swabbing?
Cleaning performed from the center to the outside edges of the printhead?
Sign off on the printhead cleaning
Sensor Cleaning
Warning: Do not use an air compressor - oil (from the pump) and dirty water will contaminate the printer and printhead.
Gently brushed or blew dust away with a can of compressed air
Used a dry swab to brush away dust
Used an alcohol moistened swab to break up adhesives or other contaminates
Used a dry swab to remove any residue that may be left from the first cleaning
Repeated steps 1 and 2 as required until all residue and streaks are removed from the sensors
Sign off on the sensor cleaning
Media Path Cleaning
Clean it thoroughly with 90% medical-grade alcohol and a fiber-free cleaning swab. Let alcohol dissipate and the printer dry completely.
Use a cleaning swab to remove debris, dust or crust that has built-up on the holders, guides and media path surfaces. Use the alcohol in the cleaning swab to soak the debris to break up the adhesive.
1. Use a cleaning swab to wipe the channel that the movable media sensor slides within.
2. Wipe the ridges and inside of the printer to remove accumulated debris and dust.
3. Wipe the inside edges of both media guides (and media holders) to remove any built-up residue.
4. Wipe the front edge (black plastic) of the printhead and the printhead cover. Do not touch or clean the printhead as part of cleaning the media path!
5. Clean behind the ribbon cover (flapper). The cover swings down to operate and in this position the top side of media can contact this surface. Adhesive from the edges of label media can slowly transfer and build up on this inside surface.
6. Clean the dispenser (if installed) pinch roller and peel bar.
7. Wait one minute before closing the printer. Discard the cleaning swab after use.
Platen Maintenance
The standard platen (drive roller) normally does not require cleaning. Paper and liner dust can accumulate without effecting print operations. Contaminates on the platen roller can damage the printhead or cause the media to slip or stick when printing. Adhesive, dirt, general dust, oils and other contaminates should be cleaned immediately off the platen.
Clean the platen (and media path) whenever the printer has significantly poorer performance, print quality or media handling. The platen is the print surface and drive roller for your media. If sticking or jamming continues even after cleaning, you must replace the platen.
The platen can be cleaned with a fiber-free swab (such as a Texpad swab) or a lint free, clean, damp cloth very lightly moistened with medical grade alcohol (90% pure or better).
1. Open the cover (and dispenser door). Remove media from platen area.
2. Pull the platen bearing latch release tabs to the outside of the printer. Lift and rotate the arm up and then towards the front of the printer.
3. Lift the platen out of the printer’s bottom frame.
4. Clean the platen with the alcohol moistened swab. Clean from the center out. Repeat this process until the all of the roller surface has been cleaned. If there has been heavy adhesive build-up or label jam, repeat with a new swab to remove residual contaminates.
Adhesives and oils, for example, may be thinned by the initial cleaning but not completely removed.
5. Install the platen in the printer. Discard the cleaning swabs after use - do not reuse.
Unlock efficiency
with MaintainX CoPilot
MaintainX CoPilot is your expert colleague, on call 24/7, helping your team find the answers they need to keep equipment running.
Reduce Unplanned Downtime
Ensure your team follows consistent procedures to minimize equipment failures and costly delays.
Maximize Asset Availability
Keep your assets running longer and more reliably, with standardized maintenance workflows from OEM manuals.
Lower Maintenance Costs
Turn any technician into an expert to streamline operations, maintain more assets, and reduce overall costs.
Thousands of companies manage their assets with MaintainX

'%3e%3cpath%20fill='url(%23b)'%20d='M66.008%2080.068c-5.084-.786-9.763-3.834-12.442-8.68a16.942%2016.942%200%200%201-1.87-5.18c1.096.19%202.203.476%203.298.87%206.525%202.333%2010.836%207.68%2011.014%2012.99ZM51.47%2061.576c.488-5.524%203.62-10.716%208.847-13.597a17.132%2017.132%200%200%201%2011.335-1.882c-.798%208.145-7.43%2014.848-16.038%2015.599-1.417.119-2.799.07-4.144-.12Zm28.564-11.478a17.513%2017.513%200%200%201%203.727%204.62c4.608%208.335%201.584%2018.813-6.75%2023.409a16.988%2016.988%200%200%201-4.359%201.679%2019.624%2019.624%200%200%201-3.977-12.776c.346-7.561%204.942-13.931%2011.36-16.932Z'/%3e%3cpath%20fill='%23110F0D'%20fill-rule='evenodd'%20d='M142.831%2048.324h4.977V77.03h-4.977V48.324Zm27.278%2013.002c.322%201.048.453%202.263.453%203.62v12.073h-4.787V66.208c0-.75-.047-1.572-.154-2.143-.453-2.382-1.822-3.572-4.215-3.572-2.31%200-3.882%201.274-4.43%203.476-.143.596-.226%201.405-.226%202.25v10.8h-4.787V56.623h4.477v2.989c1.536-2.5%203.906-3.43%206.371-3.43%203.488%200%206.263%201.68%207.298%205.144Zm24.636%207.323c0%203.882-2.358%206.525-5.763%207.727-1.298.453-2.632.643-4.62.643h-10.169V48.324h9.085c1.691%200%203.156.143%204.049.38%203.465.93%205.727%203.68%205.727%207.335%200%202.441-.81%204.156-2.762%205.644%202.905%201.417%204.453%203.727%204.453%206.966Zm-15.634-8.656h4.584c1.024%200%201.917-.143%202.536-.417%201.215-.548%201.905-1.608%201.905-3.167%200-1.548-.643-2.572-1.845-3.132-.691-.31-1.762-.452-2.763-.452h-4.417v7.168Zm10.716%208.465c0-1.536-.893-3.37-3.227-3.893-.428-.095-1.036-.143-1.571-.143h-5.918v8.085h5.501c.56%200%201.429-.048%201.953-.167%201.94-.453%203.262-1.846%203.262-3.882Zm47.747-11.847-8.097%2020.408h-4.429l-8.109-20.408h5.191l5.192%2014.574%205.108-14.574h5.144Zm-20.218%2010.002c0%20.69-.036%201.262-.155%201.94h-15.943c.631%202.87%202.714%204.728%205.882%204.728%202.131%200%203.607-.882%204.703-2.525h4.87c-1.762%204.144-5.204%206.692-9.657%206.692-6.084%200-10.537-4.858-10.537-10.49%200-6.108%204.524-10.776%2010.335-10.776%206.239%200%2010.442%204.954%2010.502%2010.43Zm-4.763-1.405c-.333-2.846-2.643-4.858-5.691-4.858-2.894%200-5.287%201.929-5.621%204.858h11.312Zm-72.667%203.44c0%204.787-3.287%208.371-9.419%208.371H119.363V64.66c-1.917.274-3.87.69-5.811%201.238l4.537%2011.121h-5.418l-3.596-9.585c-5.144%202.084-10.085%205.216-14.217%209.585h-4.786L101.8%2048.312h4.56l5.68%2013.883a44.112%2044.112%200%200%201%207.323-1.774V48.312h9.084c1.703%200%203.156.143%204.061.393%203.453.929%205.727%203.667%205.727%207.323%200%201.917-.738%204.179-2.81%205.691%203.06%201.56%204.501%204.025%204.501%206.93Zm-15.634-8.667a62.664%2062.664%200%200%201%202.06-.036c1.703.012%203.239.131%204.608.37%201.441-.549%202.357-1.727%202.357-3.537%200-1.941-.881-3.144-2.488-3.667-.548-.18-1.358-.286-2.322-.286h-4.215v7.156Zm-16.55%203.905-3.715-9.894-6.394%2016.502c2.833-2.595%206.263-4.858%2010.109-6.608Zm27.254%204.74c0-2.775-3.131-4.347-8.513-4.418-.715%200-1.441.011-2.191.047v8.252h5.918c2.548%200%204.786-1.37%204.786-3.882Z'%20clip-rule='evenodd'/%3e%3c/g%3e%3cdefs%3e%3clinearGradient%20id='b'%20x1='51.47'%20x2='85.916'%20y1='62.946'%20y2='62.946'%20gradientUnits='userSpaceOnUse'%3e%3cstop%20stop-color='%23CD9F28'/%3e%3cstop%20offset='1'%20stop-color='%23ECD80B'/%3e%3c/linearGradient%3e%3cclipPath%20id='a'%3e%3cpath%20fill='%23fff'%20d='M51.47%2045.728h186.104V80.14H51.47z'/%3e%3c/clipPath%3e%3c/defs%3e%3c/svg%3e)


More from Zebra


Explore Other Assets


© 2026 MaintainX. All rights reserved.