


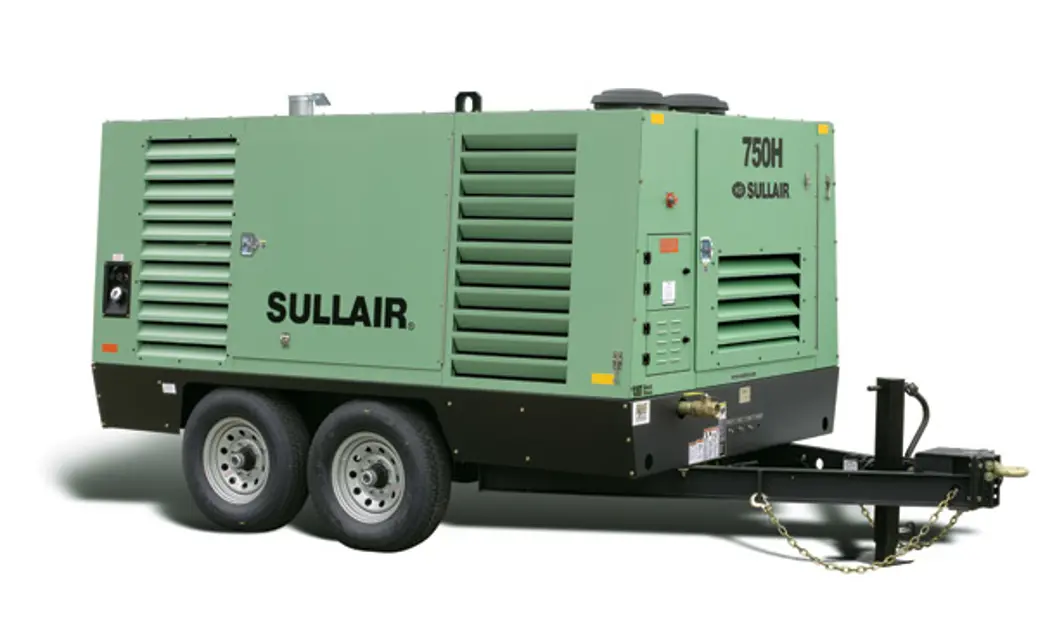
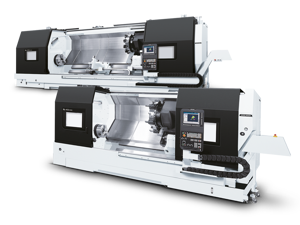
Sullair Portable Air Compressor 750H
Need answers fast?
Explore the manual using AI.
Turn manuals into instant answers
with your AI-powered assistantTurn manuals into instant answers
with your AI-powered assistant
Complete asset maintenance, one click away
Get instant access to all the maintenance information you need. Empower technicians to perform preventive maintenance with asset packages, ready to use right out of the box.

Documents & Manuals
Find all the essential guides in one place.
 Tensioning Guide
- Belt-diagram
- C-120 pulleys
+ 13 more

Work Order Templates
Pre-built workflows to keep your asset running smoothly.
- Daily Electrical System Inspection
- Replace Roller and Pulley
- Install Engine B-120
+ 29 more

Procedures
Integrate maintenance plans directly into your work orders.
- Motion Industries
- Applied Industrial Technologies
- Electrical Brothers
+ 5 more

Parts
Access the parts list for your equipment in MaintainX.
- Drive Motor
- B2 Rollers
- Tensioning System
+ 40 more
Sullair Portable Air Compressor 750H
Create an account to install this asset package.
Maintenance Plans for Sullair Portable Air Compressor Model 750H
Integrate maintenance plans directly into your work orders in MaintainX.
Control System Adjustment
Refer to Figure 5-5. Prior to adjusting the control system, it is necessary to determine the desired operating pressure range as well as the maximum pressure at which the machine is to operate. This pressure must not exceed the maximum operating pressure which is stamped on the machine serial number plate.
Start the machine and let it warm-up and enter full 'RUN' mode.
Open service valve slightly until engine tries to speed up. Slowly close the service valve.
With service valve closed, check and adjust the pressure at the reducing regulator to a minimum of 60 psig (4.1 bar) and not to exceed 75 psig (5.2 bar).
With service valve still closed, and the 'HI/LO' switch in the 'LO' position, adjust the low-pressure back-pressure regulator so the service pressure is between 115 to 125 psig (7.9 to 8.6 bar) with the engine at 1400 rpm.
Open the service valve to load the compressor to maintain 100 psig (6.9 bar) discharge pressure. Operating speed should be 1800 RPM on the instrument panel. If not, repeat step, but adjust the unload service pressure up or down as needed until 100 psig (6.9 bar) is maintained when engine speed is 1800 rpm.
For 150 psig (10.3 bar) 'H' machines, turn the 'HI/LO' switch to 'HI' position. Close the service valve and set the 'HI' pressure control regulator to maintain 165 to 175 psig (11.4 to 12.1 bar) discharge pressure.
Open the service valve to maintain 150 psig (10.3 bar) and check for 1800 RPM full-load speed. If lower speed is observed, raise the setting of the low pressure control regulator until rated speed is achieved.
For 175 psig (12.1 bar) 'HH' machines, turn the 'HI/ LO' switch to 'HI' position. Close the service valve and set the 'HI' pressure control regulator to maintain 190 to 200 psig (13.1 to 13.8 bar) discharge pressure.

Air Filter Maintenance
5.11.5 Air filter maintenance
Refer to Figure 5-4. Air filter maintenance should be performed when indicated on instrument panel. The air filters are both equipped with a primary element and secondary element each.
The secondary element must be replaced after every third primary element change. DO NOT reconnect the secondary element once it is removed.
5.11.5.1 Element removal
1. Clean the exterior of the air filter housing.
2. Remove the cover/element assembly by loosening the wingnut securing the cover/ element assembly.
3. Remove the cover/element assembly from the housing by unscrewing the wingnut.
4. Clean the interior of the housing by using a damp cloth. DO NOT blow out dirt with compressed air as this may introduce dust downstream of the filter.
5. When it becomes necessary to remove the secondary element, pull the element out of the housing.
1500 Hourly Compressor Maintenance
Maintenance every 1500 hours
Is Sullair AWF® used?
If Sullair AWF® is used, proceed with the following steps
Compressor fluid change procedure
Has the compressor been warmed up for 5 to 10 minutes?
Is the compressor off and all internal pressure relieved?
Has the fluid been drained by opening the appropriate drain valve?
Has the valve been closed when draining is complete?
Has the compressor fluid been changed and the fluid filter element replaced?
1 Yearly Noise Emissions Maintenance
6.3 Noise emissions maintenance and maintenance record log
Muffler(s) and engine exhaust system securely mounted?
All joints and connections are tight in the muffler and exhaust system?
Muffler is in good condition?
Air filter(s) and air inlet system securely mounted?
All joints and connections are tight in the air filter and air inlet system?
No leaks in the air filter and air inlet system?
Filter element(s) are intact?
Engine vibration mounts securely attached?
250 Hourly Compressor Maintenance
Maintenance every 250 hours
Check fan belt tension and adjust if needed.
Clean the radiator and cooler exterior.
Depending on how contaminated the atmosphere may be, more frequent cooler and radiator cleaning may be necessary.
Check Engine Operator's Manual for required service.
Sign off on the 250 hourly compressor maintenance
Parts for Sullair Portable Air Compressor 750H
Access the parts list for your equipment in MaintainX.
Multi-Viscosity Lubricant, 55 Gallons, 208 Liter Drum
250030-758
Multi-Viscosity Lubricant, 5 Gallons/18.9 Liters
250030-757
Repair Kit For Thermostat Element
02250087-682
Replacement Filter Element
250025-526
Primary Filter Element
048462
Multi-Viscosity Lubricant, 55 Gallons, 208 Liter Drum
250030-758
Multi-Viscosity Lubricant, 5 Gallons/18.9 Liters
250030-757
Repair Kit For Thermostat Element
02250087-682
Replacement Filter Element
250025-526
Primary Filter Element
048462
Multi-Viscosity Lubricant, 55 Gallons, 208 Liter Drum
250030-758
Multi-Viscosity Lubricant, 5 Gallons/18.9 Liters
250030-757
Repair Kit For Thermostat Element
02250087-682
Replacement Filter Element
250025-526
Primary Filter Element
048462
Unlock efficiency
with MaintainX CoPilot
MaintainX CoPilot is your expert colleague, on call 24/7, helping your team find the answers they need to keep equipment running.
Reduce Unplanned Downtime
Ensure your team follows consistent procedures to minimize equipment failures and costly delays.
Maximize Asset Availability
Keep your assets running longer and more reliably, with standardized maintenance workflows from OEM manuals.
Lower Maintenance Costs
Turn any technician into an expert to streamline operations, maintain more assets, and reduce overall costs.
Thousands of companies manage their assets with MaintainX

'%3e%3cpath%20fill='url(%23b)'%20d='M66.008%2080.068c-5.084-.786-9.763-3.834-12.442-8.68a16.942%2016.942%200%200%201-1.87-5.18c1.096.19%202.203.476%203.298.87%206.525%202.333%2010.836%207.68%2011.014%2012.99ZM51.47%2061.576c.488-5.524%203.62-10.716%208.847-13.597a17.132%2017.132%200%200%201%2011.335-1.882c-.798%208.145-7.43%2014.848-16.038%2015.599-1.417.119-2.799.07-4.144-.12Zm28.564-11.478a17.513%2017.513%200%200%201%203.727%204.62c4.608%208.335%201.584%2018.813-6.75%2023.409a16.988%2016.988%200%200%201-4.359%201.679%2019.624%2019.624%200%200%201-3.977-12.776c.346-7.561%204.942-13.931%2011.36-16.932Z'/%3e%3cpath%20fill='%23110F0D'%20fill-rule='evenodd'%20d='M142.831%2048.324h4.977V77.03h-4.977V48.324Zm27.278%2013.002c.322%201.048.453%202.263.453%203.62v12.073h-4.787V66.208c0-.75-.047-1.572-.154-2.143-.453-2.382-1.822-3.572-4.215-3.572-2.31%200-3.882%201.274-4.43%203.476-.143.596-.226%201.405-.226%202.25v10.8h-4.787V56.623h4.477v2.989c1.536-2.5%203.906-3.43%206.371-3.43%203.488%200%206.263%201.68%207.298%205.144Zm24.636%207.323c0%203.882-2.358%206.525-5.763%207.727-1.298.453-2.632.643-4.62.643h-10.169V48.324h9.085c1.691%200%203.156.143%204.049.38%203.465.93%205.727%203.68%205.727%207.335%200%202.441-.81%204.156-2.762%205.644%202.905%201.417%204.453%203.727%204.453%206.966Zm-15.634-8.656h4.584c1.024%200%201.917-.143%202.536-.417%201.215-.548%201.905-1.608%201.905-3.167%200-1.548-.643-2.572-1.845-3.132-.691-.31-1.762-.452-2.763-.452h-4.417v7.168Zm10.716%208.465c0-1.536-.893-3.37-3.227-3.893-.428-.095-1.036-.143-1.571-.143h-5.918v8.085h5.501c.56%200%201.429-.048%201.953-.167%201.94-.453%203.262-1.846%203.262-3.882Zm47.747-11.847-8.097%2020.408h-4.429l-8.109-20.408h5.191l5.192%2014.574%205.108-14.574h5.144Zm-20.218%2010.002c0%20.69-.036%201.262-.155%201.94h-15.943c.631%202.87%202.714%204.728%205.882%204.728%202.131%200%203.607-.882%204.703-2.525h4.87c-1.762%204.144-5.204%206.692-9.657%206.692-6.084%200-10.537-4.858-10.537-10.49%200-6.108%204.524-10.776%2010.335-10.776%206.239%200%2010.442%204.954%2010.502%2010.43Zm-4.763-1.405c-.333-2.846-2.643-4.858-5.691-4.858-2.894%200-5.287%201.929-5.621%204.858h11.312Zm-72.667%203.44c0%204.787-3.287%208.371-9.419%208.371H119.363V64.66c-1.917.274-3.87.69-5.811%201.238l4.537%2011.121h-5.418l-3.596-9.585c-5.144%202.084-10.085%205.216-14.217%209.585h-4.786L101.8%2048.312h4.56l5.68%2013.883a44.112%2044.112%200%200%201%207.323-1.774V48.312h9.084c1.703%200%203.156.143%204.061.393%203.453.929%205.727%203.667%205.727%207.323%200%201.917-.738%204.179-2.81%205.691%203.06%201.56%204.501%204.025%204.501%206.93Zm-15.634-8.667a62.664%2062.664%200%200%201%202.06-.036c1.703.012%203.239.131%204.608.37%201.441-.549%202.357-1.727%202.357-3.537%200-1.941-.881-3.144-2.488-3.667-.548-.18-1.358-.286-2.322-.286h-4.215v7.156Zm-16.55%203.905-3.715-9.894-6.394%2016.502c2.833-2.595%206.263-4.858%2010.109-6.608Zm27.254%204.74c0-2.775-3.131-4.347-8.513-4.418-.715%200-1.441.011-2.191.047v8.252h5.918c2.548%200%204.786-1.37%204.786-3.882Z'%20clip-rule='evenodd'/%3e%3c/g%3e%3cdefs%3e%3clinearGradient%20id='b'%20x1='51.47'%20x2='85.916'%20y1='62.946'%20y2='62.946'%20gradientUnits='userSpaceOnUse'%3e%3cstop%20stop-color='%23CD9F28'/%3e%3cstop%20offset='1'%20stop-color='%23ECD80B'/%3e%3c/linearGradient%3e%3cclipPath%20id='a'%3e%3cpath%20fill='%23fff'%20d='M51.47%2045.728h186.104V80.14H51.47z'/%3e%3c/clipPath%3e%3c/defs%3e%3c/svg%3e)


More from Sullair


Explore Other Assets


© 2026 MaintainX. All rights reserved.