


Sullair Air Compressor 10B-25
Need answers fast?
Explore the manual using AI.
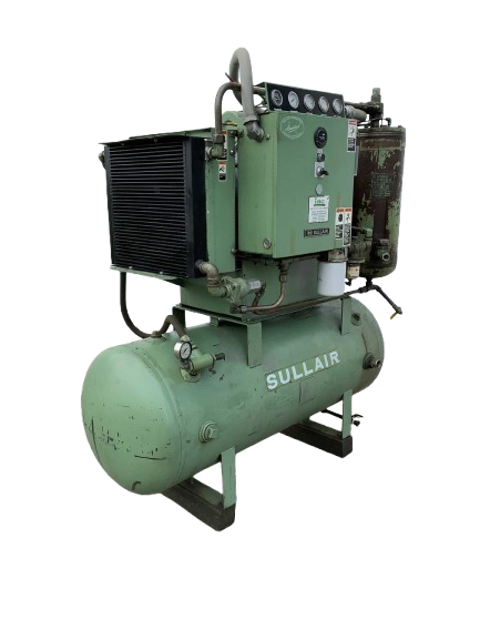
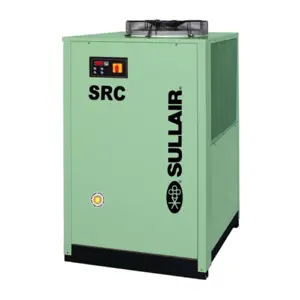
The Sullair Air Compressor 10B-25 is a robust industrial compressor designed for reliable performance in demanding applications. Known for its efficiency and durability, this model is ideal for various industries requiring compressed air solutions. Regular maintenance ensures optimal operation and longevity of the compressor.
Turn manuals into instant answers
with your AI-powered assistantTurn manuals into instant answers
with your AI-powered assistant
Complete asset maintenance, one click away
Get instant access to all the maintenance information you need. Empower technicians to perform preventive maintenance with asset packages, ready to use right out of the box.

Documents & Manuals
Find all the essential guides in one place.
 Tensioning Guide
- Belt-diagram
- C-120 pulleys
+ 13 more

Work Order Templates
Pre-built workflows to keep your asset running smoothly.
- Daily Electrical System Inspection
- Replace Roller and Pulley
- Install Engine B-120
+ 29 more

Procedures
Integrate maintenance plans directly into your work orders.
- Motion Industries
- Applied Industrial Technologies
- Electrical Brothers
+ 5 more

Parts
Access the parts list for your equipment in MaintainX.
- Drive Motor
- B2 Rollers
- Tensioning System
+ 40 more
Sullair Air Compressor 10B-25
Create an account to install this asset package.
Maintenance Plans for Sullair Air Compressor Model 10B-25
Integrate maintenance plans directly into your work orders in MaintainX.
6 Monthly / 1000 Hours Compressor Maintenance
Clean the return line strainer
Replace the fluid filter element
Replace your fluid filter element and the gasket under any of the following conditions, whichever occur first
Conditions for replacing fluid filter element
To replace fluid filter element:
Using a strap wrench, remove the old element and gasket
Clean gasket seating surface
Apply a light film of fluid to the new gasket
Hand tighten new element until new gasket is seated in the gasket groove

Compressor Minimum Pressure/ Check Valve Maintenance
WARNING: Before performing maintenance on the valve, be sure that all pressure has been relieved in the compressor sump, and all downstream pressure has been vented to the atmosphere. Also be sure that the components of the compressor are cool to the touch
All pressure relieved in the compressor sump?
All downstream pressure vented to the atmosphere?
Components of the compressor are cool to the touch?
Replace o-ring on the piston of Minimum pressure/ check valve (P/N 241581) To replace this ring, use seal repair kit no. 250020-344
Unscrew the minimum pressure/check valve (P/N 241581) from the receiver cover
Remove the hexagonal retaining cap from the main body
Remove the flat washer and heavy spring from the main body
Tap the piston assembly (with a screwdriver) from the bottom of the main body and remove. The o-ring will now be seen easily
Compressor Blowdown Valve Maintenance
Warning: Always ensure the compressor is turned off and fully depressurized before starting maintenance.
Unscrew end caps from the valve body and remove
Hold nut with an appropriate socket wrench and turn screw until loose
Remove all internal parts mounted on the machine screw. Remove the old o-rings and teflon seat and discard
Replace with the new o-rings and teflon seat provided in the repair kit. Apply appropriate lubricant to o-rings and valve body bore
Pre-assemble the internal parts for pilot (P) side of the valve onto the screw and install into the body
Assemble remaining internal parts for inlet (I) side to the screw as illustrated. Once assembled, install the locknut and torque to 25 in.-lbs. (2.82Nm)
Screw end caps into the valve body until tight
Install drive couplings
6 Monthly Air Filter Element Inspection
Place a bright light inside the element to inspect for damage or leak holes. Concentrated light will shine through the element and disclose any holes
Inspect all gaskets and gasket contact surfaces of the housing. Should faulty gaskets be evident, correct the condition immediately
If the clean element is to be stored for later use, it must be stored in a clean container
After the element has been installed, inspect and tighten all air inlet connections prior to resuming operation
Sign off on the air filter element inspection
Compressor Maintenance
PIPE END PREPARATION
Deburr and clean the pipe ends
The pipe ends are free of all deep scratches, gouges, dents, etc.
JOINT INSTALLATION
Install the retainer (1), gasket (2), and sleeve (3) on one side of the pipe as shown in Step 1
Install the remaining retainer (4) and gasket (5) on the other pipe end
Position the retainer (4) and gasket to proper pipe insertion depth (“D”)
Slide the sleeve (3) to the gasket (5) and move gasket (2) and retainer (1) into position as shown in Step 2. The pipe MUST be inserted to the proper depth (“D”) into both gaskets
COUPLER INSTALLATION
Parts for Sullair Air Compressor 10B-25
Access the parts list for your equipment in MaintainX.
Repair Kit
001836–007
Replacement Element
042445
Replacement Coil
250018–971
Fluid
046850–001
Air Filter
0410036
Repair Kit
001836–007
Replacement Element
042445
Replacement Coil
250018–971
Fluid
046850–001
Air Filter
0410036
Repair Kit
001836–007
Replacement Element
042445
Replacement Coil
250018–971
Fluid
046850–001
Air Filter
0410036
Unlock efficiency
with MaintainX CoPilot
MaintainX CoPilot is your expert colleague, on call 24/7, helping your team find the answers they need to keep equipment running.
Reduce Unplanned Downtime
Ensure your team follows consistent procedures to minimize equipment failures and costly delays.
Maximize Asset Availability
Keep your assets running longer and more reliably, with standardized maintenance workflows from OEM manuals.
Lower Maintenance Costs
Turn any technician into an expert to streamline operations, maintain more assets, and reduce overall costs.
Thousands of companies manage their assets with MaintainX

'%3e%3cpath%20fill='url(%23b)'%20d='M66.008%2080.068c-5.084-.786-9.763-3.834-12.442-8.68a16.942%2016.942%200%200%201-1.87-5.18c1.096.19%202.203.476%203.298.87%206.525%202.333%2010.836%207.68%2011.014%2012.99ZM51.47%2061.576c.488-5.524%203.62-10.716%208.847-13.597a17.132%2017.132%200%200%201%2011.335-1.882c-.798%208.145-7.43%2014.848-16.038%2015.599-1.417.119-2.799.07-4.144-.12Zm28.564-11.478a17.513%2017.513%200%200%201%203.727%204.62c4.608%208.335%201.584%2018.813-6.75%2023.409a16.988%2016.988%200%200%201-4.359%201.679%2019.624%2019.624%200%200%201-3.977-12.776c.346-7.561%204.942-13.931%2011.36-16.932Z'/%3e%3cpath%20fill='%23110F0D'%20fill-rule='evenodd'%20d='M142.831%2048.324h4.977V77.03h-4.977V48.324Zm27.278%2013.002c.322%201.048.453%202.263.453%203.62v12.073h-4.787V66.208c0-.75-.047-1.572-.154-2.143-.453-2.382-1.822-3.572-4.215-3.572-2.31%200-3.882%201.274-4.43%203.476-.143.596-.226%201.405-.226%202.25v10.8h-4.787V56.623h4.477v2.989c1.536-2.5%203.906-3.43%206.371-3.43%203.488%200%206.263%201.68%207.298%205.144Zm24.636%207.323c0%203.882-2.358%206.525-5.763%207.727-1.298.453-2.632.643-4.62.643h-10.169V48.324h9.085c1.691%200%203.156.143%204.049.38%203.465.93%205.727%203.68%205.727%207.335%200%202.441-.81%204.156-2.762%205.644%202.905%201.417%204.453%203.727%204.453%206.966Zm-15.634-8.656h4.584c1.024%200%201.917-.143%202.536-.417%201.215-.548%201.905-1.608%201.905-3.167%200-1.548-.643-2.572-1.845-3.132-.691-.31-1.762-.452-2.763-.452h-4.417v7.168Zm10.716%208.465c0-1.536-.893-3.37-3.227-3.893-.428-.095-1.036-.143-1.571-.143h-5.918v8.085h5.501c.56%200%201.429-.048%201.953-.167%201.94-.453%203.262-1.846%203.262-3.882Zm47.747-11.847-8.097%2020.408h-4.429l-8.109-20.408h5.191l5.192%2014.574%205.108-14.574h5.144Zm-20.218%2010.002c0%20.69-.036%201.262-.155%201.94h-15.943c.631%202.87%202.714%204.728%205.882%204.728%202.131%200%203.607-.882%204.703-2.525h4.87c-1.762%204.144-5.204%206.692-9.657%206.692-6.084%200-10.537-4.858-10.537-10.49%200-6.108%204.524-10.776%2010.335-10.776%206.239%200%2010.442%204.954%2010.502%2010.43Zm-4.763-1.405c-.333-2.846-2.643-4.858-5.691-4.858-2.894%200-5.287%201.929-5.621%204.858h11.312Zm-72.667%203.44c0%204.787-3.287%208.371-9.419%208.371H119.363V64.66c-1.917.274-3.87.69-5.811%201.238l4.537%2011.121h-5.418l-3.596-9.585c-5.144%202.084-10.085%205.216-14.217%209.585h-4.786L101.8%2048.312h4.56l5.68%2013.883a44.112%2044.112%200%200%201%207.323-1.774V48.312h9.084c1.703%200%203.156.143%204.061.393%203.453.929%205.727%203.667%205.727%207.323%200%201.917-.738%204.179-2.81%205.691%203.06%201.56%204.501%204.025%204.501%206.93Zm-15.634-8.667a62.664%2062.664%200%200%201%202.06-.036c1.703.012%203.239.131%204.608.37%201.441-.549%202.357-1.727%202.357-3.537%200-1.941-.881-3.144-2.488-3.667-.548-.18-1.358-.286-2.322-.286h-4.215v7.156Zm-16.55%203.905-3.715-9.894-6.394%2016.502c2.833-2.595%206.263-4.858%2010.109-6.608Zm27.254%204.74c0-2.775-3.131-4.347-8.513-4.418-.715%200-1.441.011-2.191.047v8.252h5.918c2.548%200%204.786-1.37%204.786-3.882Z'%20clip-rule='evenodd'/%3e%3c/g%3e%3cdefs%3e%3clinearGradient%20id='b'%20x1='51.47'%20x2='85.916'%20y1='62.946'%20y2='62.946'%20gradientUnits='userSpaceOnUse'%3e%3cstop%20stop-color='%23CD9F28'/%3e%3cstop%20offset='1'%20stop-color='%23ECD80B'/%3e%3c/linearGradient%3e%3cclipPath%20id='a'%3e%3cpath%20fill='%23fff'%20d='M51.47%2045.728h186.104V80.14H51.47z'/%3e%3c/clipPath%3e%3c/defs%3e%3c/svg%3e)


More from Sullair


Explore Other Assets


© 2026 MaintainX. All rights reserved.