


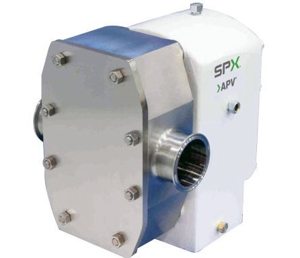
SPX Corporation Rotary Pump R0
Need answers fast?
Explore the manual using AI.

Turn manuals into instant answers
with your AI-powered assistantTurn manuals into instant answers
with your AI-powered assistant
Manual for SPX Corporation Rotary Pump R0
Complete asset maintenance, one click away
Get instant access to all the maintenance information you need. Empower technicians to perform preventive maintenance with asset packages, ready to use right out of the box.

Documents & Manuals
Find all the essential guides in one place.
 Tensioning Guide
- Belt-diagram
- C-120 pulleys
+ 13 more

Work Order Templates
Pre-built workflows to keep your asset running smoothly.
- Daily Electrical System Inspection
- Replace Roller and Pulley
- Install Engine B-120
+ 29 more

Procedures
Integrate maintenance plans directly into your work orders.
- Motion Industries
- Applied Industrial Technologies
- Electrical Brothers
+ 5 more

Parts
Access the parts list for your equipment in MaintainX.
- Drive Motor
- B2 Rollers
- Tensioning System
+ 40 more
SPX Corporation Rotary Pump R0
Create an account to install this asset package.
Maintenance Plans for SPX Corporation Rotary Pump Model R0
Integrate maintenance plans directly into your work orders in MaintainX.
1 Weekly Rotary Pump Check
Check all hardware for tightness
Check gearcase oil level
Check vented cover for air leakage
*Applies only to pumps equipped with vented covers.
Check for product leakage in incoming and outgoing lines
Sign off on the weekly rotary pump check

Rotary Pump Oil Change
Warning: Ensure the pump is not running and is cool before starting the procedure
Drain pan placed under drain plug
Drain plug removed and oil drained
Drain plug reinstalled after complete drainage
Filler plug removed and pump filled with high grade gear lube
Vent plug installed
Sign off on the oil change procedure
Initial Rotary Pump Cleaning
To properly clean and sanitize the pump for use with food products, it may be necessary to use chemical solutions. Many of the commonly used chemical solutions could cause severe injury to personnel if contacted. The hazard is especially severe for eyes, skin, or inhalation.
Prior to using any rotary pump for the rst time, disassemble and hand clean the pump. Clean all inner and outer surfaces to remove any dirt, grit or lm that may have accumulated during shipment and installation.
Cleaning Tips:
1. Do Not use carbon steel wool. Particles may break o and become embedded, causing rust development.
2. Do Not use water high in iron, salt or sulfur. Use distilled water if possible.;
3. Do Not allow cleaners or bactericides to remain on surface for over 15 minutes.
4. Rinse all parts and surfaces exposed to corrosive cleaning solutions completely with cold water.
5. Do Not allow tools or other metal items to lie on wet stainless steel.
6. Only use recommended cleaners. Alkaline dairy cleaners or bactericides should contain a wetting agent and polyphosphate to suit water hardness.
Rotary Pump Bearing Adjustment
Loosen the set screws. Loosen the top and bottom bearing adjusting nuts. This will free rotation of the shafts.
Rotate the top shaft back and forth. Tighten the top bearing adjusting nut until a slight resistance to the top shaft is felt. Mark the position of the top bearing adjusting nut and back it on one-half turn.
Rotate the bottom shaft back and forth. Tighten the bottom bearing adjusting nut until a slight resistance to the bottom shaft is felt. Lock the bottom bearing adjusting nut set screw after adjusting.
Turn the top bearing adjusting nut so that the marks line up.
Lock the top bearing adjusting nut set screw after aligning marks.
If bearing adjustment has been performed and the shafts are still loose, replace the bearings.
Rotate the shafts back and forth 180o during bearing adjustment. Putting a crescent wrench on shaft squares will make turning of the shafts easier.
Sign off on the bearing adjustment
Flanged Hopper Cleaning
Warning: This cleaning procedure requires trained personnel with PPE!
Rotors and cover removed from the pump?
Rotors and cover washed separately?
Hot water applied to the underside of the pump?
Product contact surfaces washed with hot water?
Rotors and cover put back on pump?
Rotors slide in freely without rubbing or contacting the edge of the cavity?
Sign off on the flanged hopper cleaning
Parts for SPX Corporation Rotary Pump R0
Access the parts list for your equipment in MaintainX.
Nut - Hex, Stainless Steel
M523V006515
Cover
M03HP331499
Gasket - Cover
M543S131417
Pin - Dowel
M525S161670
Backplate
M03HP331037
Nut - Hex, Stainless Steel
M523V006515
Cover
M03HP331499
Gasket - Cover
M543S131417
Pin - Dowel
M525S161670
Backplate
M03HP331037
Nut - Hex, Stainless Steel
M523V006515
Cover
M03HP331499
Gasket - Cover
M543S131417
Pin - Dowel
M525S161670
Backplate
M03HP331037
Unlock efficiency
with MaintainX CoPilot
MaintainX CoPilot is your expert colleague, on call 24/7, helping your team find the answers they need to keep equipment running.
Reduce Unplanned Downtime
Ensure your team follows consistent procedures to minimize equipment failures and costly delays.
Maximize Asset Availability
Keep your assets running longer and more reliably, with standardized maintenance workflows from OEM manuals.
Lower Maintenance Costs
Turn any technician into an expert to streamline operations, maintain more assets, and reduce overall costs.
Thousands of companies manage their assets with MaintainX

'%3e%3cpath%20fill='url(%23b)'%20d='M66.008%2080.068c-5.084-.786-9.763-3.834-12.442-8.68a16.942%2016.942%200%200%201-1.87-5.18c1.096.19%202.203.476%203.298.87%206.525%202.333%2010.836%207.68%2011.014%2012.99ZM51.47%2061.576c.488-5.524%203.62-10.716%208.847-13.597a17.132%2017.132%200%200%201%2011.335-1.882c-.798%208.145-7.43%2014.848-16.038%2015.599-1.417.119-2.799.07-4.144-.12Zm28.564-11.478a17.513%2017.513%200%200%201%203.727%204.62c4.608%208.335%201.584%2018.813-6.75%2023.409a16.988%2016.988%200%200%201-4.359%201.679%2019.624%2019.624%200%200%201-3.977-12.776c.346-7.561%204.942-13.931%2011.36-16.932Z'/%3e%3cpath%20fill='%23110F0D'%20fill-rule='evenodd'%20d='M142.831%2048.324h4.977V77.03h-4.977V48.324Zm27.278%2013.002c.322%201.048.453%202.263.453%203.62v12.073h-4.787V66.208c0-.75-.047-1.572-.154-2.143-.453-2.382-1.822-3.572-4.215-3.572-2.31%200-3.882%201.274-4.43%203.476-.143.596-.226%201.405-.226%202.25v10.8h-4.787V56.623h4.477v2.989c1.536-2.5%203.906-3.43%206.371-3.43%203.488%200%206.263%201.68%207.298%205.144Zm24.636%207.323c0%203.882-2.358%206.525-5.763%207.727-1.298.453-2.632.643-4.62.643h-10.169V48.324h9.085c1.691%200%203.156.143%204.049.38%203.465.93%205.727%203.68%205.727%207.335%200%202.441-.81%204.156-2.762%205.644%202.905%201.417%204.453%203.727%204.453%206.966Zm-15.634-8.656h4.584c1.024%200%201.917-.143%202.536-.417%201.215-.548%201.905-1.608%201.905-3.167%200-1.548-.643-2.572-1.845-3.132-.691-.31-1.762-.452-2.763-.452h-4.417v7.168Zm10.716%208.465c0-1.536-.893-3.37-3.227-3.893-.428-.095-1.036-.143-1.571-.143h-5.918v8.085h5.501c.56%200%201.429-.048%201.953-.167%201.94-.453%203.262-1.846%203.262-3.882Zm47.747-11.847-8.097%2020.408h-4.429l-8.109-20.408h5.191l5.192%2014.574%205.108-14.574h5.144Zm-20.218%2010.002c0%20.69-.036%201.262-.155%201.94h-15.943c.631%202.87%202.714%204.728%205.882%204.728%202.131%200%203.607-.882%204.703-2.525h4.87c-1.762%204.144-5.204%206.692-9.657%206.692-6.084%200-10.537-4.858-10.537-10.49%200-6.108%204.524-10.776%2010.335-10.776%206.239%200%2010.442%204.954%2010.502%2010.43Zm-4.763-1.405c-.333-2.846-2.643-4.858-5.691-4.858-2.894%200-5.287%201.929-5.621%204.858h11.312Zm-72.667%203.44c0%204.787-3.287%208.371-9.419%208.371H119.363V64.66c-1.917.274-3.87.69-5.811%201.238l4.537%2011.121h-5.418l-3.596-9.585c-5.144%202.084-10.085%205.216-14.217%209.585h-4.786L101.8%2048.312h4.56l5.68%2013.883a44.112%2044.112%200%200%201%207.323-1.774V48.312h9.084c1.703%200%203.156.143%204.061.393%203.453.929%205.727%203.667%205.727%207.323%200%201.917-.738%204.179-2.81%205.691%203.06%201.56%204.501%204.025%204.501%206.93Zm-15.634-8.667a62.664%2062.664%200%200%201%202.06-.036c1.703.012%203.239.131%204.608.37%201.441-.549%202.357-1.727%202.357-3.537%200-1.941-.881-3.144-2.488-3.667-.548-.18-1.358-.286-2.322-.286h-4.215v7.156Zm-16.55%203.905-3.715-9.894-6.394%2016.502c2.833-2.595%206.263-4.858%2010.109-6.608Zm27.254%204.74c0-2.775-3.131-4.347-8.513-4.418-.715%200-1.441.011-2.191.047v8.252h5.918c2.548%200%204.786-1.37%204.786-3.882Z'%20clip-rule='evenodd'/%3e%3c/g%3e%3cdefs%3e%3clinearGradient%20id='b'%20x1='51.47'%20x2='85.916'%20y1='62.946'%20y2='62.946'%20gradientUnits='userSpaceOnUse'%3e%3cstop%20stop-color='%23CD9F28'/%3e%3cstop%20offset='1'%20stop-color='%23ECD80B'/%3e%3c/linearGradient%3e%3cclipPath%20id='a'%3e%3cpath%20fill='%23fff'%20d='M51.47%2045.728h186.104V80.14H51.47z'/%3e%3c/clipPath%3e%3c/defs%3e%3c/svg%3e)


More from SPX Corporation


Explore Other Assets


© 2026 MaintainX. All rights reserved.