


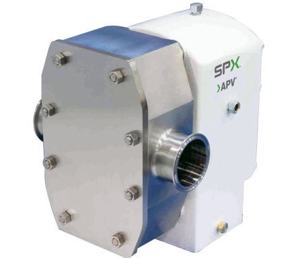
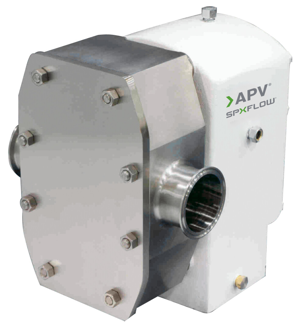
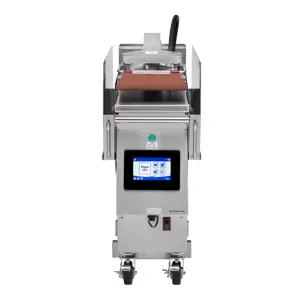
SPX Corporation Rotary Pump R6
Need answers fast?
Explore the manual using AI.

Turn manuals into instant answers
with your AI-powered assistantTurn manuals into instant answers
with your AI-powered assistant
Manual for SPX Corporation Rotary Pump R6
Complete asset maintenance, one click away
Get instant access to all the maintenance information you need. Empower technicians to perform preventive maintenance with asset packages, ready to use right out of the box.

Documents & Manuals
Find all the essential guides in one place.
 Tensioning Guide
- Belt-diagram
- C-120 pulleys
+ 13 more

Work Order Templates
Pre-built workflows to keep your asset running smoothly.
- Daily Electrical System Inspection
- Replace Roller and Pulley
- Install Engine B-120
+ 29 more

Procedures
Integrate maintenance plans directly into your work orders.
- Motion Industries
- Applied Industrial Technologies
- Electrical Brothers
+ 5 more

Parts
Access the parts list for your equipment in MaintainX.
- Drive Motor
- B2 Rollers
- Tensioning System
+ 40 more
SPX Corporation Rotary Pump R6
Create an account to install this asset package.
Maintenance Plans for SPX Corporation Rotary Pump Model R6
Integrate maintenance plans directly into your work orders in MaintainX.
Vented Cover Adjustment
- Manual:
Pump discharge pressure tends to push the rubber cover gasket and plunger towards the front of the pump. This pressure compresses spring allowing pressure to be relieved by escaping via the rear side of the gasket and the recess of the outer cover. The venting pressure can be set by adjusting spring tension with the adjusting nut.
1. Place a pressure gauge in the downstream line close to the pump; between the pump and other downstream equipment.
2. Place a shut-o valve in the discharge line immediately downstream from the pressure gauge. Leave the valve wide open.
3. Loosen the lock nut and turn the adjusting nut clockwise as far as it will go. This is to prevent any venting during Step 4 below.
4. Pump product through system at the desired temperature and adjust the pump speed until the desired capacity is attained.
5. Check the pressure gauge for the desired pumping pressure. Example: 40 psig (2.8 kg/cm2).
6. Determine the venting pressure needed to protect the system. Example: 45 psig (3.15 kg/cm2). Venting pressure must always be higher than the pumping pressure.
7. Now turn the adjusting nut counterclockwise until only two or three threads are engaged.

1 Monthly Rotary Pump Check
Check condition of V belts
Check bearings and oil seals for wear
Check pump interior and cover for wear
Check rotors for wear
Check driven and drive pulleys for wear
Check overall condition of drive units
Make sure oil is changed regularly in drive units
Check shafts and rotor hubs for wear - corners must be square
Sign off on the monthly rotary pump check
1 Daily Rotary Pump Cleaning
Warning: Use of chemical solutions could cause severe injury to personnel if contacted. The hazard is especially severe for eyes, skin, or inhalation.
Rubber mat placed under the immediate area of the pump?
R1, R2, R3 and R3HD Pumps: Removed the four hex nuts, cover and gasket from the pump body?
R4, R4HD, R6 and R6HD Pumps: Removed the eight hex nuts, cover and gasket from the pump body?
Removed the two rotors from the pump shafts?
R1, R2, R3 and R3HD Pumps: Installed the gasket, cover and four hex nuts on the pump body and tightened the hex nuts?
R4, R4HD, R6 and R6HD Pumps: Installed the gasket, cover and eight hex nuts on the pump body and tightened the hex nuts?
Rinsed outer areas of the pump and gearcase (hand clean if necessary) according to standard plant procedure?
R1, R2, R3 and R3HD Pumps: When CIP of the system is completed, removed the four hex nuts, cover and gasket from the pump body and replaced the used gasket?
Rotary Pump Bearing Adjustment
Loosen the set screws and the top and bottom bearing adjusting nuts
Rotate the top shaft back and forth and tighten the top bearing adjusting nut until a slight resistance is felt
Mark the position of the top bearing adjusting nut and back it off one-half turn
Rotate the bottom shaft back and forth and tighten the bottom bearing adjusting nut until a slight resistance is felt
Lock the bottom bearing adjusting nut set screw after adjusting
Turn the top bearing adjusting nut so that the marks line up
Lock the top bearing adjusting nut set screw after aligning marks
If bearing adjustment has been performed and the shafts are still loose, replace the bearing
Rotate the shafts back and forth 180o during bearing adjustment
Flanged Hopper Cleaning
Warning: This cleaning procedure requires trained personnel with PPE!
Rotors and cover removed from the pump?
Rotors and cover washed separately?
Hot water applied to the underside of the pump?
Product contact surfaces washed with hot water?
Rotors and cover put back on pump?
Rotors slide in freely without rubbing or contacting the edge of the cavity?
Sign off on the flanged hopper cleaning
Parts for SPX Corporation Rotary Pump R6
Access the parts list for your equipment in MaintainX.
Nut - Hex, Stainless Steel
M523V006529
Nut - Wing, Optional
M727P39782E
Cover - Standard Front Cover
M03HP133615
Gasket - Cover (Paper), Sold In Pks Of 100
M541P133610
Bearing - Seal, Stainless Steel
M03HP137734
Nut - Hex, Stainless Steel
M523V006529
Nut - Wing, Optional
M727P39782E
Cover - Standard Front Cover
M03HP133615
Gasket - Cover (Paper), Sold In Pks Of 100
M541P133610
Bearing - Seal, Stainless Steel
M03HP137734
Nut - Hex, Stainless Steel
M523V006529
Nut - Wing, Optional
M727P39782E
Cover - Standard Front Cover
M03HP133615
Gasket - Cover (Paper), Sold In Pks Of 100
M541P133610
Bearing - Seal, Stainless Steel
M03HP137734
Unlock efficiency
with MaintainX CoPilot
MaintainX CoPilot is your expert colleague, on call 24/7, helping your team find the answers they need to keep equipment running.
Reduce Unplanned Downtime
Ensure your team follows consistent procedures to minimize equipment failures and costly delays.
Maximize Asset Availability
Keep your assets running longer and more reliably, with standardized maintenance workflows from OEM manuals.
Lower Maintenance Costs
Turn any technician into an expert to streamline operations, maintain more assets, and reduce overall costs.
Thousands of companies manage their assets with MaintainX

'%3e%3cpath%20fill='url(%23b)'%20d='M66.008%2080.068c-5.084-.786-9.763-3.834-12.442-8.68a16.942%2016.942%200%200%201-1.87-5.18c1.096.19%202.203.476%203.298.87%206.525%202.333%2010.836%207.68%2011.014%2012.99ZM51.47%2061.576c.488-5.524%203.62-10.716%208.847-13.597a17.132%2017.132%200%200%201%2011.335-1.882c-.798%208.145-7.43%2014.848-16.038%2015.599-1.417.119-2.799.07-4.144-.12Zm28.564-11.478a17.513%2017.513%200%200%201%203.727%204.62c4.608%208.335%201.584%2018.813-6.75%2023.409a16.988%2016.988%200%200%201-4.359%201.679%2019.624%2019.624%200%200%201-3.977-12.776c.346-7.561%204.942-13.931%2011.36-16.932Z'/%3e%3cpath%20fill='%23110F0D'%20fill-rule='evenodd'%20d='M142.831%2048.324h4.977V77.03h-4.977V48.324Zm27.278%2013.002c.322%201.048.453%202.263.453%203.62v12.073h-4.787V66.208c0-.75-.047-1.572-.154-2.143-.453-2.382-1.822-3.572-4.215-3.572-2.31%200-3.882%201.274-4.43%203.476-.143.596-.226%201.405-.226%202.25v10.8h-4.787V56.623h4.477v2.989c1.536-2.5%203.906-3.43%206.371-3.43%203.488%200%206.263%201.68%207.298%205.144Zm24.636%207.323c0%203.882-2.358%206.525-5.763%207.727-1.298.453-2.632.643-4.62.643h-10.169V48.324h9.085c1.691%200%203.156.143%204.049.38%203.465.93%205.727%203.68%205.727%207.335%200%202.441-.81%204.156-2.762%205.644%202.905%201.417%204.453%203.727%204.453%206.966Zm-15.634-8.656h4.584c1.024%200%201.917-.143%202.536-.417%201.215-.548%201.905-1.608%201.905-3.167%200-1.548-.643-2.572-1.845-3.132-.691-.31-1.762-.452-2.763-.452h-4.417v7.168Zm10.716%208.465c0-1.536-.893-3.37-3.227-3.893-.428-.095-1.036-.143-1.571-.143h-5.918v8.085h5.501c.56%200%201.429-.048%201.953-.167%201.94-.453%203.262-1.846%203.262-3.882Zm47.747-11.847-8.097%2020.408h-4.429l-8.109-20.408h5.191l5.192%2014.574%205.108-14.574h5.144Zm-20.218%2010.002c0%20.69-.036%201.262-.155%201.94h-15.943c.631%202.87%202.714%204.728%205.882%204.728%202.131%200%203.607-.882%204.703-2.525h4.87c-1.762%204.144-5.204%206.692-9.657%206.692-6.084%200-10.537-4.858-10.537-10.49%200-6.108%204.524-10.776%2010.335-10.776%206.239%200%2010.442%204.954%2010.502%2010.43Zm-4.763-1.405c-.333-2.846-2.643-4.858-5.691-4.858-2.894%200-5.287%201.929-5.621%204.858h11.312Zm-72.667%203.44c0%204.787-3.287%208.371-9.419%208.371H119.363V64.66c-1.917.274-3.87.69-5.811%201.238l4.537%2011.121h-5.418l-3.596-9.585c-5.144%202.084-10.085%205.216-14.217%209.585h-4.786L101.8%2048.312h4.56l5.68%2013.883a44.112%2044.112%200%200%201%207.323-1.774V48.312h9.084c1.703%200%203.156.143%204.061.393%203.453.929%205.727%203.667%205.727%207.323%200%201.917-.738%204.179-2.81%205.691%203.06%201.56%204.501%204.025%204.501%206.93Zm-15.634-8.667a62.664%2062.664%200%200%201%202.06-.036c1.703.012%203.239.131%204.608.37%201.441-.549%202.357-1.727%202.357-3.537%200-1.941-.881-3.144-2.488-3.667-.548-.18-1.358-.286-2.322-.286h-4.215v7.156Zm-16.55%203.905-3.715-9.894-6.394%2016.502c2.833-2.595%206.263-4.858%2010.109-6.608Zm27.254%204.74c0-2.775-3.131-4.347-8.513-4.418-.715%200-1.441.011-2.191.047v8.252h5.918c2.548%200%204.786-1.37%204.786-3.882Z'%20clip-rule='evenodd'/%3e%3c/g%3e%3cdefs%3e%3clinearGradient%20id='b'%20x1='51.47'%20x2='85.916'%20y1='62.946'%20y2='62.946'%20gradientUnits='userSpaceOnUse'%3e%3cstop%20stop-color='%23CD9F28'/%3e%3cstop%20offset='1'%20stop-color='%23ECD80B'/%3e%3c/linearGradient%3e%3cclipPath%20id='a'%3e%3cpath%20fill='%23fff'%20d='M51.47%2045.728h186.104V80.14H51.47z'/%3e%3c/clipPath%3e%3c/defs%3e%3c/svg%3e)


More from SPX Corporation


Explore Other Assets


© 2026 MaintainX. All rights reserved.