


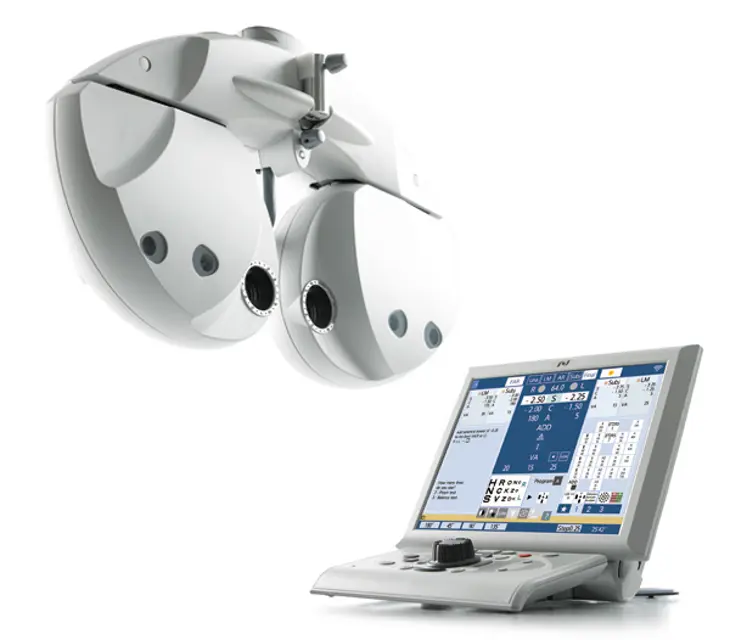
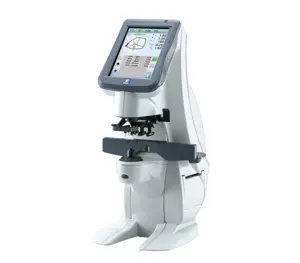
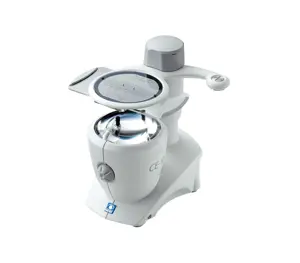
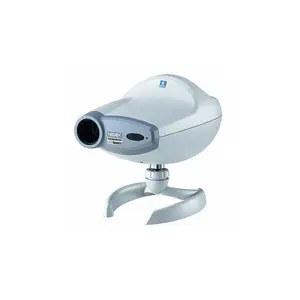
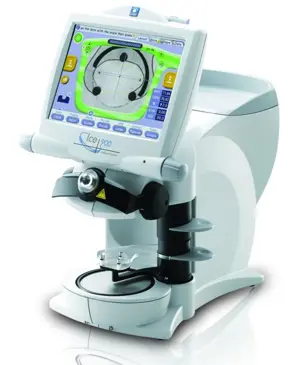
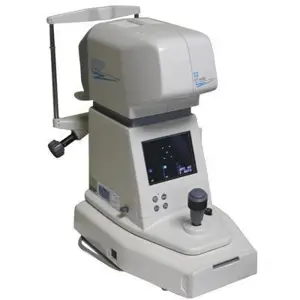
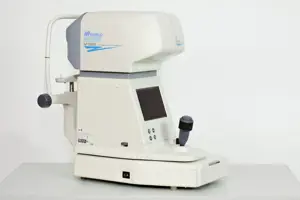
The Nidec Refractor RT 6100 is a high-performance industrial refractor designed for precision applications. Known for its reliability and efficiency, this model is ideal for various manufacturing processes, ensuring optimal performance and minimal downtime. Regular maintenance is essential to maximize its lifespan and operational efficiency.
Turn manuals into instant answers
with your AI-powered assistantTurn manuals into instant answers
with your AI-powered assistant
Complete asset maintenance, one click away
Get instant access to all the maintenance information you need. Empower technicians to perform preventive maintenance with asset packages, ready to use right out of the box.

Documents & Manuals
Find all the essential guides in one place.
 Tensioning Guide
- Belt-diagram
- C-120 pulleys
+ 13 more

Work Order Templates
Pre-built workflows to keep your asset running smoothly.
- Daily Electrical System Inspection
- Replace Roller and Pulley
- Install Engine B-120
+ 29 more

Procedures
Integrate maintenance plans directly into your work orders.
- Motion Industries
- Applied Industrial Technologies
- Electrical Brothers
+ 5 more

Parts
Access the parts list for your equipment in MaintainX.
- Drive Motor
- B2 Rollers
- Tensioning System
+ 40 more
Nidec Refractor RT 6100
Create an account to install this asset package.
Maintenance Plans for Nidec Refractor Model RT 6100
Integrate maintenance plans directly into your work orders in MaintainX.
1 Yearly Refractor Inspection
CAUTION: Only service personnel trained by Nidek are allowed to disassemble or repair the device. Nidek assumes no responsibility for any adverse events resulting from improper servicing.
Wipe the device exterior using a cloth dampened with rubbing alcohol before maintenance and inspections.
With the expected service life as a guide, consider planned replacement of the device. If the expected service life of the device is exceeded, even with proper maintenance and inspection, the device reliability or safety may become degraded and fail to achieve the target values.
Inspect appearance, ID label, labels, stains, scratches, LCD (scratches etc.), cover failures
Inspect for Safety Earth leakage current, touch current, protective grounding connection, power cord, and near point chart holder
Inspect Device main body, Power switch, LCD touch screen, buttons on the control panel, buttons on the touch screen, dial, sphere/cylinder/axis switching, PD switching, auxiliary lens switching, convergence, near lighting, and measurement windows dirt
Inspect Software version, Operator's Manual
Inspect Installation location, temperature, humidity, voltage, frequency
If there is a problem other than performance, measurement, and the above inspection items, describe the issue

Printer Paper Replacement
CAUTION: Do not touch the auto cutter or the printer head when replacing the printer paper. Do not attempt to print without printer paper loaded. Use only the specified printer paper (part number: 8062000001). Do not use strong force to pull the printer paper threaded through the printer. If the printer paper becomes jammed, remove the paper roll by the procedure as when replacing the printer paper. Cut off the crumpled portion and then return the paper roll.
Red line appearing along the edge of the printer paper?
If red line appears, stop using the printer and replace the printer paper with a new roll.
Press the cover open button to open the printer cover?
Remove the used printer paper roll?
Install a new printer paper roll in the same orientation as shown?
Close the printer cover so that a short length of printer paper extends from the cover?
Press the printer cover on both sides to close the cover securely?
If the roll is loaded with the paper upside down, printing is not possible. Confirm that there is no slack in the printer paper. Confirm that printer paper is not loaded in a tilted angle and that the core of the roll is properly placed. Confirm that the cover is securely closed. If the cover is insecurely closed, the auto cutter may not operate properly. In addition, an error may appear and printing will not occur.
Measuring Windows Cleaning
CAUTION: Remove any dust on the windows with a blower brush before cleaning them. Wiping the windows with dust on may scratch the glass of the measuring windows.
CAUTION: If the measuring window is dirty with fingerprints, eyelash oil, or dust, accurate measurement cannot be performed. Be sure to check the measuring windows before refraction. Clean them if necessary.
CAUTION: Do not clean the measuring windows using a cloth moistened with detergent or such. Wiping marks may be left or the surface coating may be damaged.
Remove the face shields
Blow off the dust on the measuring windows with a blower. Clean the measuring windows of both the patient’s side and the operator’s side.
For severe stains, lightly wipe with a soft cloth that does not scratch the protective glass of the measuring windows.
Reattach the face shields
When the inside of the measuring window becomes dirty: If the inside of the measuring window becomes dirty due to condensation or such, remove the protective glass and wipe its inside.
Remove the protective glass on both the operator’s side and patient’s side with a Phillips precision screwdriver.
Touch Screen Calibration
Press the dial button while holding 'Shift'
Did a message to confirm whether to display the calibration screen appear?
Press the dial button while holding 'Shift' again
Did the calibration screen display?
Press the blue square in the upper left corner
Did you press the blue square in the upper left corner?
Press the blue square in the upper right corner
Did you press the blue square in the upper right corner?
Press the blue square in the lower left corner
Printer Cleaning
Warning: Do not touch the auto cutter. It may hurt fingers.
Printer cover opened and paper roll removed
Vacuum cleaner applied to the auto cutter to remove paper residue
Do not blow off paper residue with a blower. If paper residue settles on the internal working structure, malfunction may result.
Printer paper reloaded
Sign off on the printer cleaning
Parts for Nidec Refractor RT 6100
Access the parts list for your equipment in MaintainX.
Contact Cleaner
8060500023
Printer Paper
8062000001
Contact Cleaner
8060500023
Printer Paper
8062000001
Contact Cleaner
8060500023
Printer Paper
8062000001
Unlock efficiency
with MaintainX CoPilot
MaintainX CoPilot is your expert colleague, on call 24/7, helping your team find the answers they need to keep equipment running.
Reduce Unplanned Downtime
Ensure your team follows consistent procedures to minimize equipment failures and costly delays.
Maximize Asset Availability
Keep your assets running longer and more reliably, with standardized maintenance workflows from OEM manuals.
Lower Maintenance Costs
Turn any technician into an expert to streamline operations, maintain more assets, and reduce overall costs.
Thousands of companies manage their assets with MaintainX

'%3e%3cpath%20fill='url(%23b)'%20d='M66.008%2080.068c-5.084-.786-9.763-3.834-12.442-8.68a16.942%2016.942%200%200%201-1.87-5.18c1.096.19%202.203.476%203.298.87%206.525%202.333%2010.836%207.68%2011.014%2012.99ZM51.47%2061.576c.488-5.524%203.62-10.716%208.847-13.597a17.132%2017.132%200%200%201%2011.335-1.882c-.798%208.145-7.43%2014.848-16.038%2015.599-1.417.119-2.799.07-4.144-.12Zm28.564-11.478a17.513%2017.513%200%200%201%203.727%204.62c4.608%208.335%201.584%2018.813-6.75%2023.409a16.988%2016.988%200%200%201-4.359%201.679%2019.624%2019.624%200%200%201-3.977-12.776c.346-7.561%204.942-13.931%2011.36-16.932Z'/%3e%3cpath%20fill='%23110F0D'%20fill-rule='evenodd'%20d='M142.831%2048.324h4.977V77.03h-4.977V48.324Zm27.278%2013.002c.322%201.048.453%202.263.453%203.62v12.073h-4.787V66.208c0-.75-.047-1.572-.154-2.143-.453-2.382-1.822-3.572-4.215-3.572-2.31%200-3.882%201.274-4.43%203.476-.143.596-.226%201.405-.226%202.25v10.8h-4.787V56.623h4.477v2.989c1.536-2.5%203.906-3.43%206.371-3.43%203.488%200%206.263%201.68%207.298%205.144Zm24.636%207.323c0%203.882-2.358%206.525-5.763%207.727-1.298.453-2.632.643-4.62.643h-10.169V48.324h9.085c1.691%200%203.156.143%204.049.38%203.465.93%205.727%203.68%205.727%207.335%200%202.441-.81%204.156-2.762%205.644%202.905%201.417%204.453%203.727%204.453%206.966Zm-15.634-8.656h4.584c1.024%200%201.917-.143%202.536-.417%201.215-.548%201.905-1.608%201.905-3.167%200-1.548-.643-2.572-1.845-3.132-.691-.31-1.762-.452-2.763-.452h-4.417v7.168Zm10.716%208.465c0-1.536-.893-3.37-3.227-3.893-.428-.095-1.036-.143-1.571-.143h-5.918v8.085h5.501c.56%200%201.429-.048%201.953-.167%201.94-.453%203.262-1.846%203.262-3.882Zm47.747-11.847-8.097%2020.408h-4.429l-8.109-20.408h5.191l5.192%2014.574%205.108-14.574h5.144Zm-20.218%2010.002c0%20.69-.036%201.262-.155%201.94h-15.943c.631%202.87%202.714%204.728%205.882%204.728%202.131%200%203.607-.882%204.703-2.525h4.87c-1.762%204.144-5.204%206.692-9.657%206.692-6.084%200-10.537-4.858-10.537-10.49%200-6.108%204.524-10.776%2010.335-10.776%206.239%200%2010.442%204.954%2010.502%2010.43Zm-4.763-1.405c-.333-2.846-2.643-4.858-5.691-4.858-2.894%200-5.287%201.929-5.621%204.858h11.312Zm-72.667%203.44c0%204.787-3.287%208.371-9.419%208.371H119.363V64.66c-1.917.274-3.87.69-5.811%201.238l4.537%2011.121h-5.418l-3.596-9.585c-5.144%202.084-10.085%205.216-14.217%209.585h-4.786L101.8%2048.312h4.56l5.68%2013.883a44.112%2044.112%200%200%201%207.323-1.774V48.312h9.084c1.703%200%203.156.143%204.061.393%203.453.929%205.727%203.667%205.727%207.323%200%201.917-.738%204.179-2.81%205.691%203.06%201.56%204.501%204.025%204.501%206.93Zm-15.634-8.667a62.664%2062.664%200%200%201%202.06-.036c1.703.012%203.239.131%204.608.37%201.441-.549%202.357-1.727%202.357-3.537%200-1.941-.881-3.144-2.488-3.667-.548-.18-1.358-.286-2.322-.286h-4.215v7.156Zm-16.55%203.905-3.715-9.894-6.394%2016.502c2.833-2.595%206.263-4.858%2010.109-6.608Zm27.254%204.74c0-2.775-3.131-4.347-8.513-4.418-.715%200-1.441.011-2.191.047v8.252h5.918c2.548%200%204.786-1.37%204.786-3.882Z'%20clip-rule='evenodd'/%3e%3c/g%3e%3cdefs%3e%3clinearGradient%20id='b'%20x1='51.47'%20x2='85.916'%20y1='62.946'%20y2='62.946'%20gradientUnits='userSpaceOnUse'%3e%3cstop%20stop-color='%23CD9F28'/%3e%3cstop%20offset='1'%20stop-color='%23ECD80B'/%3e%3c/linearGradient%3e%3cclipPath%20id='a'%3e%3cpath%20fill='%23fff'%20d='M51.47%2045.728h186.104V80.14H51.47z'/%3e%3c/clipPath%3e%3c/defs%3e%3c/svg%3e)


More from Nidec


Explore Other Assets


© 2026 MaintainX. All rights reserved.