


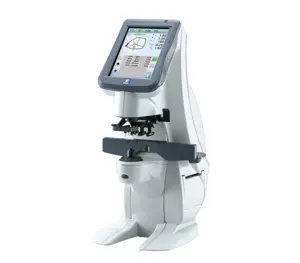
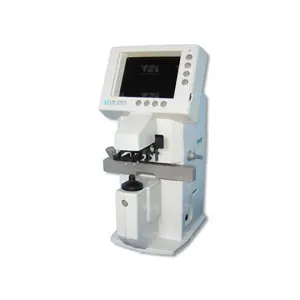
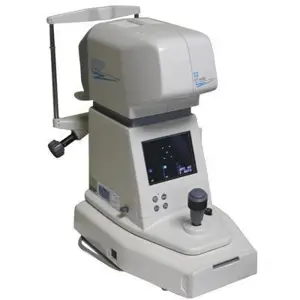
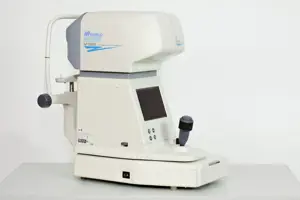
Nidec Refractor RT-3100 Ecran
Need answers fast?
Explore the manual using AI.
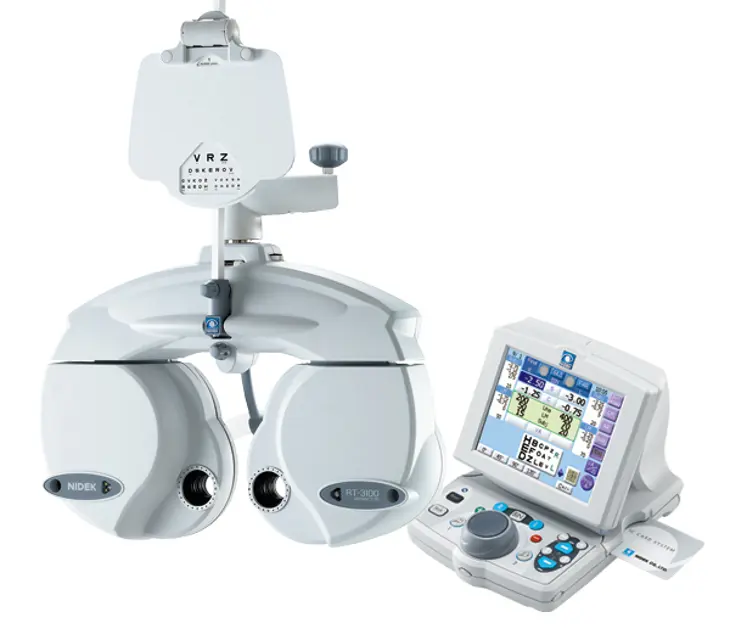
The Nidec Refractor RT-3100 Ecran is a high-performance industrial refractor designed for precision applications. This advanced model offers robust features and reliability, making it ideal for various industrial settings. Ensure optimal performance with regular maintenance and quality spare parts.
Turn manuals into instant answers
with your AI-powered assistantTurn manuals into instant answers
with your AI-powered assistant
Complete asset maintenance, one click away
Get instant access to all the maintenance information you need. Empower technicians to perform preventive maintenance with asset packages, ready to use right out of the box.

Documents & Manuals
Find all the essential guides in one place.
 Tensioning Guide
- Belt-diagram
- C-120 pulleys
+ 13 more

Work Order Templates
Pre-built workflows to keep your asset running smoothly.
- Daily Electrical System Inspection
- Replace Roller and Pulley
- Install Engine B-120
+ 29 more

Procedures
Integrate maintenance plans directly into your work orders.
- Motion Industries
- Applied Industrial Technologies
- Electrical Brothers
+ 5 more

Parts
Access the parts list for your equipment in MaintainX.
- Drive Motor
- B2 Rollers
- Tensioning System
+ 40 more
Nidec Refractor RT-3100 Ecran
Create an account to install this asset package.
Maintenance Plans for Nidec Refractor Model RT-3100 Ecran
Integrate maintenance plans directly into your work orders in MaintainX.
Printer Paper Replacement
Warning: Do not pull the printer paper forcefully. It could cause malfunction of the printer.
Warning: When replacing the printer paper, be sure not to touch the printer head on the upper part inside the printer paper holder. The printer head can get very hot and cause burns.
Slide the printer cover lever to open the printer cover
Remove any remaining printer paper
Set the printer paper as shown in the figure to the right. When the roll is set upside down, the data is not printed correctly.
Note: Be sure to take up any slack in the printer paper. Failure to do so could cause printer failure.
Check that the printer paper is set straight and the core of the roll paper is not misaligned. The printer paper may not feed properly.
Pass the paper through the paper outlet and close the paper cover. Press the both top sides of the paper cover to close the cover.
Note: Check that the cover is closed securely. If the cover is closed incompletely, the auto-cutter may not operate properly.

Printer Cleaning
Warning: This cleaning procedure requires trained personnel!
Printer cover opened and paper removed?
Residue vacuumed from the auto-cutter?
Warning: Do not blow the residue. It may cause failure due to the residue becoming attached to the internal operation mechanism.
Printer set as it was?
Sign off on the printer cleaning
Forehead Rest Cleaning
WARNING: Be sure to secure the refractor head before removing or attaching the forehead rest. If the refractor head is moved unintentionally, it may strike someone or something and injury may occur.
Forehead rest removed?
Forehead rest wiped with a clean cloth?
Persistent grime present?
Forehead rest washed with dilute neutral detergents?
Forehead rest attached in the original position?
Sign off on the forehead rest cleaning
Face Shields Cleaning
WARNING: Be sure to secure the refractor head before removing or attaching the face shields. If the refractor head is moved unintentionally, it may strike someone or something and injury may occur.
Face shields removed from the refractor head
Face shields wiped with a clean cloth
Persistent grime present?
If persistent grime is present, soak a cloth in a dilute neutral detergent, wring well, and wipe; Finally wipe with a dry, soft cloth.
Note: Do not wipe the inner surface of the face shields with neutral detergents. Doing so could make the inner surfaces rust.
Face shields attached in the original position
Sign off on the face shields cleaning
Refractor Cleaning
Warning: Ensure the device is powered off before cleaning
Check the measuring windows for fingerprints, oil, or dust
If the windows are dirty, proceed with the following steps
Remove dust on the measuring window with a blower brush
Wipe persistent stains lightly with a clean and soft cloth
Check for condensation inside the measuring windows
If condensation is present, proceed with the following steps
Remove the protective glasses by unscrewing the four screws with a precise screwdriver
Wipe the inside of the measuring windows
Parts for Nidec Refractor RT-3100 Ecran
Access the parts list for your equipment in MaintainX.
Eye Care Card Reader/Writer
EyeCa-RW2
Contact Cleaner
34086-7110
Printer Paper
806-20-00001
Eye Care Card Reader/Writer
EyeCa-RW2
Contact Cleaner
34086-7110
Printer Paper
806-20-00001
Eye Care Card Reader/Writer
EyeCa-RW2
Contact Cleaner
34086-7110
Printer Paper
806-20-00001
Unlock efficiency
with MaintainX CoPilot
MaintainX CoPilot is your expert colleague, on call 24/7, helping your team find the answers they need to keep equipment running.
Reduce Unplanned Downtime
Ensure your team follows consistent procedures to minimize equipment failures and costly delays.
Maximize Asset Availability
Keep your assets running longer and more reliably, with standardized maintenance workflows from OEM manuals.
Lower Maintenance Costs
Turn any technician into an expert to streamline operations, maintain more assets, and reduce overall costs.
Thousands of companies manage their assets with MaintainX

'%3e%3cpath%20fill='url(%23b)'%20d='M66.008%2080.068c-5.084-.786-9.763-3.834-12.442-8.68a16.942%2016.942%200%200%201-1.87-5.18c1.096.19%202.203.476%203.298.87%206.525%202.333%2010.836%207.68%2011.014%2012.99ZM51.47%2061.576c.488-5.524%203.62-10.716%208.847-13.597a17.132%2017.132%200%200%201%2011.335-1.882c-.798%208.145-7.43%2014.848-16.038%2015.599-1.417.119-2.799.07-4.144-.12Zm28.564-11.478a17.513%2017.513%200%200%201%203.727%204.62c4.608%208.335%201.584%2018.813-6.75%2023.409a16.988%2016.988%200%200%201-4.359%201.679%2019.624%2019.624%200%200%201-3.977-12.776c.346-7.561%204.942-13.931%2011.36-16.932Z'/%3e%3cpath%20fill='%23110F0D'%20fill-rule='evenodd'%20d='M142.831%2048.324h4.977V77.03h-4.977V48.324Zm27.278%2013.002c.322%201.048.453%202.263.453%203.62v12.073h-4.787V66.208c0-.75-.047-1.572-.154-2.143-.453-2.382-1.822-3.572-4.215-3.572-2.31%200-3.882%201.274-4.43%203.476-.143.596-.226%201.405-.226%202.25v10.8h-4.787V56.623h4.477v2.989c1.536-2.5%203.906-3.43%206.371-3.43%203.488%200%206.263%201.68%207.298%205.144Zm24.636%207.323c0%203.882-2.358%206.525-5.763%207.727-1.298.453-2.632.643-4.62.643h-10.169V48.324h9.085c1.691%200%203.156.143%204.049.38%203.465.93%205.727%203.68%205.727%207.335%200%202.441-.81%204.156-2.762%205.644%202.905%201.417%204.453%203.727%204.453%206.966Zm-15.634-8.656h4.584c1.024%200%201.917-.143%202.536-.417%201.215-.548%201.905-1.608%201.905-3.167%200-1.548-.643-2.572-1.845-3.132-.691-.31-1.762-.452-2.763-.452h-4.417v7.168Zm10.716%208.465c0-1.536-.893-3.37-3.227-3.893-.428-.095-1.036-.143-1.571-.143h-5.918v8.085h5.501c.56%200%201.429-.048%201.953-.167%201.94-.453%203.262-1.846%203.262-3.882Zm47.747-11.847-8.097%2020.408h-4.429l-8.109-20.408h5.191l5.192%2014.574%205.108-14.574h5.144Zm-20.218%2010.002c0%20.69-.036%201.262-.155%201.94h-15.943c.631%202.87%202.714%204.728%205.882%204.728%202.131%200%203.607-.882%204.703-2.525h4.87c-1.762%204.144-5.204%206.692-9.657%206.692-6.084%200-10.537-4.858-10.537-10.49%200-6.108%204.524-10.776%2010.335-10.776%206.239%200%2010.442%204.954%2010.502%2010.43Zm-4.763-1.405c-.333-2.846-2.643-4.858-5.691-4.858-2.894%200-5.287%201.929-5.621%204.858h11.312Zm-72.667%203.44c0%204.787-3.287%208.371-9.419%208.371H119.363V64.66c-1.917.274-3.87.69-5.811%201.238l4.537%2011.121h-5.418l-3.596-9.585c-5.144%202.084-10.085%205.216-14.217%209.585h-4.786L101.8%2048.312h4.56l5.68%2013.883a44.112%2044.112%200%200%201%207.323-1.774V48.312h9.084c1.703%200%203.156.143%204.061.393%203.453.929%205.727%203.667%205.727%207.323%200%201.917-.738%204.179-2.81%205.691%203.06%201.56%204.501%204.025%204.501%206.93Zm-15.634-8.667a62.664%2062.664%200%200%201%202.06-.036c1.703.012%203.239.131%204.608.37%201.441-.549%202.357-1.727%202.357-3.537%200-1.941-.881-3.144-2.488-3.667-.548-.18-1.358-.286-2.322-.286h-4.215v7.156Zm-16.55%203.905-3.715-9.894-6.394%2016.502c2.833-2.595%206.263-4.858%2010.109-6.608Zm27.254%204.74c0-2.775-3.131-4.347-8.513-4.418-.715%200-1.441.011-2.191.047v8.252h5.918c2.548%200%204.786-1.37%204.786-3.882Z'%20clip-rule='evenodd'/%3e%3c/g%3e%3cdefs%3e%3clinearGradient%20id='b'%20x1='51.47'%20x2='85.916'%20y1='62.946'%20y2='62.946'%20gradientUnits='userSpaceOnUse'%3e%3cstop%20stop-color='%23CD9F28'/%3e%3cstop%20offset='1'%20stop-color='%23ECD80B'/%3e%3c/linearGradient%3e%3cclipPath%20id='a'%3e%3cpath%20fill='%23fff'%20d='M51.47%2045.728h186.104V80.14H51.47z'/%3e%3c/clipPath%3e%3c/defs%3e%3c/svg%3e)


More from Nidec


Explore Other Assets


© 2026 MaintainX. All rights reserved.