


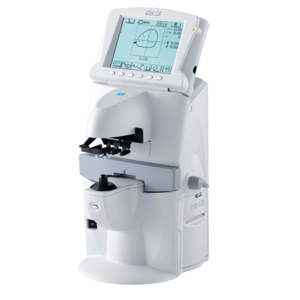
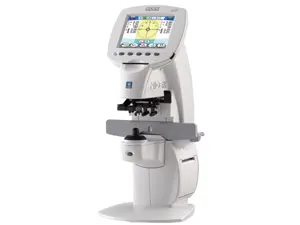
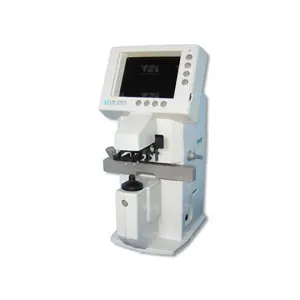
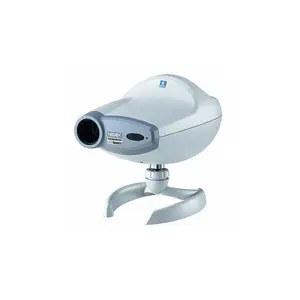
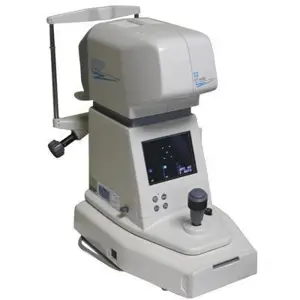
Nidec Ophthalmic Yag Laser System Nidek YC-1600
Need answers fast?
Explore the manual using AI.

The Nidec Ophthalmic Yag Laser System Nidek YC-1600 is a precision laser device designed for ophthalmic procedures. Known for its reliability and advanced technology, this system offers exceptional performance in laser treatments, ensuring optimal patient outcomes. Regular maintenance is essential for its longevity and efficiency.
Turn manuals into instant answers
with your AI-powered assistantTurn manuals into instant answers
with your AI-powered assistant
Manual for Nidec Ophthalmic Yag Laser System Nidek YC-1600
Complete asset maintenance, one click away
Get instant access to all the maintenance information you need. Empower technicians to perform preventive maintenance with asset packages, ready to use right out of the box.

Documents & Manuals
Find all the essential guides in one place.
 Tensioning Guide
- Belt-diagram
- C-120 pulleys
+ 13 more

Work Order Templates
Pre-built workflows to keep your asset running smoothly.
- Daily Electrical System Inspection
- Replace Roller and Pulley
- Install Engine B-120
+ 29 more

Procedures
Integrate maintenance plans directly into your work orders.
- Motion Industries
- Applied Industrial Technologies
- Electrical Brothers
+ 5 more

Parts
Access the parts list for your equipment in MaintainX.
- Drive Motor
- B2 Rollers
- Tensioning System
+ 40 more
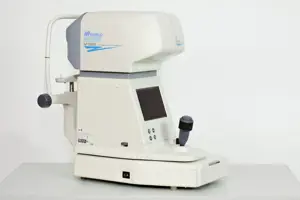
Nidec Ophthalmic Yag Laser System Nidek YC-1600
Create an account to install this asset package.
Maintenance Plans for Nidec Ophthalmic Yag Laser System Model Nidek YC-1600
Integrate maintenance plans directly into your work orders in MaintainX.
Display Board Assy Replacement
Warning: This procedure requires trained personnel with PPE!
Right cover removed
Left cover removed
Control board ASSY removed
Microscope arm swung more than 45o to right or left
SB3 × 6 (n=2) loosened and display board ASSY removed
New display board ASSY assembled in the reverse order
Sign off on the Display Board Assy Replacement

Slit Maintenance
Horizontal Slit Image Adjustment
Mount the focusing rod and set the magnification of microscope to 10×
Make the slit image horizontal and long
Check if the knife edges of the slit are parallel
Verify the position where the slit starts to be closed
Turn the slit image 180o and verify that the slit image position coincides with the position described in the previous step
If the slit image position does not coincide with the position described in the previous step, adjust with the adjustment screw
Open the knife edges by tightening the adjustment screw on A side
Loosen the adjustment screw on B side for fine adjustment to close the knife edges
Optical Axis Microscope Check
Start the Optical Axis Microscope Check
Set the magnification of the microscope to 10×
Set the slit length to maximum
Verify the position of the slit image on the focusing rod by looking through the microscope with each eye respectively
Remove the binocular tube and attach it changing its up-and-down direction
Verify the opposite side of the binocular tube of the step 2
Sign off on the Optical Axis Microscope Check
Vertical Driving Axle Replacement
Chin support goes down during use?
If yes, replace SL5HR-1L M007 (the vertical driving axle)
Unscrew PC3 × 104,HH4 × 64 and PC4 × 62 and remove the head rest AS
Unscrew the screws in A and B in the right figure
Unscrew M015 and remove the sub-assembly A.
Remove M347 (grip) form the sub-assembly A.
Unscrew the fixing screw (FK2×43) and remove M344
Unscrew the fixing screw (FK2×43) and remove M014
Unscrew M015 and remove it from M007 (the vertical driving axle)
Aiming Shutter Sensor Check
Warning: This procedure requires trained personnel!
Aiming shutter ASSY removed
Connector reconnected and key switch turned ON
4th pin of J103 on the master board verified
Detection light interrupted by inserting a board or metal plate into the slot of the sensor for the aiming shutter (1 position; PI3)
Sign off on the Aiming Shutter Sensor Check
Parts for Nidec Ophthalmic Yag Laser System Nidek YC-1600
Access the parts list for your equipment in MaintainX.
Lamp
80426-00015
Fuse
80402-02044
Master Board
13704-BA01
Display Board
13704-BA02
Power Supply
SLSCT-IL, M7177
Lamp
80426-00015
Fuse
80402-02044
Master Board
13704-BA01
Display Board
13704-BA02
Power Supply
SLSCT-IL, M7177
Lamp
80426-00015
Fuse
80402-02044
Master Board
13704-BA01
Display Board
13704-BA02
Power Supply
SLSCT-IL, M7177
Unlock efficiency
with MaintainX CoPilot
MaintainX CoPilot is your expert colleague, on call 24/7, helping your team find the answers they need to keep equipment running.
Reduce Unplanned Downtime
Ensure your team follows consistent procedures to minimize equipment failures and costly delays.
Maximize Asset Availability
Keep your assets running longer and more reliably, with standardized maintenance workflows from OEM manuals.
Lower Maintenance Costs
Turn any technician into an expert to streamline operations, maintain more assets, and reduce overall costs.
Thousands of companies manage their assets with MaintainX

'%3e%3cpath%20fill='url(%23b)'%20d='M66.008%2080.068c-5.084-.786-9.763-3.834-12.442-8.68a16.942%2016.942%200%200%201-1.87-5.18c1.096.19%202.203.476%203.298.87%206.525%202.333%2010.836%207.68%2011.014%2012.99ZM51.47%2061.576c.488-5.524%203.62-10.716%208.847-13.597a17.132%2017.132%200%200%201%2011.335-1.882c-.798%208.145-7.43%2014.848-16.038%2015.599-1.417.119-2.799.07-4.144-.12Zm28.564-11.478a17.513%2017.513%200%200%201%203.727%204.62c4.608%208.335%201.584%2018.813-6.75%2023.409a16.988%2016.988%200%200%201-4.359%201.679%2019.624%2019.624%200%200%201-3.977-12.776c.346-7.561%204.942-13.931%2011.36-16.932Z'/%3e%3cpath%20fill='%23110F0D'%20fill-rule='evenodd'%20d='M142.831%2048.324h4.977V77.03h-4.977V48.324Zm27.278%2013.002c.322%201.048.453%202.263.453%203.62v12.073h-4.787V66.208c0-.75-.047-1.572-.154-2.143-.453-2.382-1.822-3.572-4.215-3.572-2.31%200-3.882%201.274-4.43%203.476-.143.596-.226%201.405-.226%202.25v10.8h-4.787V56.623h4.477v2.989c1.536-2.5%203.906-3.43%206.371-3.43%203.488%200%206.263%201.68%207.298%205.144Zm24.636%207.323c0%203.882-2.358%206.525-5.763%207.727-1.298.453-2.632.643-4.62.643h-10.169V48.324h9.085c1.691%200%203.156.143%204.049.38%203.465.93%205.727%203.68%205.727%207.335%200%202.441-.81%204.156-2.762%205.644%202.905%201.417%204.453%203.727%204.453%206.966Zm-15.634-8.656h4.584c1.024%200%201.917-.143%202.536-.417%201.215-.548%201.905-1.608%201.905-3.167%200-1.548-.643-2.572-1.845-3.132-.691-.31-1.762-.452-2.763-.452h-4.417v7.168Zm10.716%208.465c0-1.536-.893-3.37-3.227-3.893-.428-.095-1.036-.143-1.571-.143h-5.918v8.085h5.501c.56%200%201.429-.048%201.953-.167%201.94-.453%203.262-1.846%203.262-3.882Zm47.747-11.847-8.097%2020.408h-4.429l-8.109-20.408h5.191l5.192%2014.574%205.108-14.574h5.144Zm-20.218%2010.002c0%20.69-.036%201.262-.155%201.94h-15.943c.631%202.87%202.714%204.728%205.882%204.728%202.131%200%203.607-.882%204.703-2.525h4.87c-1.762%204.144-5.204%206.692-9.657%206.692-6.084%200-10.537-4.858-10.537-10.49%200-6.108%204.524-10.776%2010.335-10.776%206.239%200%2010.442%204.954%2010.502%2010.43Zm-4.763-1.405c-.333-2.846-2.643-4.858-5.691-4.858-2.894%200-5.287%201.929-5.621%204.858h11.312Zm-72.667%203.44c0%204.787-3.287%208.371-9.419%208.371H119.363V64.66c-1.917.274-3.87.69-5.811%201.238l4.537%2011.121h-5.418l-3.596-9.585c-5.144%202.084-10.085%205.216-14.217%209.585h-4.786L101.8%2048.312h4.56l5.68%2013.883a44.112%2044.112%200%200%201%207.323-1.774V48.312h9.084c1.703%200%203.156.143%204.061.393%203.453.929%205.727%203.667%205.727%207.323%200%201.917-.738%204.179-2.81%205.691%203.06%201.56%204.501%204.025%204.501%206.93Zm-15.634-8.667a62.664%2062.664%200%200%201%202.06-.036c1.703.012%203.239.131%204.608.37%201.441-.549%202.357-1.727%202.357-3.537%200-1.941-.881-3.144-2.488-3.667-.548-.18-1.358-.286-2.322-.286h-4.215v7.156Zm-16.55%203.905-3.715-9.894-6.394%2016.502c2.833-2.595%206.263-4.858%2010.109-6.608Zm27.254%204.74c0-2.775-3.131-4.347-8.513-4.418-.715%200-1.441.011-2.191.047v8.252h5.918c2.548%200%204.786-1.37%204.786-3.882Z'%20clip-rule='evenodd'/%3e%3c/g%3e%3cdefs%3e%3clinearGradient%20id='b'%20x1='51.47'%20x2='85.916'%20y1='62.946'%20y2='62.946'%20gradientUnits='userSpaceOnUse'%3e%3cstop%20stop-color='%23CD9F28'/%3e%3cstop%20offset='1'%20stop-color='%23ECD80B'/%3e%3c/linearGradient%3e%3cclipPath%20id='a'%3e%3cpath%20fill='%23fff'%20d='M51.47%2045.728h186.104V80.14H51.47z'/%3e%3c/clipPath%3e%3c/defs%3e%3c/svg%3e)


More from Nidec


Explore Other Assets


© 2026 MaintainX. All rights reserved.