


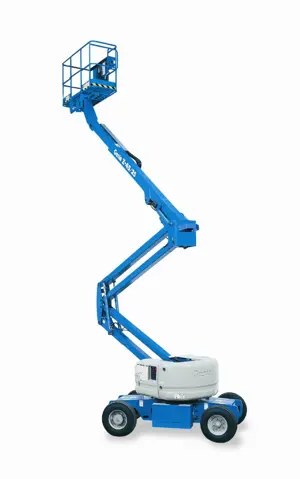
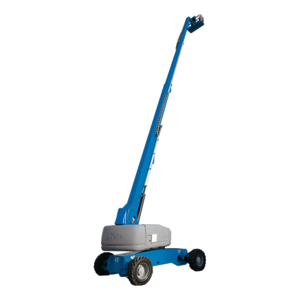
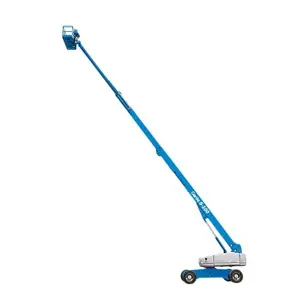
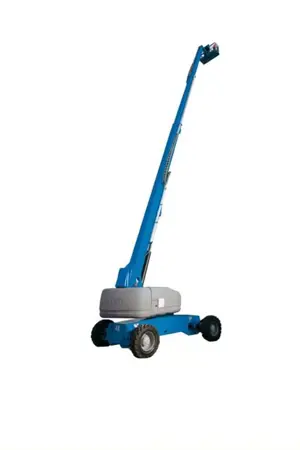
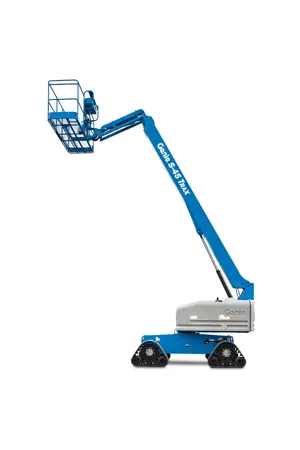
Genie Articulated Boom Lifts Z-34/22 IC
Need answers fast?
Explore the manual using AI.
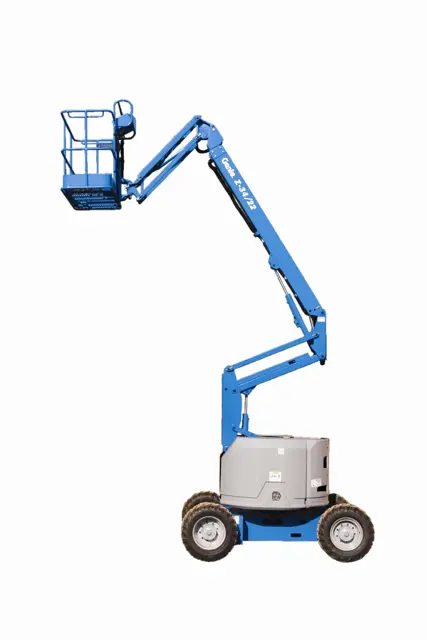
The Genie Articulated Boom Lift Z-34/22 IC is a versatile and reliable aerial work platform designed for various industrial applications. Known for its exceptional reach and maneuverability, this model ensures safety and efficiency on job sites, making it a preferred choice for contractors and maintenance professionals.
Turn manuals into instant answers
with your AI-powered assistantTurn manuals into instant answers
with your AI-powered assistant
Manual for Genie Articulated Boom Lifts Z-34/22 IC
Complete asset maintenance, one click away
Get instant access to all the maintenance information you need. Empower technicians to perform preventive maintenance with asset packages, ready to use right out of the box.

Documents & Manuals
Find all the essential guides in one place.
 Tensioning Guide
- Belt-diagram
- C-120 pulleys
+ 13 more

Work Order Templates
Pre-built workflows to keep your asset running smoothly.
- Daily Electrical System Inspection
- Replace Roller and Pulley
- Install Engine B-120
+ 29 more

Procedures
Integrate maintenance plans directly into your work orders.
- Motion Industries
- Applied Industrial Technologies
- Electrical Brothers
+ 5 more

Parts
Access the parts list for your equipment in MaintainX.
- Drive Motor
- B2 Rollers
- Tensioning System
+ 40 more
Genie Articulated Boom Lifts Z-34/22 IC
Create an account to install this asset package.
Maintenance Plans for Genie Articulated Boom Lifts Model Z-34/22 IC
Integrate maintenance plans directly into your work orders in MaintainX.
3 Monthly / 250 Hourly Ground Control Override Inspection
Push in the platform red Emergency Stop button to the off position.
Turn the key switch to ground control and pull out the red Emergency Stop button to the on position.
At the ground controls, operate each boom function through a partial cycle.
All boom functions should operate.
Sign off on the ground control override inspection

100 Hourly Turntable Rotation Bearing and Worm Drive Gear Lubrication
Warning: Crushing hazard. Keep hands away from the cylinder and all moving parts when lowering the boom.
Raise the secondary boom and place a safety chock on the secondary boom lift cylinder. Carefully lower the boom onto the lift cylinder safety chock.
Before serial number 5204: Locate the grease fitting on the inside of the bearing in the middle of the turntable.
After serial number 5203: Locate the grease fitting in front of the function manifold below the ground control box.
Pump grease into the turntable rotation bearing. Rotate the turntable in increments of 4 to 5 inches / 10 to 13 cm at a time and repeat this step until the entire bearing has been greased.
Before serial number 5204: Remove the safety chock. Lower the boom to the stowed position.
Locate the grease fitting on the worm drive housing.
Pump grease into the gear until you see it coming out of the side of the gear housing.
Grease each tooth on the outside of the turntable rotation bearing.
3 Monthly / 250 Hourly Drive Brakes Testing
Warning: Collision hazard. Be sure that the machine is not in free-wheel or partial free-wheel configuration. Refer to maintenance procedure, Confirm the Proper Brake Configuration.
Note: Select a test area that is firm, level and free of obstructions.
Mark a test line on the ground for reference.
Lower the boom to the stowed position.
Turn the key switch to platform controls.
Choose a point on the machine (i.e., contact patch of a tire) as a visual reference for use when crossing the test line.
Bring the machine to top drive speed before reaching the test line. Release the drive joystick when your reference point on the machine crosses the test line.
Measure the distance between the test line and your machine reference point. Refer to Specifications, Performance Specifications.
The brakes must be able to hold the machine on any slope it is able to climb.
1 Yearly / 1000 Hourly Free-Wheel Configuration Check
Warning: Collision hazard. Select a work site that is firm and level.
Notice: Component damage hazard. If the machine must be towed, do not exceed 2 mph / 3.2 km/h.
Steer wheels chocked to prevent the machine from rolling
Lifting jack of ample capacity (20,000 lbs / 10,000 kg) centered under the drive chassis between the non-steer tires
Wheels lifted off the ground and jack stands placed under the drive chassis for support
Drive hubs disengaged by turning over the drive hub disconnect caps on each non-steer wheel hub
Each non-steer wheel manually rotated
Each non-steer wheel rotates with minimum effort
Drive hubs re-engaged by turning over the hub disconnect caps
1 Daily / 8 Hourly Manuals and Decals Inspection
This procedure must be performed every 8 hours or daily, whichever comes first.
Are the operator's and safety manuals present and complete in the storage container on the platform?
Are the pages of each manual legible and in good condition?
If the operator's manual is not appropriate for the machine or all manuals are not in good condition or is illegible, remove the machine from service until the manual is replaced.
Open the operator's manual to the decals inspection section. Are all decals on the machine legible and undamaged?
If the machine is not equipped with all required decals, or one or more decals are illegible or in poor condition, remove the machine from service until the decals are replaced.
Confirm that the manuals have been returned to the storage container after use.
Contact your authorized Genie distributor or Genie if replacement manuals or decals are needed.
Sign off on the manuals and decals inspection
Parts for Genie Articulated Boom Lifts Z-34/22 IC
Access the parts list for your equipment in MaintainX.
O-ring Field Service Kit
49612
Operator's Manual
139420
Resistor
27287
Operator and Maintenance Manual
52958
O-ring Field Service Kit
49612
Operator's Manual
139420
Resistor
27287
Operator and Maintenance Manual
52958
O-ring Field Service Kit
49612
Operator's Manual
139420
Resistor
27287
Operator and Maintenance Manual
52958
Unlock efficiency
with MaintainX CoPilot
MaintainX CoPilot is your expert colleague, on call 24/7, helping your team find the answers they need to keep equipment running.
Reduce Unplanned Downtime
Ensure your team follows consistent procedures to minimize equipment failures and costly delays.
Maximize Asset Availability
Keep your assets running longer and more reliably, with standardized maintenance workflows from OEM manuals.
Lower Maintenance Costs
Turn any technician into an expert to streamline operations, maintain more assets, and reduce overall costs.
Thousands of companies manage their assets with MaintainX

'%3e%3cpath%20fill='url(%23b)'%20d='M66.008%2080.068c-5.084-.786-9.763-3.834-12.442-8.68a16.942%2016.942%200%200%201-1.87-5.18c1.096.19%202.203.476%203.298.87%206.525%202.333%2010.836%207.68%2011.014%2012.99ZM51.47%2061.576c.488-5.524%203.62-10.716%208.847-13.597a17.132%2017.132%200%200%201%2011.335-1.882c-.798%208.145-7.43%2014.848-16.038%2015.599-1.417.119-2.799.07-4.144-.12Zm28.564-11.478a17.513%2017.513%200%200%201%203.727%204.62c4.608%208.335%201.584%2018.813-6.75%2023.409a16.988%2016.988%200%200%201-4.359%201.679%2019.624%2019.624%200%200%201-3.977-12.776c.346-7.561%204.942-13.931%2011.36-16.932Z'/%3e%3cpath%20fill='%23110F0D'%20fill-rule='evenodd'%20d='M142.831%2048.324h4.977V77.03h-4.977V48.324Zm27.278%2013.002c.322%201.048.453%202.263.453%203.62v12.073h-4.787V66.208c0-.75-.047-1.572-.154-2.143-.453-2.382-1.822-3.572-4.215-3.572-2.31%200-3.882%201.274-4.43%203.476-.143.596-.226%201.405-.226%202.25v10.8h-4.787V56.623h4.477v2.989c1.536-2.5%203.906-3.43%206.371-3.43%203.488%200%206.263%201.68%207.298%205.144Zm24.636%207.323c0%203.882-2.358%206.525-5.763%207.727-1.298.453-2.632.643-4.62.643h-10.169V48.324h9.085c1.691%200%203.156.143%204.049.38%203.465.93%205.727%203.68%205.727%207.335%200%202.441-.81%204.156-2.762%205.644%202.905%201.417%204.453%203.727%204.453%206.966Zm-15.634-8.656h4.584c1.024%200%201.917-.143%202.536-.417%201.215-.548%201.905-1.608%201.905-3.167%200-1.548-.643-2.572-1.845-3.132-.691-.31-1.762-.452-2.763-.452h-4.417v7.168Zm10.716%208.465c0-1.536-.893-3.37-3.227-3.893-.428-.095-1.036-.143-1.571-.143h-5.918v8.085h5.501c.56%200%201.429-.048%201.953-.167%201.94-.453%203.262-1.846%203.262-3.882Zm47.747-11.847-8.097%2020.408h-4.429l-8.109-20.408h5.191l5.192%2014.574%205.108-14.574h5.144Zm-20.218%2010.002c0%20.69-.036%201.262-.155%201.94h-15.943c.631%202.87%202.714%204.728%205.882%204.728%202.131%200%203.607-.882%204.703-2.525h4.87c-1.762%204.144-5.204%206.692-9.657%206.692-6.084%200-10.537-4.858-10.537-10.49%200-6.108%204.524-10.776%2010.335-10.776%206.239%200%2010.442%204.954%2010.502%2010.43Zm-4.763-1.405c-.333-2.846-2.643-4.858-5.691-4.858-2.894%200-5.287%201.929-5.621%204.858h11.312Zm-72.667%203.44c0%204.787-3.287%208.371-9.419%208.371H119.363V64.66c-1.917.274-3.87.69-5.811%201.238l4.537%2011.121h-5.418l-3.596-9.585c-5.144%202.084-10.085%205.216-14.217%209.585h-4.786L101.8%2048.312h4.56l5.68%2013.883a44.112%2044.112%200%200%201%207.323-1.774V48.312h9.084c1.703%200%203.156.143%204.061.393%203.453.929%205.727%203.667%205.727%207.323%200%201.917-.738%204.179-2.81%205.691%203.06%201.56%204.501%204.025%204.501%206.93Zm-15.634-8.667a62.664%2062.664%200%200%201%202.06-.036c1.703.012%203.239.131%204.608.37%201.441-.549%202.357-1.727%202.357-3.537%200-1.941-.881-3.144-2.488-3.667-.548-.18-1.358-.286-2.322-.286h-4.215v7.156Zm-16.55%203.905-3.715-9.894-6.394%2016.502c2.833-2.595%206.263-4.858%2010.109-6.608Zm27.254%204.74c0-2.775-3.131-4.347-8.513-4.418-.715%200-1.441.011-2.191.047v8.252h5.918c2.548%200%204.786-1.37%204.786-3.882Z'%20clip-rule='evenodd'/%3e%3c/g%3e%3cdefs%3e%3clinearGradient%20id='b'%20x1='51.47'%20x2='85.916'%20y1='62.946'%20y2='62.946'%20gradientUnits='userSpaceOnUse'%3e%3cstop%20stop-color='%23CD9F28'/%3e%3cstop%20offset='1'%20stop-color='%23ECD80B'/%3e%3c/linearGradient%3e%3cclipPath%20id='a'%3e%3cpath%20fill='%23fff'%20d='M51.47%2045.728h186.104V80.14H51.47z'/%3e%3c/clipPath%3e%3c/defs%3e%3c/svg%3e)


More from Genie


Explore Other Assets


© 2026 MaintainX. All rights reserved.