


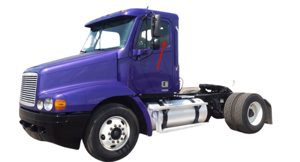
Freightliner Trucks Business Class Truck MB60
Need answers fast?
Explore the manual using AI.

Turn manuals into instant answers
with your AI-powered assistantTurn manuals into instant answers
with your AI-powered assistant
Manual for Freightliner Trucks Business Class Truck MB60
Complete asset maintenance, one click away
Get instant access to all the maintenance information you need. Empower technicians to perform preventive maintenance with asset packages, ready to use right out of the box.

Documents & Manuals
Find all the essential guides in one place.
 Tensioning Guide
- Belt-diagram
- C-120 pulleys
+ 13 more

Work Order Templates
Pre-built workflows to keep your asset running smoothly.
- Daily Electrical System Inspection
- Replace Roller and Pulley
- Install Engine B-120
+ 29 more

Procedures
Integrate maintenance plans directly into your work orders.
- Motion Industries
- Applied Industrial Technologies
- Electrical Brothers
+ 5 more

Parts
Access the parts list for your equipment in MaintainX.
- Drive Motor
- B2 Rollers
- Tensioning System
+ 40 more
Freightliner Trucks Business Class Truck MB60
Create an account to install this asset package.
Maintenance Plans for Freightliner Trucks Business Class Truck Model MB60
Integrate maintenance plans directly into your work orders in MaintainX.
Freightliner AirLiner Component Inspection
WARNING: Inspect the components and check their operation as described below. Failure to perform these inspections and checks could result in separation of worn suspension components and loss of vehicle control resulting in property damage, serious personal injury or death.
Chock the front tires. Raise the rear of the vehicle so the tires just clear the ground and the suspension is fully extended. Place safety stands under the vehicle frame.
Squeeze all air springs to check for complete deflation. If any air springs remain partially or fully inflated, see Group 32 of the Business Class® Trucks Service Manual.
Inspect each air spring for wear at its connection to its pedestal. Replace any worn air springs; for instructions, see Group 32 of the Business Class® Trucks Service Manual.
Check the axle connection welds (beam-seat to equalizing-beam) and axle-adapter to axle for cracks. If welds are cracked, grind them out and reweld the parts.
Move the axle up and down while checking for signs of looseness due to worn parts at the front pivot connections. Replace any worn parts by following the procedures in Group 32 of the Business Class® Trucks Service Manual.
Inspect the shock absorbers for oil leaks and worn rubber bushings. Replace the shock absorbers and/or rubber bushings if wear or damage is noted. For instructions, see Group 32 of the Business Class® Trucks Service Manual.
Remove the safety stands and lower the rear of the vehicle to the ground. Run the engine until air pressure of at least 100 psi (689 kPa) is maintained throughout the system.
Check that all air springs are inflated. If the air springs do not inflate, see Group 32 of the Business Class® Trucks Service Manual for possible causes and corrections.

Manual Transmission Fluid Level Check
Park the vehicle on a level surface. Apply the parking brakes and chock the rear tires.
Is the transmission at operating temperature (Eaton Fuller transmissions) or at room temperature (Meritor transmissions)?
Clean the area around the fill plug, then remove the plug from the side of the case.
Is the oil level with the lower edge of the fill opening?
If needed, fill the transmission with oil until level with the lower edge of the fill opening. See Table 1 for approved lubricants.
CAUTION: Operating a manual transmission with the oil level higher or lower than recommended can result in transmission damage. Do not overfill the transmission; overfilling will force oil out of the case through the main shaft openings. Oil overflow may also drain onto the clutch or clutch brake, causing additional problems.
IMPORTANT: Do not mix types of oil, because of possible incompatibility. Do not use oil additives or friction modifiers. Do not use multiviscosity oils or EP (Extreme Pressure) gear oils. If switching from a petroleum based lubricant to a synthetic, all areas of each affected component must be thoroughly drained.
Switching to a synthetic lubricant, when a petroleumbased lubricant has been used for 50,000 miles (80 000 km) or longer, may affect transmission performance. Monitor all seal areas for the first 10,000 miles (16 000 km) after changing to a synthetic from a petroleum-based lubricant.
Clean the fill plug, then install it in the gear case. Tighten the plug as follows:
Gasoline In-Tank Fuel Filter Replacement
Park the vehicle on a level surface. Apply the parking brakes, and chock the tires.
Disconnect the batteries to prevent static discharge.
Release the fuel system pressure and drain the fuel tank.
Remove the fuel tank cap to release the fuel tank pressure.
Unscrew the protective plastic cap from the pressure test port on the fuel rail.
Obtain a Kent-Moore fuel pressure gauge tool set (#5069), or equivalent tool. Remove the gauge from the hose. Place one end of the hose into an approval gasoline container.
Place a shop towel under the test port, then screw the other end of the hose onto the test port. Allow the fuel to flow into the gasoline container until fuel pressure is completely released.
Remove the hose from the test port, and reconnect the gauge to the hose.
Install the protective plastic cap to the pressure test port on the fuel rail.
Foot Brake Valve Actuator Lubrication
Clean any dirt, gravel, and other foreign debris from the plunger boot and brake base bracket.
Check the brake plunger boot for cracks, holes, or deterioration. Replace if necessary.
Lift up the edge of the brake plunger boot and check the plunger for existing lubrication.
If the plunger is dry, remove it by removing the cotter pin from the clevis pin and pulling the clevis pin out. Remove the piston rod and boot. Lift out the plunger. Lubricate the plunger and the tip of the piston rod with barium grease part number BW 246671, or Penzoil Adhezoplex EP 2. Install the piston rod, boot, clevis pin, and cotter pin.
If the plunger has grease on it, lift the edge of the brake plunger boot enough to apply 2 to 4 drops of light oil around the brake plunger. Do not over-oil. Install the plunger boot.
Lubricate the clevis pin with light oil.
Check for leakage; see Group 42 of the Business Class® Trucks Service Manual for instructions.
Sign off on the Foot Brake Valve Actuator Lubrication
Relay Valve Check
Warning: This procedure requires trained personnel with PPE!
Tires chocked
Enter the air pressure in the system
If pressure is below 80 psi (550 kPa), restart the engine to maintain pressure
Relay valve and exhaust port cleaned
No air leakage around the fittings or exhaust port
If air leakage is detected, tighten the fittings using two wrenches
Valve passes the check and is not damaged
If valve fails the check or is damaged, refer to the Midland service manual for repair or replacement instructions
Parts for Freightliner Trucks Business Class Truck MB60
Access the parts list for your equipment in MaintainX.
Gunite
W–854
Piston Rod With Barium Grease
BW246671
Gunite
W–854
Piston Rod With Barium Grease
BW246671
Gunite
W–854
Piston Rod With Barium Grease
BW246671
Unlock efficiency
with MaintainX CoPilot
MaintainX CoPilot is your expert colleague, on call 24/7, helping your team find the answers they need to keep equipment running.
Reduce Unplanned Downtime
Ensure your team follows consistent procedures to minimize equipment failures and costly delays.
Maximize Asset Availability
Keep your assets running longer and more reliably, with standardized maintenance workflows from OEM manuals.
Lower Maintenance Costs
Turn any technician into an expert to streamline operations, maintain more assets, and reduce overall costs.
Thousands of companies manage their assets with MaintainX

'%3e%3cpath%20fill='url(%23b)'%20d='M66.008%2080.068c-5.084-.786-9.763-3.834-12.442-8.68a16.942%2016.942%200%200%201-1.87-5.18c1.096.19%202.203.476%203.298.87%206.525%202.333%2010.836%207.68%2011.014%2012.99ZM51.47%2061.576c.488-5.524%203.62-10.716%208.847-13.597a17.132%2017.132%200%200%201%2011.335-1.882c-.798%208.145-7.43%2014.848-16.038%2015.599-1.417.119-2.799.07-4.144-.12Zm28.564-11.478a17.513%2017.513%200%200%201%203.727%204.62c4.608%208.335%201.584%2018.813-6.75%2023.409a16.988%2016.988%200%200%201-4.359%201.679%2019.624%2019.624%200%200%201-3.977-12.776c.346-7.561%204.942-13.931%2011.36-16.932Z'/%3e%3cpath%20fill='%23110F0D'%20fill-rule='evenodd'%20d='M142.831%2048.324h4.977V77.03h-4.977V48.324Zm27.278%2013.002c.322%201.048.453%202.263.453%203.62v12.073h-4.787V66.208c0-.75-.047-1.572-.154-2.143-.453-2.382-1.822-3.572-4.215-3.572-2.31%200-3.882%201.274-4.43%203.476-.143.596-.226%201.405-.226%202.25v10.8h-4.787V56.623h4.477v2.989c1.536-2.5%203.906-3.43%206.371-3.43%203.488%200%206.263%201.68%207.298%205.144Zm24.636%207.323c0%203.882-2.358%206.525-5.763%207.727-1.298.453-2.632.643-4.62.643h-10.169V48.324h9.085c1.691%200%203.156.143%204.049.38%203.465.93%205.727%203.68%205.727%207.335%200%202.441-.81%204.156-2.762%205.644%202.905%201.417%204.453%203.727%204.453%206.966Zm-15.634-8.656h4.584c1.024%200%201.917-.143%202.536-.417%201.215-.548%201.905-1.608%201.905-3.167%200-1.548-.643-2.572-1.845-3.132-.691-.31-1.762-.452-2.763-.452h-4.417v7.168Zm10.716%208.465c0-1.536-.893-3.37-3.227-3.893-.428-.095-1.036-.143-1.571-.143h-5.918v8.085h5.501c.56%200%201.429-.048%201.953-.167%201.94-.453%203.262-1.846%203.262-3.882Zm47.747-11.847-8.097%2020.408h-4.429l-8.109-20.408h5.191l5.192%2014.574%205.108-14.574h5.144Zm-20.218%2010.002c0%20.69-.036%201.262-.155%201.94h-15.943c.631%202.87%202.714%204.728%205.882%204.728%202.131%200%203.607-.882%204.703-2.525h4.87c-1.762%204.144-5.204%206.692-9.657%206.692-6.084%200-10.537-4.858-10.537-10.49%200-6.108%204.524-10.776%2010.335-10.776%206.239%200%2010.442%204.954%2010.502%2010.43Zm-4.763-1.405c-.333-2.846-2.643-4.858-5.691-4.858-2.894%200-5.287%201.929-5.621%204.858h11.312Zm-72.667%203.44c0%204.787-3.287%208.371-9.419%208.371H119.363V64.66c-1.917.274-3.87.69-5.811%201.238l4.537%2011.121h-5.418l-3.596-9.585c-5.144%202.084-10.085%205.216-14.217%209.585h-4.786L101.8%2048.312h4.56l5.68%2013.883a44.112%2044.112%200%200%201%207.323-1.774V48.312h9.084c1.703%200%203.156.143%204.061.393%203.453.929%205.727%203.667%205.727%207.323%200%201.917-.738%204.179-2.81%205.691%203.06%201.56%204.501%204.025%204.501%206.93Zm-15.634-8.667a62.664%2062.664%200%200%201%202.06-.036c1.703.012%203.239.131%204.608.37%201.441-.549%202.357-1.727%202.357-3.537%200-1.941-.881-3.144-2.488-3.667-.548-.18-1.358-.286-2.322-.286h-4.215v7.156Zm-16.55%203.905-3.715-9.894-6.394%2016.502c2.833-2.595%206.263-4.858%2010.109-6.608Zm27.254%204.74c0-2.775-3.131-4.347-8.513-4.418-.715%200-1.441.011-2.191.047v8.252h5.918c2.548%200%204.786-1.37%204.786-3.882Z'%20clip-rule='evenodd'/%3e%3c/g%3e%3cdefs%3e%3clinearGradient%20id='b'%20x1='51.47'%20x2='85.916'%20y1='62.946'%20y2='62.946'%20gradientUnits='userSpaceOnUse'%3e%3cstop%20stop-color='%23CD9F28'/%3e%3cstop%20offset='1'%20stop-color='%23ECD80B'/%3e%3c/linearGradient%3e%3cclipPath%20id='a'%3e%3cpath%20fill='%23fff'%20d='M51.47%2045.728h186.104V80.14H51.47z'/%3e%3c/clipPath%3e%3c/defs%3e%3c/svg%3e)


More from Freightliner Trucks


Explore Other Assets


© 2026 MaintainX. All rights reserved.