


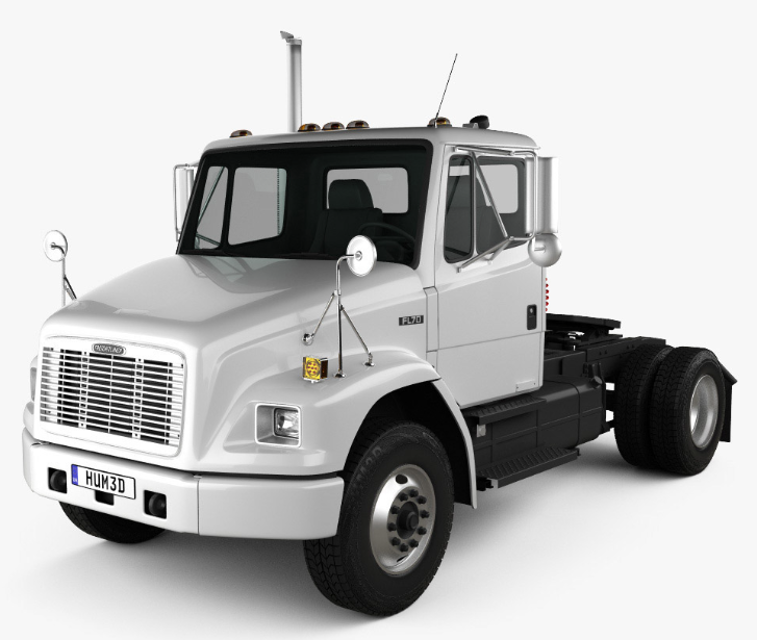
Freightliner Trucks Business Class Truck FL70 Bear
Need answers fast?
Explore the manual using AI.
Turn manuals into instant answers
with your AI-powered assistantTurn manuals into instant answers
with your AI-powered assistant
Manual for Freightliner Trucks Business Class Truck FL70 Bear
Complete asset maintenance, one click away
Get instant access to all the maintenance information you need. Empower technicians to perform preventive maintenance with asset packages, ready to use right out of the box.

Documents & Manuals
Find all the essential guides in one place.
 Tensioning Guide
- Belt-diagram
- C-120 pulleys
+ 13 more

Work Order Templates
Pre-built workflows to keep your asset running smoothly.
- Daily Electrical System Inspection
- Replace Roller and Pulley
- Install Engine B-120
+ 29 more

Procedures
Integrate maintenance plans directly into your work orders.
- Motion Industries
- Applied Industrial Technologies
- Electrical Brothers
+ 5 more

Parts
Access the parts list for your equipment in MaintainX.
- Drive Motor
- B2 Rollers
- Tensioning System
+ 40 more
Freightliner Trucks Business Class Truck FL70 Bear
Create an account to install this asset package.
Maintenance Plans for Freightliner Trucks Business Class Truck Model FL70 Bear
Integrate maintenance plans directly into your work orders in MaintainX.
Freightliner AirLiner Component Inspection
WARNING: Inspect the components and check their operation as described below. Failure to perform these inspections and checks could result in separation of worn suspension components and loss of vehicle control resulting in property damage, serious personal injury or death.
Chock the front tires. Raise the rear of the vehicle so the tires just clear the ground and the suspension is fully extended. Place safety stands under the vehicle frame.
Squeeze all air springs to check for complete deflation.
Inspect each air spring for wear at its connection to its pedestal.
Check the axle connection welds (beam-seat to equalizing-beam) and axle-adapter to axle for cracks.
Move the axle up and down while checking for signs of looseness due to worn parts at the front pivot connections.
Inspect the shock absorbers for oil leaks and worn rubber bushings.
Remove the safety stands and lower the rear of the vehicle to the ground. Run the engine until air pressure of at least 100 psi (689 kPa) is maintained throughout the system.
Check that all air springs are inflated.

All-Wheel-Drive Front Axle Oil Level Check
1. On all front-wheel-drive vehicles, check the oil level in the differential. See Fig. 3.
1.1 Remove the oil level check-and-fill plug, and make sure the oil level is even with the bottom of the bore.
1.2 If needed, add oil until the differential is filled to the bottom of the bore.
1.3 Install the oil level check-and-fill plug, and tighten it firmly.
2. On front-wheel-drive vehicles equipped with MT-17 axles, check the oil level in the hubs.
2.1 The oil drain bore must be at the bottom in order to check the oil level. See Fig. 4.
2.2 Remove the plug from the oil level checking bore, and make sure the oil is level with the bottom edge of the bore.
2.3 If needed, add oil until each axle hub is filled to the bottom of the bore.
2.4 Install the plug in each oil level checking bore, and tighten it firmly.;
All-Wheel-Drive Front Axle Oil Change
1. Drive the vehicle until the axle oil is warmed, then park it, and chock the rear tires.
2. Jack up the front axle until the wheels are off the ground, then secure the axle on jack stands.
3. On vehicles equipped with an MT-11 front axle, drain the oil from the differential.
On vehicles equipped with an MT-17 front axle, drain the oil from the differential and the hubs.
3.1 Remove the oil-drain plug from the differential, and allow the oil to drain. See Fig. 5.
3.2 If applicable, rotate each wheel until the oil drain bore is at the bottom, then remove the drain bore plugs and allow the oil to drain into a suitable container. If needed use a bent piece of sheet metal to direct the draining oil so it doesn’t splash on the tires.
4. Fill the differential and hubs (if applicable) with new oil.
4.1 Install the drain bore plugs in each hub and the differential, then tighten the plugs firmly.
4.2 Remove the plug from the oil level check bore in each hub and from the fill-and-check bore in the differential.
Fuel Tank / Vent Check
Drain plug or valve at the bottom of the fuel tank opened and all traces of water and sediment have disappeared
Drain plug or valve installed or closed
Fuel cap removed and cleaned with solvent (for vehicles with a screw-on fuel cap)
Fuel cap vent is open (for vehicles with a screw-on fuel cap)
Fuel cap installed (for vehicles with a screw-on fuel cap)
Vent line at the inboard side of the fuel tank is clean and not plugged (for vehicles with a quarter-turn fuel cap)
Sign off on the fuel tank / vent check
Air Dryer Inspection
Check the reservoirs for moisture
Amount of moisture found in reservoirs
Check the mounting and connecting lines
Tighten the fasteners attaching the air dryer to the vehicle to 28 lbf·ft (38 N·m) for SAE grade 5, 3/8–16 fasteners
Tighten the fasteners attaching the air dryer to the vehicle to 135 lbf·ft (183 N·m) for SAE grade 5, 5/8–11 fasteners
Check all air lines, fittings, and electrical connections for damage, leakage, or looseness
List of damaged or leaking parts
Sign off on the air dryer inspection
Parts for Freightliner Trucks Business Class Truck FL70 Bear
Access the parts list for your equipment in MaintainX.
Gunite
W–854
Piston Rod With Barium Grease
BW246671
Gunite
W–854
Piston Rod With Barium Grease
BW246671
Gunite
W–854
Piston Rod With Barium Grease
BW246671
Unlock efficiency
with MaintainX CoPilot
MaintainX CoPilot is your expert colleague, on call 24/7, helping your team find the answers they need to keep equipment running.
Reduce Unplanned Downtime
Ensure your team follows consistent procedures to minimize equipment failures and costly delays.
Maximize Asset Availability
Keep your assets running longer and more reliably, with standardized maintenance workflows from OEM manuals.
Lower Maintenance Costs
Turn any technician into an expert to streamline operations, maintain more assets, and reduce overall costs.
Thousands of companies manage their assets with MaintainX

'%3e%3cpath%20fill='url(%23b)'%20d='M66.008%2080.068c-5.084-.786-9.763-3.834-12.442-8.68a16.942%2016.942%200%200%201-1.87-5.18c1.096.19%202.203.476%203.298.87%206.525%202.333%2010.836%207.68%2011.014%2012.99ZM51.47%2061.576c.488-5.524%203.62-10.716%208.847-13.597a17.132%2017.132%200%200%201%2011.335-1.882c-.798%208.145-7.43%2014.848-16.038%2015.599-1.417.119-2.799.07-4.144-.12Zm28.564-11.478a17.513%2017.513%200%200%201%203.727%204.62c4.608%208.335%201.584%2018.813-6.75%2023.409a16.988%2016.988%200%200%201-4.359%201.679%2019.624%2019.624%200%200%201-3.977-12.776c.346-7.561%204.942-13.931%2011.36-16.932Z'/%3e%3cpath%20fill='%23110F0D'%20fill-rule='evenodd'%20d='M142.831%2048.324h4.977V77.03h-4.977V48.324Zm27.278%2013.002c.322%201.048.453%202.263.453%203.62v12.073h-4.787V66.208c0-.75-.047-1.572-.154-2.143-.453-2.382-1.822-3.572-4.215-3.572-2.31%200-3.882%201.274-4.43%203.476-.143.596-.226%201.405-.226%202.25v10.8h-4.787V56.623h4.477v2.989c1.536-2.5%203.906-3.43%206.371-3.43%203.488%200%206.263%201.68%207.298%205.144Zm24.636%207.323c0%203.882-2.358%206.525-5.763%207.727-1.298.453-2.632.643-4.62.643h-10.169V48.324h9.085c1.691%200%203.156.143%204.049.38%203.465.93%205.727%203.68%205.727%207.335%200%202.441-.81%204.156-2.762%205.644%202.905%201.417%204.453%203.727%204.453%206.966Zm-15.634-8.656h4.584c1.024%200%201.917-.143%202.536-.417%201.215-.548%201.905-1.608%201.905-3.167%200-1.548-.643-2.572-1.845-3.132-.691-.31-1.762-.452-2.763-.452h-4.417v7.168Zm10.716%208.465c0-1.536-.893-3.37-3.227-3.893-.428-.095-1.036-.143-1.571-.143h-5.918v8.085h5.501c.56%200%201.429-.048%201.953-.167%201.94-.453%203.262-1.846%203.262-3.882Zm47.747-11.847-8.097%2020.408h-4.429l-8.109-20.408h5.191l5.192%2014.574%205.108-14.574h5.144Zm-20.218%2010.002c0%20.69-.036%201.262-.155%201.94h-15.943c.631%202.87%202.714%204.728%205.882%204.728%202.131%200%203.607-.882%204.703-2.525h4.87c-1.762%204.144-5.204%206.692-9.657%206.692-6.084%200-10.537-4.858-10.537-10.49%200-6.108%204.524-10.776%2010.335-10.776%206.239%200%2010.442%204.954%2010.502%2010.43Zm-4.763-1.405c-.333-2.846-2.643-4.858-5.691-4.858-2.894%200-5.287%201.929-5.621%204.858h11.312Zm-72.667%203.44c0%204.787-3.287%208.371-9.419%208.371H119.363V64.66c-1.917.274-3.87.69-5.811%201.238l4.537%2011.121h-5.418l-3.596-9.585c-5.144%202.084-10.085%205.216-14.217%209.585h-4.786L101.8%2048.312h4.56l5.68%2013.883a44.112%2044.112%200%200%201%207.323-1.774V48.312h9.084c1.703%200%203.156.143%204.061.393%203.453.929%205.727%203.667%205.727%207.323%200%201.917-.738%204.179-2.81%205.691%203.06%201.56%204.501%204.025%204.501%206.93Zm-15.634-8.667a62.664%2062.664%200%200%201%202.06-.036c1.703.012%203.239.131%204.608.37%201.441-.549%202.357-1.727%202.357-3.537%200-1.941-.881-3.144-2.488-3.667-.548-.18-1.358-.286-2.322-.286h-4.215v7.156Zm-16.55%203.905-3.715-9.894-6.394%2016.502c2.833-2.595%206.263-4.858%2010.109-6.608Zm27.254%204.74c0-2.775-3.131-4.347-8.513-4.418-.715%200-1.441.011-2.191.047v8.252h5.918c2.548%200%204.786-1.37%204.786-3.882Z'%20clip-rule='evenodd'/%3e%3c/g%3e%3cdefs%3e%3clinearGradient%20id='b'%20x1='51.47'%20x2='85.916'%20y1='62.946'%20y2='62.946'%20gradientUnits='userSpaceOnUse'%3e%3cstop%20stop-color='%23CD9F28'/%3e%3cstop%20offset='1'%20stop-color='%23ECD80B'/%3e%3c/linearGradient%3e%3cclipPath%20id='a'%3e%3cpath%20fill='%23fff'%20d='M51.47%2045.728h186.104V80.14H51.47z'/%3e%3c/clipPath%3e%3c/defs%3e%3c/svg%3e)


More from Freightliner Trucks


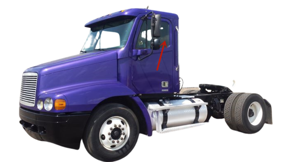


Explore Other Assets


© 2026 MaintainX. All rights reserved.