


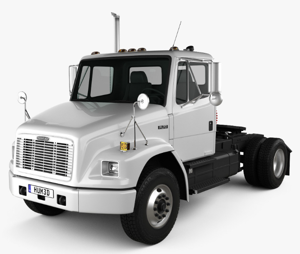
Freightliner Trucks Business Class Truck MB50
Need answers fast?
Explore the manual using AI.

Turn manuals into instant answers
with your AI-powered assistantTurn manuals into instant answers
with your AI-powered assistant
Manual for Freightliner Trucks Business Class Truck MB50
Complete asset maintenance, one click away
Get instant access to all the maintenance information you need. Empower technicians to perform preventive maintenance with asset packages, ready to use right out of the box.

Documents & Manuals
Find all the essential guides in one place.
 Tensioning Guide
- Belt-diagram
- C-120 pulleys
+ 13 more

Work Order Templates
Pre-built workflows to keep your asset running smoothly.
- Daily Electrical System Inspection
- Replace Roller and Pulley
- Install Engine B-120
+ 29 more

Procedures
Integrate maintenance plans directly into your work orders.
- Motion Industries
- Applied Industrial Technologies
- Electrical Brothers
+ 5 more

Parts
Access the parts list for your equipment in MaintainX.
- Drive Motor
- B2 Rollers
- Tensioning System
+ 40 more
Freightliner Trucks Business Class Truck MB50
Create an account to install this asset package.
Maintenance Plans for Freightliner Trucks Business Class Truck Model MB50
Integrate maintenance plans directly into your work orders in MaintainX.
Foot Brake Valve Actuator Lubrication
Clean any dirt, gravel, and other foreign debris from the plunger boot and brake base bracket.
Check the brake plunger boot for cracks, holes, or deterioration. Replace if necessary.
Lift up the edge of the brake plunger boot and check the plunger for existing lubrication.
If the plunger is dry, remove it by removing the cotter pin from the clevis pin and pulling the clevis pin out. Remove the piston rod and boot. Lift out the plunger. Lubricate the plunger and the tip of the piston rod with barium grease part number BW 246671, or Penzoil Adhezoplex EP 2. Install the piston rod, boot, clevis pin, and cotter pin.
If the plunger has grease on it, lift the edge of the brake plunger boot enough to apply 2 to 4 drops of light oil around the brake plunger. Do not over-oil. Install the plunger boot.
Lubricate the clevis pin with light oil.
Check for leakage; see Group 42 of the Business Class® Trucks Service Manual for instructions.
Sign off on the Foot Brake Valve Actuator Lubrication

Allison Transmission Fluid / Filter Change
AT Series
1. Park the vehicle on a level surface and apply the parking brakes.
2. Run the engine until the transmission fluid reaches the operating temperature of 160° to 200°F (71° to 93°C). Shift the transmission to neutral (N) and shut down the engine.
CAUTION: To prevent dirt from entering the transmission, use only clean containers and fillers for the transmission fluid. Do not use fillers or containers that have been used for water or antifreeze. Dirt, water, or antifreeze could damage the transmission.
3. Clean the area around the drain plug. While the transmission fluid is warm, remove the drain plug and drain the fluid. Disconnect the fill tube from the oil pan.
IMPORTANT: Examine the used transmission fluid for dirt, coolant or water, and metal particles. If any of these contaminants are present, a problem may exist within the transmission system.
4. Support the oil pan, then remove the twenty-one washer-head screws that attach the oil pan to the transmission case. Remove the pan, and discard the pan gasket.
5. Clean the oil pan with mineral spirits.
6. Remove the washer-head screw that attaches the internal fluid filter to the filter spacer, then remove the filter and discard it. See Fig. 5. Remove the fluid intake tube, and then remove the seal ring from the intake tube, and discard the seal ring.
U-Bolt Torque Check
CAUTION: Failure to retorque the U-bolt nuts could result in spring breakage and abnormal tire wear.
Vehicle parked on a flat surface and parking brakes applied
Tires chocked to prevent the vehicle from moving
U-bolt torque checked in a diagonal pattern
Set a click-type torque wrench to the highest torque value for the fastener being checked
Turn the wrench in a clockwise motion (looking up) until the torque wrench clicks
Chocks removed
Sign off on the U-Bolt Torque Check
Frame Fastener Torque Check
Warning: This procedure requires trained personnel with PPE!
Note: For off-highway operations, retorque the frame fasteners the first 1000 miles (1600 km), then periodically, depending on the operating conditions.
Caution: Continued vehicle operation with insufficiently tightened fasteners could result in bracket or frame damage.
Front frame brackets torqued correctly
Suspension brackets torqued correctly
Spring brackets torqued correctly
Fuel tank supports torqued correctly
Exhaust supports torqued correctly
Engine supports torqued correctly
Chrysler Transmission Fluid / Filter Replacement
Park the vehicle on a level surface and apply the parking brakes.
CAUTION: To prevent dirt from entering the transmission, use only clean containers and fillers for the transmission fluid. Do not use containers or fillers that have been used for water or antifreeze. Dirt, water, or antifreeze could damage the transmission.
While the transmission fluid is warm, raise the vehicle, remove the oil pan, and drain the fluid.
IMPORTANT: Examine the used transmission fluid for dirt, coolant or water, and metal particles. If any of these contaminants are present, there may be a problem within the transmission.
Remove the three filter screws. Remove the filter from the valve body.
Install the new filter.
Position the new filter on the valve body and install the filter screws finger-tight.
Tighten the filter screws 35 lbf·in (400 N·cm).
Install the oil pan bolts and tighten them 13 lbf·ft (17 N·m).
Parts for Freightliner Trucks Business Class Truck MB50
Access the parts list for your equipment in MaintainX.
Gunite
W–854
Piston Rod With Barium Grease
BW246671
Gunite
W–854
Piston Rod With Barium Grease
BW246671
Gunite
W–854
Piston Rod With Barium Grease
BW246671
Unlock efficiency
with MaintainX CoPilot
MaintainX CoPilot is your expert colleague, on call 24/7, helping your team find the answers they need to keep equipment running.
Reduce Unplanned Downtime
Ensure your team follows consistent procedures to minimize equipment failures and costly delays.
Maximize Asset Availability
Keep your assets running longer and more reliably, with standardized maintenance workflows from OEM manuals.
Lower Maintenance Costs
Turn any technician into an expert to streamline operations, maintain more assets, and reduce overall costs.
Thousands of companies manage their assets with MaintainX

'%3e%3cpath%20fill='url(%23b)'%20d='M66.008%2080.068c-5.084-.786-9.763-3.834-12.442-8.68a16.942%2016.942%200%200%201-1.87-5.18c1.096.19%202.203.476%203.298.87%206.525%202.333%2010.836%207.68%2011.014%2012.99ZM51.47%2061.576c.488-5.524%203.62-10.716%208.847-13.597a17.132%2017.132%200%200%201%2011.335-1.882c-.798%208.145-7.43%2014.848-16.038%2015.599-1.417.119-2.799.07-4.144-.12Zm28.564-11.478a17.513%2017.513%200%200%201%203.727%204.62c4.608%208.335%201.584%2018.813-6.75%2023.409a16.988%2016.988%200%200%201-4.359%201.679%2019.624%2019.624%200%200%201-3.977-12.776c.346-7.561%204.942-13.931%2011.36-16.932Z'/%3e%3cpath%20fill='%23110F0D'%20fill-rule='evenodd'%20d='M142.831%2048.324h4.977V77.03h-4.977V48.324Zm27.278%2013.002c.322%201.048.453%202.263.453%203.62v12.073h-4.787V66.208c0-.75-.047-1.572-.154-2.143-.453-2.382-1.822-3.572-4.215-3.572-2.31%200-3.882%201.274-4.43%203.476-.143.596-.226%201.405-.226%202.25v10.8h-4.787V56.623h4.477v2.989c1.536-2.5%203.906-3.43%206.371-3.43%203.488%200%206.263%201.68%207.298%205.144Zm24.636%207.323c0%203.882-2.358%206.525-5.763%207.727-1.298.453-2.632.643-4.62.643h-10.169V48.324h9.085c1.691%200%203.156.143%204.049.38%203.465.93%205.727%203.68%205.727%207.335%200%202.441-.81%204.156-2.762%205.644%202.905%201.417%204.453%203.727%204.453%206.966Zm-15.634-8.656h4.584c1.024%200%201.917-.143%202.536-.417%201.215-.548%201.905-1.608%201.905-3.167%200-1.548-.643-2.572-1.845-3.132-.691-.31-1.762-.452-2.763-.452h-4.417v7.168Zm10.716%208.465c0-1.536-.893-3.37-3.227-3.893-.428-.095-1.036-.143-1.571-.143h-5.918v8.085h5.501c.56%200%201.429-.048%201.953-.167%201.94-.453%203.262-1.846%203.262-3.882Zm47.747-11.847-8.097%2020.408h-4.429l-8.109-20.408h5.191l5.192%2014.574%205.108-14.574h5.144Zm-20.218%2010.002c0%20.69-.036%201.262-.155%201.94h-15.943c.631%202.87%202.714%204.728%205.882%204.728%202.131%200%203.607-.882%204.703-2.525h4.87c-1.762%204.144-5.204%206.692-9.657%206.692-6.084%200-10.537-4.858-10.537-10.49%200-6.108%204.524-10.776%2010.335-10.776%206.239%200%2010.442%204.954%2010.502%2010.43Zm-4.763-1.405c-.333-2.846-2.643-4.858-5.691-4.858-2.894%200-5.287%201.929-5.621%204.858h11.312Zm-72.667%203.44c0%204.787-3.287%208.371-9.419%208.371H119.363V64.66c-1.917.274-3.87.69-5.811%201.238l4.537%2011.121h-5.418l-3.596-9.585c-5.144%202.084-10.085%205.216-14.217%209.585h-4.786L101.8%2048.312h4.56l5.68%2013.883a44.112%2044.112%200%200%201%207.323-1.774V48.312h9.084c1.703%200%203.156.143%204.061.393%203.453.929%205.727%203.667%205.727%207.323%200%201.917-.738%204.179-2.81%205.691%203.06%201.56%204.501%204.025%204.501%206.93Zm-15.634-8.667a62.664%2062.664%200%200%201%202.06-.036c1.703.012%203.239.131%204.608.37%201.441-.549%202.357-1.727%202.357-3.537%200-1.941-.881-3.144-2.488-3.667-.548-.18-1.358-.286-2.322-.286h-4.215v7.156Zm-16.55%203.905-3.715-9.894-6.394%2016.502c2.833-2.595%206.263-4.858%2010.109-6.608Zm27.254%204.74c0-2.775-3.131-4.347-8.513-4.418-.715%200-1.441.011-2.191.047v8.252h5.918c2.548%200%204.786-1.37%204.786-3.882Z'%20clip-rule='evenodd'/%3e%3c/g%3e%3cdefs%3e%3clinearGradient%20id='b'%20x1='51.47'%20x2='85.916'%20y1='62.946'%20y2='62.946'%20gradientUnits='userSpaceOnUse'%3e%3cstop%20stop-color='%23CD9F28'/%3e%3cstop%20offset='1'%20stop-color='%23ECD80B'/%3e%3c/linearGradient%3e%3cclipPath%20id='a'%3e%3cpath%20fill='%23fff'%20d='M51.47%2045.728h186.104V80.14H51.47z'/%3e%3c/clipPath%3e%3c/defs%3e%3c/svg%3e)


More from Freightliner Trucks


Explore Other Assets


© 2026 MaintainX. All rights reserved.