


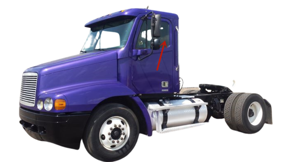
Freightliner Trucks Business Class Truck FL60
Need answers fast?
Explore the manual using AI.

Turn manuals into instant answers
with your AI-powered assistantTurn manuals into instant answers
with your AI-powered assistant
Manual for Freightliner Trucks Business Class Truck FL60
Complete asset maintenance, one click away
Get instant access to all the maintenance information you need. Empower technicians to perform preventive maintenance with asset packages, ready to use right out of the box.

Documents & Manuals
Find all the essential guides in one place.
 Tensioning Guide
- Belt-diagram
- C-120 pulleys
+ 13 more

Work Order Templates
Pre-built workflows to keep your asset running smoothly.
- Daily Electrical System Inspection
- Replace Roller and Pulley
- Install Engine B-120
+ 29 more

Procedures
Integrate maintenance plans directly into your work orders.
- Motion Industries
- Applied Industrial Technologies
- Electrical Brothers
+ 5 more

Parts
Access the parts list for your equipment in MaintainX.
- Drive Motor
- B2 Rollers
- Tensioning System
+ 40 more
Freightliner Trucks Business Class Truck FL60
Create an account to install this asset package.
Maintenance Plans for Freightliner Trucks Business Class Truck Model FL60
Integrate maintenance plans directly into your work orders in MaintainX.
Drag Link Lubrication
Cleaned the dirt from both grease fittings on the drag link
Upload a photo of the cleaned grease fittings
Applied multipurpose chassis grease at the grease fittings until old grease is forced out of the socket
Select the type of grease used
Sign off on the drag link lubrication

Automatic Slack Adjuster Inspection
1. Inspect the slack adjuster for structural damage. Replace the slack adjuster if needed.
2. Inspect the slack adjuster boot for cuts or tears. If the boot is damaged, replace it (see Fig. 10).
2.1 Remove the two clevis pins.
2.2 Rotate the worm shaft adjusting hexnut counterclockwise to move the link away from the clevis. About 45 lbf·ft (60 N·m) is needed. You will hear a clicking sound. Remove the old boot from the link.
2.3 Install a new boot on the link, heavy section down. Be careful not to damage the boot.
2.4 Seat the boot so that the bottom of the boot is in the boot insert, and the top is in the groove of the link.
2.5 Rotate the adjusting hexnut clockwise until the 1/4-inch hole in the clevis lines up with the hole in the link.
Install the 1/4-inch clevis pin and the cotter pin.
2.6 Tap the clevis upward or downward until the large hole in the slack adjuster lines up with one in the clevis.
Air Conditioner Check
Preliminary Checks
1. Apply the parking brakes and chock the tires.
2. Make sure the refrigerant compressor drive belt is not damaged, and is correctly tensioned. Also check the tightness of the compressor mounting fasteners. For instructions and torque values, see Group 01 of the Business Class® Trucks
Service Manual.
3. Using a feeler gauge, check for correct clutch clearance. For instructions, see Group 83 in the Business Class® Trucks Service Manual.
4. Inspect the compressor clutch coil wire. Check the connector for damage or looseness. Replace the wire if it is damaged.
5. Check for broken, burst, or cut hoses. Also check for loose fittings on all parts.
WARNING: Wear eye protection when using compressed air or high-pressure water to clean parts, as permanent harm to eyes could result from flying debris.
6. Check for a build-up of road debris on the condenser fins. Using a whiskbroom and air pressure, or a spray of soapy water, carefully clean off the condenser; be careful not to bend the fins.
U-Bolt Torque Check
CAUTION: Failure to retorque the U-bolt nuts could result in spring breakage and abnormal tire wear.
Vehicle parked on a flat surface and parking brakes applied
Tires chocked to prevent the vehicle from moving
U-bolt torque value
Torque wrench set to the highest torque value for the fastener being checked
Wrench turned in a clockwise motion until the torque wrench clicks
Chocks removed
Sign off on the U-Bolt Torque Check
Fifth Wheel Lubrication
Fontaine: Use a multipurpose extreme pressure (EP) chassis grease, and lubricate all moving parts on the fifth wheel. When lubricating the top plate at the grease fittings for the bracket bearing area, tilt the top plate forward and backward to evenly distribute the grease. Using a pry tool, separate the jaw and wedge and lubricate the serrations using a brush to distribute the grease. On slide-mount applications, lubricate the slide rail and tapered wedges for smooth operation.
Once the fifth wheel’s moving parts are lubricated, apply a liberal coating of grease to the top plate and the trailer kingpin plate.
Holland: Lubricate all moving parts with oil or a light grease. Lubricate the fifth wheel top plate with a waterproof or multipurpose chassis grease.
Once the moving parts of the fifth wheel are lubricated, apply a heavy coat of grease to the top plate by direct application. On slide-mount applications, lubricate the baseplate rails and the plungers for smooth operation.;
Parts for Freightliner Trucks Business Class Truck FL60
Access the parts list for your equipment in MaintainX.
Gunite
W–854
Piston Rod With Barium Grease
BW246671
Gunite
W–854
Piston Rod With Barium Grease
BW246671
Gunite
W–854
Piston Rod With Barium Grease
BW246671
Unlock efficiency
with MaintainX CoPilot
MaintainX CoPilot is your expert colleague, on call 24/7, helping your team find the answers they need to keep equipment running.
Reduce Unplanned Downtime
Ensure your team follows consistent procedures to minimize equipment failures and costly delays.
Maximize Asset Availability
Keep your assets running longer and more reliably, with standardized maintenance workflows from OEM manuals.
Lower Maintenance Costs
Turn any technician into an expert to streamline operations, maintain more assets, and reduce overall costs.
Thousands of companies manage their assets with MaintainX

'%3e%3cpath%20fill='url(%23b)'%20d='M66.008%2080.068c-5.084-.786-9.763-3.834-12.442-8.68a16.942%2016.942%200%200%201-1.87-5.18c1.096.19%202.203.476%203.298.87%206.525%202.333%2010.836%207.68%2011.014%2012.99ZM51.47%2061.576c.488-5.524%203.62-10.716%208.847-13.597a17.132%2017.132%200%200%201%2011.335-1.882c-.798%208.145-7.43%2014.848-16.038%2015.599-1.417.119-2.799.07-4.144-.12Zm28.564-11.478a17.513%2017.513%200%200%201%203.727%204.62c4.608%208.335%201.584%2018.813-6.75%2023.409a16.988%2016.988%200%200%201-4.359%201.679%2019.624%2019.624%200%200%201-3.977-12.776c.346-7.561%204.942-13.931%2011.36-16.932Z'/%3e%3cpath%20fill='%23110F0D'%20fill-rule='evenodd'%20d='M142.831%2048.324h4.977V77.03h-4.977V48.324Zm27.278%2013.002c.322%201.048.453%202.263.453%203.62v12.073h-4.787V66.208c0-.75-.047-1.572-.154-2.143-.453-2.382-1.822-3.572-4.215-3.572-2.31%200-3.882%201.274-4.43%203.476-.143.596-.226%201.405-.226%202.25v10.8h-4.787V56.623h4.477v2.989c1.536-2.5%203.906-3.43%206.371-3.43%203.488%200%206.263%201.68%207.298%205.144Zm24.636%207.323c0%203.882-2.358%206.525-5.763%207.727-1.298.453-2.632.643-4.62.643h-10.169V48.324h9.085c1.691%200%203.156.143%204.049.38%203.465.93%205.727%203.68%205.727%207.335%200%202.441-.81%204.156-2.762%205.644%202.905%201.417%204.453%203.727%204.453%206.966Zm-15.634-8.656h4.584c1.024%200%201.917-.143%202.536-.417%201.215-.548%201.905-1.608%201.905-3.167%200-1.548-.643-2.572-1.845-3.132-.691-.31-1.762-.452-2.763-.452h-4.417v7.168Zm10.716%208.465c0-1.536-.893-3.37-3.227-3.893-.428-.095-1.036-.143-1.571-.143h-5.918v8.085h5.501c.56%200%201.429-.048%201.953-.167%201.94-.453%203.262-1.846%203.262-3.882Zm47.747-11.847-8.097%2020.408h-4.429l-8.109-20.408h5.191l5.192%2014.574%205.108-14.574h5.144Zm-20.218%2010.002c0%20.69-.036%201.262-.155%201.94h-15.943c.631%202.87%202.714%204.728%205.882%204.728%202.131%200%203.607-.882%204.703-2.525h4.87c-1.762%204.144-5.204%206.692-9.657%206.692-6.084%200-10.537-4.858-10.537-10.49%200-6.108%204.524-10.776%2010.335-10.776%206.239%200%2010.442%204.954%2010.502%2010.43Zm-4.763-1.405c-.333-2.846-2.643-4.858-5.691-4.858-2.894%200-5.287%201.929-5.621%204.858h11.312Zm-72.667%203.44c0%204.787-3.287%208.371-9.419%208.371H119.363V64.66c-1.917.274-3.87.69-5.811%201.238l4.537%2011.121h-5.418l-3.596-9.585c-5.144%202.084-10.085%205.216-14.217%209.585h-4.786L101.8%2048.312h4.56l5.68%2013.883a44.112%2044.112%200%200%201%207.323-1.774V48.312h9.084c1.703%200%203.156.143%204.061.393%203.453.929%205.727%203.667%205.727%207.323%200%201.917-.738%204.179-2.81%205.691%203.06%201.56%204.501%204.025%204.501%206.93Zm-15.634-8.667a62.664%2062.664%200%200%201%202.06-.036c1.703.012%203.239.131%204.608.37%201.441-.549%202.357-1.727%202.357-3.537%200-1.941-.881-3.144-2.488-3.667-.548-.18-1.358-.286-2.322-.286h-4.215v7.156Zm-16.55%203.905-3.715-9.894-6.394%2016.502c2.833-2.595%206.263-4.858%2010.109-6.608Zm27.254%204.74c0-2.775-3.131-4.347-8.513-4.418-.715%200-1.441.011-2.191.047v8.252h5.918c2.548%200%204.786-1.37%204.786-3.882Z'%20clip-rule='evenodd'/%3e%3c/g%3e%3cdefs%3e%3clinearGradient%20id='b'%20x1='51.47'%20x2='85.916'%20y1='62.946'%20y2='62.946'%20gradientUnits='userSpaceOnUse'%3e%3cstop%20stop-color='%23CD9F28'/%3e%3cstop%20offset='1'%20stop-color='%23ECD80B'/%3e%3c/linearGradient%3e%3cclipPath%20id='a'%3e%3cpath%20fill='%23fff'%20d='M51.47%2045.728h186.104V80.14H51.47z'/%3e%3c/clipPath%3e%3c/defs%3e%3c/svg%3e)


More from Freightliner Trucks


Explore Other Assets


© 2026 MaintainX. All rights reserved.