


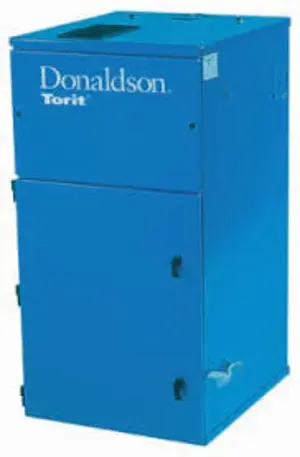
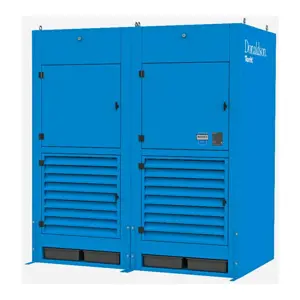
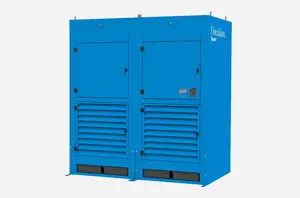
Donaldson Dust Collector TG 6
Need answers fast?
Explore the manual using AI.
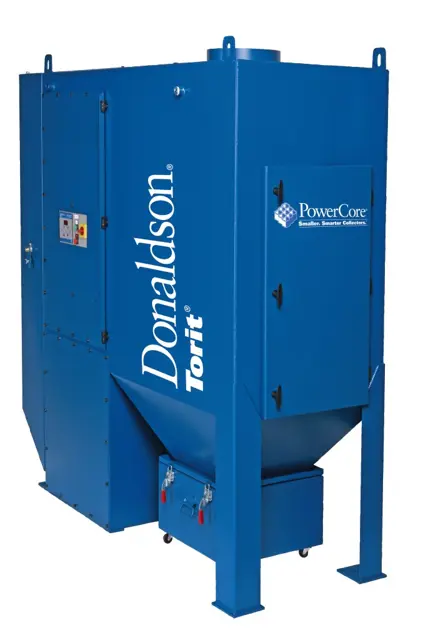
The Donaldson Dust Collector TG 6 is a robust industrial dust collection system designed to efficiently capture airborne particulates. This model ensures optimal air quality and compliance with environmental regulations, making it ideal for various manufacturing applications. With its reliable performance and easy maintenance, the TG 6 is a trusted choice for effective dust management.
Turn manuals into instant answers
with your AI-powered assistantTurn manuals into instant answers
with your AI-powered assistant
Manual for Donaldson Dust Collector TG 6
Complete asset maintenance, one click away
Get instant access to all the maintenance information you need. Empower technicians to perform preventive maintenance with asset packages, ready to use right out of the box.

Documents & Manuals
Find all the essential guides in one place.
 Tensioning Guide
- Belt-diagram
- C-120 pulleys
+ 13 more

Work Order Templates
Pre-built workflows to keep your asset running smoothly.
- Daily Electrical System Inspection
- Replace Roller and Pulley
- Install Engine B-120
+ 29 more

Procedures
Integrate maintenance plans directly into your work orders.
- Motion Industries
- Applied Industrial Technologies
- Electrical Brothers
+ 5 more

Parts
Access the parts list for your equipment in MaintainX.
- Drive Motor
- B2 Rollers
- Tensioning System
+ 40 more
Donaldson Dust Collector TG 6
Create an account to install this asset package.
Maintenance Plans for Donaldson Dust Collector Model TG 6
Integrate maintenance plans directly into your work orders in MaintainX.
Filter Installation and Replacement
⚠ WARNING: Use proper safety and protective equipment when removing contaminants and filters. Dirty filters may be heavier than they appear. Use care when removing filters to avoid personal injury.
⚠ CAUTION: Do not climb on door, door frame, retention parts, or filter components. Use care when servicing the filters as there are rotating parts.
Turn power off to collector and bleed manifold pressure to 0 psi.
Open access door by turning handles counterclockwise and swinging door fully open.
Remove each locking pin.
Rotate each assembly counterclockwise to decompress filters.
Detach right-side arms and rotate them up, then reinstall locking pins to hold arms in place.
Detach left-side arms and let them rotate down and out of the way.
Open cradles fully to access filters.

Dust Collector Operational Checkl
Operational Checklist
1. Monitor the physical condition of the collector and repair or replace any damaged components.
- Routine inspections will minimize downtime and maintain optimum collector performance.
- Periodically check the compressed air components and replace compressed air filters.
- Drain moisture following the manufacturer’s instructions. With the compressed air supply ON, check the cleaning valves, solenoid valves, and tubing for leaks. Replace as necessary.
2. Monitor pressure drop across filters.
- Abnormal changes in pressure drop indicate a change in operating conditions and possibly a fault to be corrected.
- For example, prolonged lack of compressed air will cause an excess build-up of dust on the filters resulting in increased pressure drop.
- Cleaning off-line with no flow usually restores the filters to normal pressure drop.
HEPA Afterfilter Maintenance
Warning: Ensure the power supply is OFF before starting the procedure
Supply power turned OFF
Bolts from the top back roof panel removed
HEPA mounting frame positioned on top of the clean-air outlet
Front flange holes marked and match-drilled in the roof panel
1/4-in diameter rope-type sealant applied
HEPA mounting frame bolted in place
HEPA filter positioned on mounting frame and secured with latches
Exhaust damper reset to fully closed position
Dust Collector Dust Disposal
Dust Disposal
⚠ WARNING
Use proper safety and protective equipment when emptying dust container
Dust containers may be heavier than they appear
Use care when removing dust container to avoid personal injury
⚠ CAUTION
To reduce the risk of damage from fires or explosions, combustible dust should not be stored in the collector
Remove accumulated dust from the collector at least once per day and at more frequent intervals if conditions warrant
Use extreme caution when removing combustible materials. Avoid creating dust clouds and ensure no materials are burning prior to servicing the dust container
Sprinkler Maint
Sprinkler Installation
⚠ CAUTION
Sprinkler systems place a large quantity of water in the dust collector when activated. Provide adequate drainage to remove water to avoid personal injury or property damage
Fire control sprinklers are available for all models operating under negative pressure. Donaldson Torit supplied sprinklers require a minimum of 15-psig water pressure. The volume of water discharged per sprinkler head is 17 gallons per minute
NOTICE
Consult with local authorities when installing fire control systems on dust collection equipment
1. Remove or open the filter access covers to access the sprinkler tap located in the dirty-air plenum
2. Apply pipe sealant to the threads of the pipe reducer located on the sprinkler assembly
3. Thread sprinkler assembly onto the 1-in diameter sprinkler tap
Parts for Donaldson Dust Collector TG 6
Access the parts list for your equipment in MaintainX.
PowerCore Ultra-Web FR
P032767-016-340
PowerCore Ultra-Web AS
P032955-016-340
PowerCore Ultra-Web FR
P032767-016-340
PowerCore Ultra-Web AS
P032955-016-340
PowerCore Ultra-Web FR
P032767-016-340
PowerCore Ultra-Web AS
P032955-016-340
Unlock efficiency
with MaintainX CoPilot
MaintainX CoPilot is your expert colleague, on call 24/7, helping your team find the answers they need to keep equipment running.
Reduce Unplanned Downtime
Ensure your team follows consistent procedures to minimize equipment failures and costly delays.
Maximize Asset Availability
Keep your assets running longer and more reliably, with standardized maintenance workflows from OEM manuals.
Lower Maintenance Costs
Turn any technician into an expert to streamline operations, maintain more assets, and reduce overall costs.
Thousands of companies manage their assets with MaintainX

'%3e%3cpath%20fill='url(%23b)'%20d='M66.008%2080.068c-5.084-.786-9.763-3.834-12.442-8.68a16.942%2016.942%200%200%201-1.87-5.18c1.096.19%202.203.476%203.298.87%206.525%202.333%2010.836%207.68%2011.014%2012.99ZM51.47%2061.576c.488-5.524%203.62-10.716%208.847-13.597a17.132%2017.132%200%200%201%2011.335-1.882c-.798%208.145-7.43%2014.848-16.038%2015.599-1.417.119-2.799.07-4.144-.12Zm28.564-11.478a17.513%2017.513%200%200%201%203.727%204.62c4.608%208.335%201.584%2018.813-6.75%2023.409a16.988%2016.988%200%200%201-4.359%201.679%2019.624%2019.624%200%200%201-3.977-12.776c.346-7.561%204.942-13.931%2011.36-16.932Z'/%3e%3cpath%20fill='%23110F0D'%20fill-rule='evenodd'%20d='M142.831%2048.324h4.977V77.03h-4.977V48.324Zm27.278%2013.002c.322%201.048.453%202.263.453%203.62v12.073h-4.787V66.208c0-.75-.047-1.572-.154-2.143-.453-2.382-1.822-3.572-4.215-3.572-2.31%200-3.882%201.274-4.43%203.476-.143.596-.226%201.405-.226%202.25v10.8h-4.787V56.623h4.477v2.989c1.536-2.5%203.906-3.43%206.371-3.43%203.488%200%206.263%201.68%207.298%205.144Zm24.636%207.323c0%203.882-2.358%206.525-5.763%207.727-1.298.453-2.632.643-4.62.643h-10.169V48.324h9.085c1.691%200%203.156.143%204.049.38%203.465.93%205.727%203.68%205.727%207.335%200%202.441-.81%204.156-2.762%205.644%202.905%201.417%204.453%203.727%204.453%206.966Zm-15.634-8.656h4.584c1.024%200%201.917-.143%202.536-.417%201.215-.548%201.905-1.608%201.905-3.167%200-1.548-.643-2.572-1.845-3.132-.691-.31-1.762-.452-2.763-.452h-4.417v7.168Zm10.716%208.465c0-1.536-.893-3.37-3.227-3.893-.428-.095-1.036-.143-1.571-.143h-5.918v8.085h5.501c.56%200%201.429-.048%201.953-.167%201.94-.453%203.262-1.846%203.262-3.882Zm47.747-11.847-8.097%2020.408h-4.429l-8.109-20.408h5.191l5.192%2014.574%205.108-14.574h5.144Zm-20.218%2010.002c0%20.69-.036%201.262-.155%201.94h-15.943c.631%202.87%202.714%204.728%205.882%204.728%202.131%200%203.607-.882%204.703-2.525h4.87c-1.762%204.144-5.204%206.692-9.657%206.692-6.084%200-10.537-4.858-10.537-10.49%200-6.108%204.524-10.776%2010.335-10.776%206.239%200%2010.442%204.954%2010.502%2010.43Zm-4.763-1.405c-.333-2.846-2.643-4.858-5.691-4.858-2.894%200-5.287%201.929-5.621%204.858h11.312Zm-72.667%203.44c0%204.787-3.287%208.371-9.419%208.371H119.363V64.66c-1.917.274-3.87.69-5.811%201.238l4.537%2011.121h-5.418l-3.596-9.585c-5.144%202.084-10.085%205.216-14.217%209.585h-4.786L101.8%2048.312h4.56l5.68%2013.883a44.112%2044.112%200%200%201%207.323-1.774V48.312h9.084c1.703%200%203.156.143%204.061.393%203.453.929%205.727%203.667%205.727%207.323%200%201.917-.738%204.179-2.81%205.691%203.06%201.56%204.501%204.025%204.501%206.93Zm-15.634-8.667a62.664%2062.664%200%200%201%202.06-.036c1.703.012%203.239.131%204.608.37%201.441-.549%202.357-1.727%202.357-3.537%200-1.941-.881-3.144-2.488-3.667-.548-.18-1.358-.286-2.322-.286h-4.215v7.156Zm-16.55%203.905-3.715-9.894-6.394%2016.502c2.833-2.595%206.263-4.858%2010.109-6.608Zm27.254%204.74c0-2.775-3.131-4.347-8.513-4.418-.715%200-1.441.011-2.191.047v8.252h5.918c2.548%200%204.786-1.37%204.786-3.882Z'%20clip-rule='evenodd'/%3e%3c/g%3e%3cdefs%3e%3clinearGradient%20id='b'%20x1='51.47'%20x2='85.916'%20y1='62.946'%20y2='62.946'%20gradientUnits='userSpaceOnUse'%3e%3cstop%20stop-color='%23CD9F28'/%3e%3cstop%20offset='1'%20stop-color='%23ECD80B'/%3e%3c/linearGradient%3e%3cclipPath%20id='a'%3e%3cpath%20fill='%23fff'%20d='M51.47%2045.728h186.104V80.14H51.47z'/%3e%3c/clipPath%3e%3c/defs%3e%3c/svg%3e)


More from Donaldson


Explore Other Assets


© 2026 MaintainX. All rights reserved.