


Donaldson Cartridge Dust Collector DWS 4-2
Need answers fast?
Explore the manual using AI.
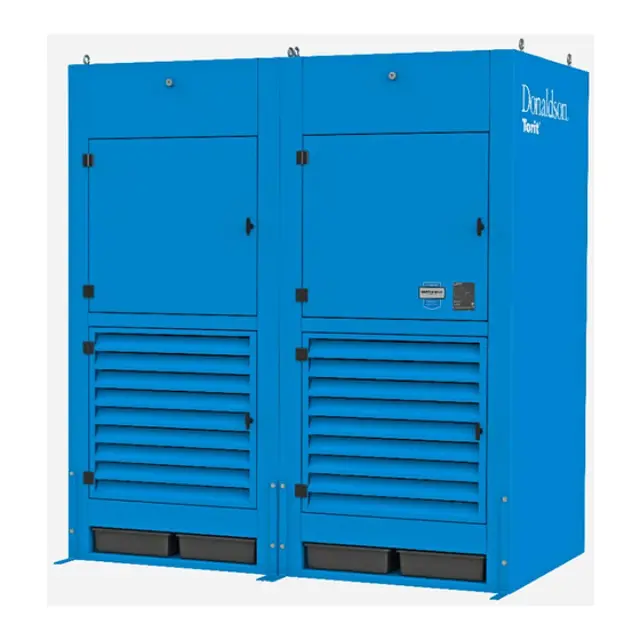
The Donaldson Cartridge Dust Collector DWS 4-2 is a high-efficiency industrial dust collection system designed to maintain air quality and enhance workplace safety. This robust unit effectively captures airborne particles, ensuring compliance with environmental standards while optimizing operational performance.
Turn manuals into instant answers
with your AI-powered assistantTurn manuals into instant answers
with your AI-powered assistant
Manual for Donaldson Cartridge Dust Collector DWS 4-2
Complete asset maintenance, one click away
Get instant access to all the maintenance information you need. Empower technicians to perform preventive maintenance with asset packages, ready to use right out of the box.

Documents & Manuals
Find all the essential guides in one place.
 Tensioning Guide
- Belt-diagram
- C-120 pulleys
+ 13 more

Work Order Templates
Pre-built workflows to keep your asset running smoothly.
- Daily Electrical System Inspection
- Replace Roller and Pulley
- Install Engine B-120
+ 29 more

Procedures
Integrate maintenance plans directly into your work orders.
- Motion Industries
- Applied Industrial Technologies
- Electrical Brothers
+ 5 more

Parts
Access the parts list for your equipment in MaintainX.
- Drive Motor
- B2 Rollers
- Tensioning System
+ 40 more
Donaldson Cartridge Dust Collector DWS 4-2
Create an account to install this asset package.
Maintenance Plans for Donaldson Cartridge Dust Collector Model DWS 4-2
Integrate maintenance plans directly into your work orders in MaintainX.
Cartridge Dust Collector Filter Replacement
Filter Removal and Installation
Use proper safety and protective equipment when removing contaminants and filters.
Dirty filters may be heavier than they appear.
Use care when removing filters to avoid personal injury.
Filter Removal
Note: Remove filter cartridges by opening the top and bottom doors. Start with the top filters first. Optional plastic filter bags are offered for filter and dustpan dust removal for cleanliness.
1. Turn the knob counterclockwise until it is loose. Remove the knob and access cover.
2. Remove the filter cartridge from the yoke.
Filter Installation

Chamber Silencer and Acoustic Curtain Replacement
Warning: Electrical work must be performed by a qualified electrician and comply with all applicable national and local codes.
Turn power off and lock out electrical power sources before performing service or maintenance work.
Do not install in classified hazardous atmospheres without an enclosure rated for the application.
Power turned off and locked out?
Motors wired and rotation checked?
Upload a photo of the power module before installation
Acoustic curtain installed to the front of the power module?
Chamber silencer installed to the top of the power module?
Upload a photo of the power module after installation
Fluorescent Bulb Replacement
Light Fixture
Electrical work must be performed by a qualified electrician and comply with all applicable national and local codes.
Turn power off and lock out electrical power sources before performing service or maintenance work.
Do not install in classified hazardous atmospheres without an enclosure rated for the application.
- Industrial Light Fixture
This light fixture uses a wrap-around lens that is not fastened to the light housing by fasteners or latches.
To remove the lens: Lift lens one side at a time up and away from the housing.
To replace the bulbs: Rotate and remove from the rotary-lock lamp holders.
Replace with 40-watt, 48-inch long fluorescent bulbs.
IEC Control Panel Replacement
Warning: Electrical work must be performed by a qualified electrician and comply with all applicable national and local codes.
Turn power off and lock out electrical power sources before performing service or maintenance work.
Do not install in classified hazardous atmospheres without an enclosure rated for the application.
Control panel mounted in a convenient, accessible location
Tubing connected to the low-pressure barbed fitting on the control panel and to the barb fittings on the rear of the power module marked Low
Upload a photo of the control panel wired to the motor and solenoid valves
Blower motor turned on and off for rotation check
To reverse rotation with a three-phase power supply: Turn electrical power off at the source and switch any two leads on the output side of the blower-motor starter.
Compressed-air supply connected following the instructions in Compressed Air Installation
Magnehelic Gauge Replacement
Warning: This procedure requires trained personnel with PPE!
Enter the location for mounting the gauge
Pressure ports on the back of the gauge plugged using the two supplied 1/8-inch NPT pipe plugs
One 1/8-inch NPT male adapter installed into the low-pressure port on the side of the gauge
Mounting bracket attached using three #6-32 x 1/4-inch screws supplied
Gauge and bracket assembly mounted to the supporting structure using three self-drilling screws
Gauge zeroed and maintained as directed in the manufacturer’s operating and maintenance instructions
Sign off on the Magnehelic Gauge Replacement
Parts for Donaldson Cartridge Dust Collector DWS 4-2
Access the parts list for your equipment in MaintainX.
Ultra-Web SB CD
P032232-016-436
Torit-Tex CD
P032221-016-433
Endura-Tek FR
P033840-016-340
Endura-Tek XL
P033023-016-340
Ultra-Web SS
P199610-016-436
Ultra-Web SB CD
P032232-016-436
Torit-Tex CD
P032221-016-433
Endura-Tek FR
P033840-016-340
Endura-Tek XL
P033023-016-340
Ultra-Web SS
P199610-016-436
Ultra-Web SB CD
P032232-016-436
Torit-Tex CD
P032221-016-433
Endura-Tek FR
P033840-016-340
Endura-Tek XL
P033023-016-340
Ultra-Web SS
P199610-016-436
Unlock efficiency
with MaintainX CoPilot
MaintainX CoPilot is your expert colleague, on call 24/7, helping your team find the answers they need to keep equipment running.
Reduce Unplanned Downtime
Ensure your team follows consistent procedures to minimize equipment failures and costly delays.
Maximize Asset Availability
Keep your assets running longer and more reliably, with standardized maintenance workflows from OEM manuals.
Lower Maintenance Costs
Turn any technician into an expert to streamline operations, maintain more assets, and reduce overall costs.
Thousands of companies manage their assets with MaintainX

'%3e%3cpath%20fill='url(%23b)'%20d='M66.008%2080.068c-5.084-.786-9.763-3.834-12.442-8.68a16.942%2016.942%200%200%201-1.87-5.18c1.096.19%202.203.476%203.298.87%206.525%202.333%2010.836%207.68%2011.014%2012.99ZM51.47%2061.576c.488-5.524%203.62-10.716%208.847-13.597a17.132%2017.132%200%200%201%2011.335-1.882c-.798%208.145-7.43%2014.848-16.038%2015.599-1.417.119-2.799.07-4.144-.12Zm28.564-11.478a17.513%2017.513%200%200%201%203.727%204.62c4.608%208.335%201.584%2018.813-6.75%2023.409a16.988%2016.988%200%200%201-4.359%201.679%2019.624%2019.624%200%200%201-3.977-12.776c.346-7.561%204.942-13.931%2011.36-16.932Z'/%3e%3cpath%20fill='%23110F0D'%20fill-rule='evenodd'%20d='M142.831%2048.324h4.977V77.03h-4.977V48.324Zm27.278%2013.002c.322%201.048.453%202.263.453%203.62v12.073h-4.787V66.208c0-.75-.047-1.572-.154-2.143-.453-2.382-1.822-3.572-4.215-3.572-2.31%200-3.882%201.274-4.43%203.476-.143.596-.226%201.405-.226%202.25v10.8h-4.787V56.623h4.477v2.989c1.536-2.5%203.906-3.43%206.371-3.43%203.488%200%206.263%201.68%207.298%205.144Zm24.636%207.323c0%203.882-2.358%206.525-5.763%207.727-1.298.453-2.632.643-4.62.643h-10.169V48.324h9.085c1.691%200%203.156.143%204.049.38%203.465.93%205.727%203.68%205.727%207.335%200%202.441-.81%204.156-2.762%205.644%202.905%201.417%204.453%203.727%204.453%206.966Zm-15.634-8.656h4.584c1.024%200%201.917-.143%202.536-.417%201.215-.548%201.905-1.608%201.905-3.167%200-1.548-.643-2.572-1.845-3.132-.691-.31-1.762-.452-2.763-.452h-4.417v7.168Zm10.716%208.465c0-1.536-.893-3.37-3.227-3.893-.428-.095-1.036-.143-1.571-.143h-5.918v8.085h5.501c.56%200%201.429-.048%201.953-.167%201.94-.453%203.262-1.846%203.262-3.882Zm47.747-11.847-8.097%2020.408h-4.429l-8.109-20.408h5.191l5.192%2014.574%205.108-14.574h5.144Zm-20.218%2010.002c0%20.69-.036%201.262-.155%201.94h-15.943c.631%202.87%202.714%204.728%205.882%204.728%202.131%200%203.607-.882%204.703-2.525h4.87c-1.762%204.144-5.204%206.692-9.657%206.692-6.084%200-10.537-4.858-10.537-10.49%200-6.108%204.524-10.776%2010.335-10.776%206.239%200%2010.442%204.954%2010.502%2010.43Zm-4.763-1.405c-.333-2.846-2.643-4.858-5.691-4.858-2.894%200-5.287%201.929-5.621%204.858h11.312Zm-72.667%203.44c0%204.787-3.287%208.371-9.419%208.371H119.363V64.66c-1.917.274-3.87.69-5.811%201.238l4.537%2011.121h-5.418l-3.596-9.585c-5.144%202.084-10.085%205.216-14.217%209.585h-4.786L101.8%2048.312h4.56l5.68%2013.883a44.112%2044.112%200%200%201%207.323-1.774V48.312h9.084c1.703%200%203.156.143%204.061.393%203.453.929%205.727%203.667%205.727%207.323%200%201.917-.738%204.179-2.81%205.691%203.06%201.56%204.501%204.025%204.501%206.93Zm-15.634-8.667a62.664%2062.664%200%200%201%202.06-.036c1.703.012%203.239.131%204.608.37%201.441-.549%202.357-1.727%202.357-3.537%200-1.941-.881-3.144-2.488-3.667-.548-.18-1.358-.286-2.322-.286h-4.215v7.156Zm-16.55%203.905-3.715-9.894-6.394%2016.502c2.833-2.595%206.263-4.858%2010.109-6.608Zm27.254%204.74c0-2.775-3.131-4.347-8.513-4.418-.715%200-1.441.011-2.191.047v8.252h5.918c2.548%200%204.786-1.37%204.786-3.882Z'%20clip-rule='evenodd'/%3e%3c/g%3e%3cdefs%3e%3clinearGradient%20id='b'%20x1='51.47'%20x2='85.916'%20y1='62.946'%20y2='62.946'%20gradientUnits='userSpaceOnUse'%3e%3cstop%20stop-color='%23CD9F28'/%3e%3cstop%20offset='1'%20stop-color='%23ECD80B'/%3e%3c/linearGradient%3e%3cclipPath%20id='a'%3e%3cpath%20fill='%23fff'%20d='M51.47%2045.728h186.104V80.14H51.47z'/%3e%3c/clipPath%3e%3c/defs%3e%3c/svg%3e)


More from Donaldson


Explore Other Assets


© 2026 MaintainX. All rights reserved.