


Caterpillar Excavator 320D
Need answers fast?
Explore the manual using AI.
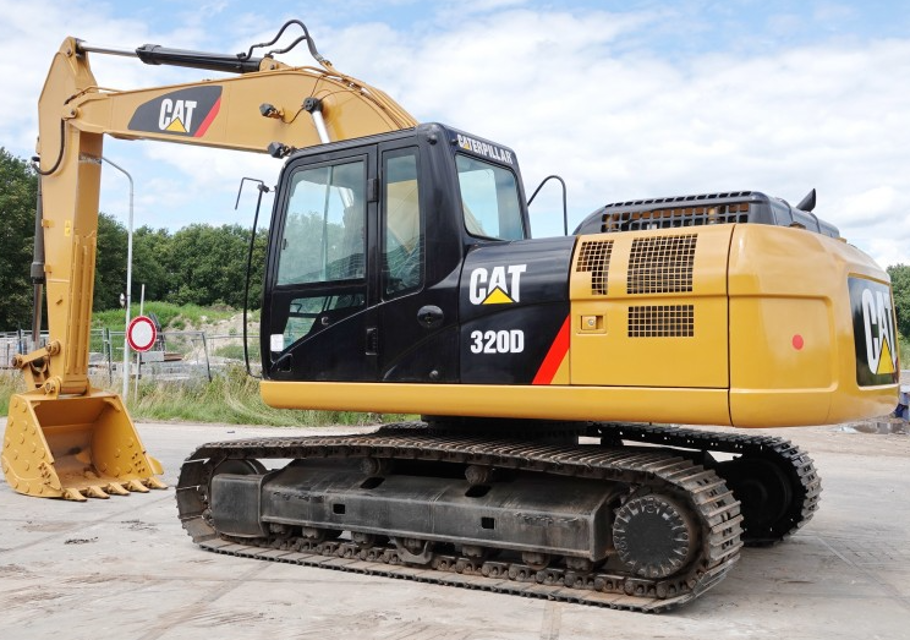
The Caterpillar Excavator 320D is a versatile and powerful machine designed for various construction and excavation tasks. Known for its reliability and efficiency, the 320D model offers advanced hydraulic systems and robust performance, making it an ideal choice for contractors and heavy equipment operators.
Turn manuals into instant answers
with your AI-powered assistantTurn manuals into instant answers
with your AI-powered assistant
Manual for Caterpillar Excavator 320D
Complete asset maintenance, one click away
Get instant access to all the maintenance information you need. Empower technicians to perform preventive maintenance with asset packages, ready to use right out of the box.

Documents & Manuals
Find all the essential guides in one place.
 Tensioning Guide
- Belt-diagram
- C-120 pulleys
+ 13 more

Work Order Templates
Pre-built workflows to keep your asset running smoothly.
- Daily Electrical System Inspection
- Replace Roller and Pulley
- Install Engine B-120
+ 29 more

Procedures
Integrate maintenance plans directly into your work orders.
- Motion Industries
- Applied Industrial Technologies
- Electrical Brothers
+ 5 more

Parts
Access the parts list for your equipment in MaintainX.
- Drive Motor
- B2 Rollers
- Tensioning System
+ 40 more
Caterpillar Excavator 320D
Create an account to install this asset package.
Maintenance Plans for Caterpillar Excavator Model 320D
Integrate maintenance plans directly into your work orders in MaintainX.
50 Hourly or 1 Weekly Excavator Maintenance
WARNING: Unexpected machine movement can cause injury or death. Move the hydraulic lockout control to the LOCKED position and attach a Special Instruction, SEHS7332, “Do Not Operate” or similar warning tag to the hydraulic lockout control.
NOTICE: Improperly adjusted bucket clearance could cause galling on the contact surfaces of the bucket and stick, resulting in excessive noise and/or damaged Oring seals.
Bucket Linkage - Inspect/Adjust
Is the machine positioned on a level surface and the bucket lowered to the ground?
Is the stick boss and the bucket boss in full face contact at no gap?
Enter the measured bucket clearance
Enter the number of shims that need to be removed
Are there a minimum of three 0.5 mm shims?
Is the pin aligned with the pin hole after removing the shims?

250 Hourly Excavator Maintenance
Engine Oil Sample - Obtain
Obtained a sample of the engine oil from the engine oil sampling valve located on the engine oil filter housing?
Final Drive Oil Sample - Obtain
Positioned the final drive so that oil drain plug is at the bottom?
Removed oil level plug?
Obtained a sample of the final drive oil through the hole for the oil level plug?
Installed oil level plug?
Fuel System Primary Filter (Water Separator) Element - Replace
Opened the rear access door on the left side of the machine?
6000 Hourly or 3 Yearly Excavator Maintenance
WARNING: Personal injury can result from hot coolant, steam and alkali.
At operating temperature, engine coolant is hot and under pressure. The radiator and all lines to heaters or the engine contain hot coolant or steam. Any contact can cause severe burns.
Remove cooling system pressure cap slowly to relieve pressure only when engine is stopped and cooling system pressure cap is cool enough to touch with your bare hand.
Do not attempt to tighten hose connections when the coolant is hot, the hose can come off causing burns.
Cooling System Coolant Additive contains alkali. Avoid contact with skin and eyes.
Use Caterpillar Extended Life Coolant (ELC) when you add coolant to the cooling system. See Special Publication, SEBU6250, “Caterpillar Machine Fluids Recommendations” for all cooling system requirements.
Use a Coolant Conditioner Test Kit in order to check the concentration of the coolant.
NOTICE: Mixing ELC with other products will reduce the effectiveness of the coolant. This could result in damage to cooling system components.
If Caterpillar products are not available and commercial products must be used, make sure they have passed the Caterpillar EC-1 specification for premixed or concentrate coolants and Caterpillar Extender.
250 Hourly or 1 Monthly Excavator Maintenance
Belt - Inspect/Adjust/Replace
Inspect the belts for wear and cracking
Measure the deflection of the belt
Check if the belt tension is correct
Check if the belt is worn or frayed
Check if the belt adjustment is correct after 30 minutes of operation
Air Conditioner Belt (If Equipped)
Check if the V-belt is tensioned correctly
Measure the deflection of the V-belt
2000 Hourly or 1 Yearly Excavator Maintenance
Final Drive Oil - Change
WARNING: Hot oil and hot components can cause personal injury. Do not allow hot oil or hot components to contact skin
1. Position one final drive so that oil drain plug (2) is at the bottom.
Note: Refer to Operation and Maintenance Manual, “General Hazard Information” for information on Containing Fluid Spillage.
2. Remove drain plug (2) and level plug (1). Allow the oil to drain into a suitable container.
3. Clean the plugs and inspect the O-ring seals. If wear or damage is evident, replace the drain plug, the level plug, and/or the O-ring seals.
4. Install drain plug (2).
5. Fill the final drive to the bottom of the opening on level plug (1). See Operation and Maintenance Manual, “Lubricant Viscosities” and Operation and Maintenance Manual, “Capacities (Refill)”.
Note: If the oil fills slowly, the fill hole may be blocked by the planetary gear. Rotate the final drive to move the planetary gear away from the fill hole.
Unlock efficiency
with MaintainX CoPilot
MaintainX CoPilot is your expert colleague, on call 24/7, helping your team find the answers they need to keep equipment running.
Reduce Unplanned Downtime
Ensure your team follows consistent procedures to minimize equipment failures and costly delays.
Maximize Asset Availability
Keep your assets running longer and more reliably, with standardized maintenance workflows from OEM manuals.
Lower Maintenance Costs
Turn any technician into an expert to streamline operations, maintain more assets, and reduce overall costs.
Thousands of companies manage their assets with MaintainX

'%3e%3cpath%20fill='url(%23b)'%20d='M66.008%2080.068c-5.084-.786-9.763-3.834-12.442-8.68a16.942%2016.942%200%200%201-1.87-5.18c1.096.19%202.203.476%203.298.87%206.525%202.333%2010.836%207.68%2011.014%2012.99ZM51.47%2061.576c.488-5.524%203.62-10.716%208.847-13.597a17.132%2017.132%200%200%201%2011.335-1.882c-.798%208.145-7.43%2014.848-16.038%2015.599-1.417.119-2.799.07-4.144-.12Zm28.564-11.478a17.513%2017.513%200%200%201%203.727%204.62c4.608%208.335%201.584%2018.813-6.75%2023.409a16.988%2016.988%200%200%201-4.359%201.679%2019.624%2019.624%200%200%201-3.977-12.776c.346-7.561%204.942-13.931%2011.36-16.932Z'/%3e%3cpath%20fill='%23110F0D'%20fill-rule='evenodd'%20d='M142.831%2048.324h4.977V77.03h-4.977V48.324Zm27.278%2013.002c.322%201.048.453%202.263.453%203.62v12.073h-4.787V66.208c0-.75-.047-1.572-.154-2.143-.453-2.382-1.822-3.572-4.215-3.572-2.31%200-3.882%201.274-4.43%203.476-.143.596-.226%201.405-.226%202.25v10.8h-4.787V56.623h4.477v2.989c1.536-2.5%203.906-3.43%206.371-3.43%203.488%200%206.263%201.68%207.298%205.144Zm24.636%207.323c0%203.882-2.358%206.525-5.763%207.727-1.298.453-2.632.643-4.62.643h-10.169V48.324h9.085c1.691%200%203.156.143%204.049.38%203.465.93%205.727%203.68%205.727%207.335%200%202.441-.81%204.156-2.762%205.644%202.905%201.417%204.453%203.727%204.453%206.966Zm-15.634-8.656h4.584c1.024%200%201.917-.143%202.536-.417%201.215-.548%201.905-1.608%201.905-3.167%200-1.548-.643-2.572-1.845-3.132-.691-.31-1.762-.452-2.763-.452h-4.417v7.168Zm10.716%208.465c0-1.536-.893-3.37-3.227-3.893-.428-.095-1.036-.143-1.571-.143h-5.918v8.085h5.501c.56%200%201.429-.048%201.953-.167%201.94-.453%203.262-1.846%203.262-3.882Zm47.747-11.847-8.097%2020.408h-4.429l-8.109-20.408h5.191l5.192%2014.574%205.108-14.574h5.144Zm-20.218%2010.002c0%20.69-.036%201.262-.155%201.94h-15.943c.631%202.87%202.714%204.728%205.882%204.728%202.131%200%203.607-.882%204.703-2.525h4.87c-1.762%204.144-5.204%206.692-9.657%206.692-6.084%200-10.537-4.858-10.537-10.49%200-6.108%204.524-10.776%2010.335-10.776%206.239%200%2010.442%204.954%2010.502%2010.43Zm-4.763-1.405c-.333-2.846-2.643-4.858-5.691-4.858-2.894%200-5.287%201.929-5.621%204.858h11.312Zm-72.667%203.44c0%204.787-3.287%208.371-9.419%208.371H119.363V64.66c-1.917.274-3.87.69-5.811%201.238l4.537%2011.121h-5.418l-3.596-9.585c-5.144%202.084-10.085%205.216-14.217%209.585h-4.786L101.8%2048.312h4.56l5.68%2013.883a44.112%2044.112%200%200%201%207.323-1.774V48.312h9.084c1.703%200%203.156.143%204.061.393%203.453.929%205.727%203.667%205.727%207.323%200%201.917-.738%204.179-2.81%205.691%203.06%201.56%204.501%204.025%204.501%206.93Zm-15.634-8.667a62.664%2062.664%200%200%201%202.06-.036c1.703.012%203.239.131%204.608.37%201.441-.549%202.357-1.727%202.357-3.537%200-1.941-.881-3.144-2.488-3.667-.548-.18-1.358-.286-2.322-.286h-4.215v7.156Zm-16.55%203.905-3.715-9.894-6.394%2016.502c2.833-2.595%206.263-4.858%2010.109-6.608Zm27.254%204.74c0-2.775-3.131-4.347-8.513-4.418-.715%200-1.441.011-2.191.047v8.252h5.918c2.548%200%204.786-1.37%204.786-3.882Z'%20clip-rule='evenodd'/%3e%3c/g%3e%3cdefs%3e%3clinearGradient%20id='b'%20x1='51.47'%20x2='85.916'%20y1='62.946'%20y2='62.946'%20gradientUnits='userSpaceOnUse'%3e%3cstop%20stop-color='%23CD9F28'/%3e%3cstop%20offset='1'%20stop-color='%23ECD80B'/%3e%3c/linearGradient%3e%3cclipPath%20id='a'%3e%3cpath%20fill='%23fff'%20d='M51.47%2045.728h186.104V80.14H51.47z'/%3e%3c/clipPath%3e%3c/defs%3e%3c/svg%3e)


More from Caterpillar


Explore Other Assets


© 2026 MaintainX. All rights reserved.