


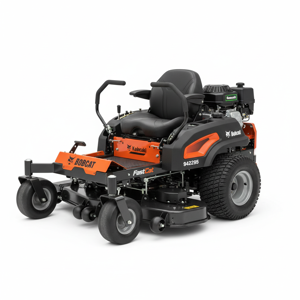
Bobcat Side Discharge Mower 942291
Need answers fast?
Explore the manual using AI.

Turn manuals into instant answers
with your AI-powered assistantTurn manuals into instant answers
with your AI-powered assistant
Manual for Bobcat Side Discharge Mower 942291
Complete asset maintenance, one click away
Get instant access to all the maintenance information you need. Empower technicians to perform preventive maintenance with asset packages, ready to use right out of the box.

Documents & Manuals
Find all the essential guides in one place.
 Tensioning Guide
- Belt-diagram
- C-120 pulleys
+ 13 more

Work Order Templates
Pre-built workflows to keep your asset running smoothly.
- Daily Electrical System Inspection
- Replace Roller and Pulley
- Install Engine B-120
+ 29 more

Procedures
Integrate maintenance plans directly into your work orders.
- Motion Industries
- Applied Industrial Technologies
- Electrical Brothers
+ 5 more

Parts
Access the parts list for your equipment in MaintainX.
- Drive Motor
- B2 Rollers
- Tensioning System
+ 40 more
Bobcat Side Discharge Mower 942291
Create an account to install this asset package.
Maintenance Plans for Bobcat Side Discharge Mower Model 942291
Integrate maintenance plans directly into your work orders in MaintainX.
50 Hourly Side Discharge Mower Lubrication
Every 50 hours of operation, lubricate the following points (1-3) with grease:
1. Deck lift lever (1 point)
2. Deck lift pivots (4 points)
3. Pull arms (2 points located at the front of the cutterdeck)
4. Caster wheel pivots (2 points) (Lubricate every 500 hours or once a year)
NOTE ON BLADE SPINDLES - The blade spindles on these machines use a superior sealed bearing that does not require relubrication.;

200 Hourly Transaxles Fluid Change
Ensure the exterior of the transaxle is free of debris before starting the procedure
Removed the three 1/4\ filter guard screws and filter guard A"
Removed the oil filter B from the transaxle and discarded
Disposed of used oil in accordance with local requirements
Wiped the filter base surface off and applied a film of new oil to the gasket of the new replacement filter
Installed the new filter by hand, turned 3/4 to one full turn after the filter gasket contacts the filter base surface
Re-installed the filter guard and torqued the three screws to 65 in. lbs. each
Removed cap C, filled the transaxles through the expansion tank D with approximately 4 quarts of SAE 20W-50 engine oil
Caution: Do not overfill! If you overfill the transaxle while the unit is \cold\"
Side DIscharge Mower Pre-Operation Check
Review and follow all safety rules and safety decal instructions.
All safety decals are installed and in good condition
All shields and guards are properly installed and in good condition
Either the discharge shield or complete vacuum attachment is installed
All hardware is properly installed and secured
Equipment is properly and securely attached to power unit
Engine is free of dirt and debris
Air intake screen is clean
Air cleaner is serviced if necessary
Hydrostatic Transaxle Adjustment
Neutral Adjustment Procedure
Machine supported with rear wheels off the ground
Traction levers moved to neutral lock position and seat raised
Seat switch wire disconnected and terminals connected with jumper wire J
Engine started and running at low speed
Parking brake moved to OFF position
Jam nuts K at both ends of control rod L loosened
Control rod rotated until corresponding wheel stops turning
Control rod jam nuts locked and adjustment checked
Blade Adjustment
Warning: Blade balance must be maintained at 5/8 oz-in (19.4 g-cm) or less. Failure to keep blades balanced causes excess vibration, wear, and shortened life of most components of the machine.
Sharpen blade first
Balance the blade at the center
Attach a 1/8 oz (3.9 g) weight at a distance 5\ (127 mm) from center on the light end"
Does the addition of the weight make the light end the heavy end?
If the weight does not make the light end the heavy end, file or grind the heavy end until it does.
Sign off on the blade adjustment
Unlock efficiency
with MaintainX CoPilot
MaintainX CoPilot is your expert colleague, on call 24/7, helping your team find the answers they need to keep equipment running.
Reduce Unplanned Downtime
Ensure your team follows consistent procedures to minimize equipment failures and costly delays.
Maximize Asset Availability
Keep your assets running longer and more reliably, with standardized maintenance workflows from OEM manuals.
Lower Maintenance Costs
Turn any technician into an expert to streamline operations, maintain more assets, and reduce overall costs.
Thousands of companies manage their assets with MaintainX

'%3e%3cpath%20fill='url(%23b)'%20d='M66.008%2080.068c-5.084-.786-9.763-3.834-12.442-8.68a16.942%2016.942%200%200%201-1.87-5.18c1.096.19%202.203.476%203.298.87%206.525%202.333%2010.836%207.68%2011.014%2012.99ZM51.47%2061.576c.488-5.524%203.62-10.716%208.847-13.597a17.132%2017.132%200%200%201%2011.335-1.882c-.798%208.145-7.43%2014.848-16.038%2015.599-1.417.119-2.799.07-4.144-.12Zm28.564-11.478a17.513%2017.513%200%200%201%203.727%204.62c4.608%208.335%201.584%2018.813-6.75%2023.409a16.988%2016.988%200%200%201-4.359%201.679%2019.624%2019.624%200%200%201-3.977-12.776c.346-7.561%204.942-13.931%2011.36-16.932Z'/%3e%3cpath%20fill='%23110F0D'%20fill-rule='evenodd'%20d='M142.831%2048.324h4.977V77.03h-4.977V48.324Zm27.278%2013.002c.322%201.048.453%202.263.453%203.62v12.073h-4.787V66.208c0-.75-.047-1.572-.154-2.143-.453-2.382-1.822-3.572-4.215-3.572-2.31%200-3.882%201.274-4.43%203.476-.143.596-.226%201.405-.226%202.25v10.8h-4.787V56.623h4.477v2.989c1.536-2.5%203.906-3.43%206.371-3.43%203.488%200%206.263%201.68%207.298%205.144Zm24.636%207.323c0%203.882-2.358%206.525-5.763%207.727-1.298.453-2.632.643-4.62.643h-10.169V48.324h9.085c1.691%200%203.156.143%204.049.38%203.465.93%205.727%203.68%205.727%207.335%200%202.441-.81%204.156-2.762%205.644%202.905%201.417%204.453%203.727%204.453%206.966Zm-15.634-8.656h4.584c1.024%200%201.917-.143%202.536-.417%201.215-.548%201.905-1.608%201.905-3.167%200-1.548-.643-2.572-1.845-3.132-.691-.31-1.762-.452-2.763-.452h-4.417v7.168Zm10.716%208.465c0-1.536-.893-3.37-3.227-3.893-.428-.095-1.036-.143-1.571-.143h-5.918v8.085h5.501c.56%200%201.429-.048%201.953-.167%201.94-.453%203.262-1.846%203.262-3.882Zm47.747-11.847-8.097%2020.408h-4.429l-8.109-20.408h5.191l5.192%2014.574%205.108-14.574h5.144Zm-20.218%2010.002c0%20.69-.036%201.262-.155%201.94h-15.943c.631%202.87%202.714%204.728%205.882%204.728%202.131%200%203.607-.882%204.703-2.525h4.87c-1.762%204.144-5.204%206.692-9.657%206.692-6.084%200-10.537-4.858-10.537-10.49%200-6.108%204.524-10.776%2010.335-10.776%206.239%200%2010.442%204.954%2010.502%2010.43Zm-4.763-1.405c-.333-2.846-2.643-4.858-5.691-4.858-2.894%200-5.287%201.929-5.621%204.858h11.312Zm-72.667%203.44c0%204.787-3.287%208.371-9.419%208.371H119.363V64.66c-1.917.274-3.87.69-5.811%201.238l4.537%2011.121h-5.418l-3.596-9.585c-5.144%202.084-10.085%205.216-14.217%209.585h-4.786L101.8%2048.312h4.56l5.68%2013.883a44.112%2044.112%200%200%201%207.323-1.774V48.312h9.084c1.703%200%203.156.143%204.061.393%203.453.929%205.727%203.667%205.727%207.323%200%201.917-.738%204.179-2.81%205.691%203.06%201.56%204.501%204.025%204.501%206.93Zm-15.634-8.667a62.664%2062.664%200%200%201%202.06-.036c1.703.012%203.239.131%204.608.37%201.441-.549%202.357-1.727%202.357-3.537%200-1.941-.881-3.144-2.488-3.667-.548-.18-1.358-.286-2.322-.286h-4.215v7.156Zm-16.55%203.905-3.715-9.894-6.394%2016.502c2.833-2.595%206.263-4.858%2010.109-6.608Zm27.254%204.74c0-2.775-3.131-4.347-8.513-4.418-.715%200-1.441.011-2.191.047v8.252h5.918c2.548%200%204.786-1.37%204.786-3.882Z'%20clip-rule='evenodd'/%3e%3c/g%3e%3cdefs%3e%3clinearGradient%20id='b'%20x1='51.47'%20x2='85.916'%20y1='62.946'%20y2='62.946'%20gradientUnits='userSpaceOnUse'%3e%3cstop%20stop-color='%23CD9F28'/%3e%3cstop%20offset='1'%20stop-color='%23ECD80B'/%3e%3c/linearGradient%3e%3cclipPath%20id='a'%3e%3cpath%20fill='%23fff'%20d='M51.47%2045.728h186.104V80.14H51.47z'/%3e%3c/clipPath%3e%3c/defs%3e%3c/svg%3e)


More from Bobcat


Explore Other Assets


© 2026 MaintainX. All rights reserved.