


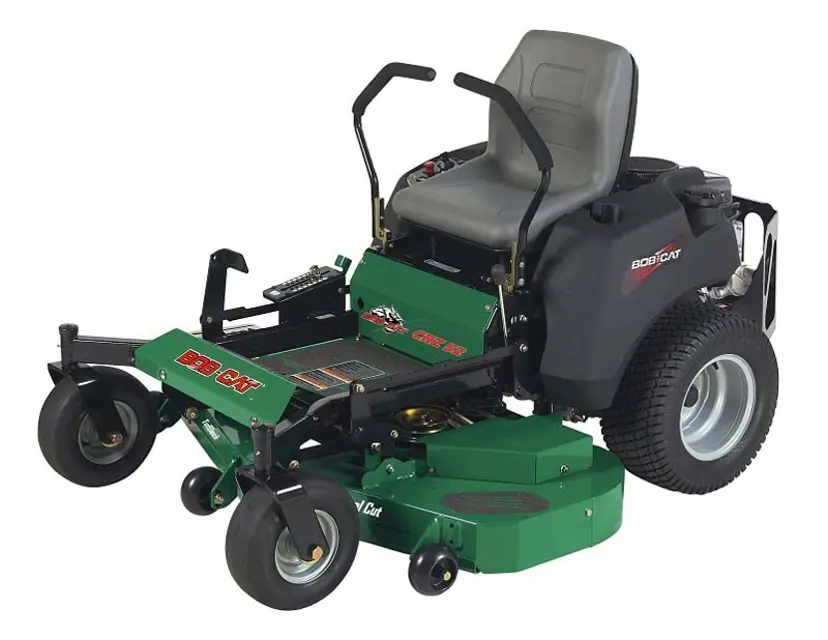
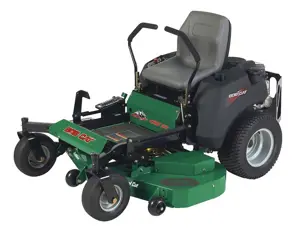
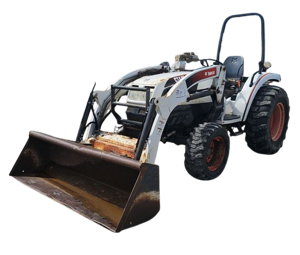
Bobcat Side Discharge Mower 942631
Need answers fast?
Explore the manual using AI.
Turn manuals into instant answers
with your AI-powered assistantTurn manuals into instant answers
with your AI-powered assistant
Manual for Bobcat Side Discharge Mower 942631
Complete asset maintenance, one click away
Get instant access to all the maintenance information you need. Empower technicians to perform preventive maintenance with asset packages, ready to use right out of the box.

Documents & Manuals
Find all the essential guides in one place.
 Tensioning Guide
- Belt-diagram
- C-120 pulleys
+ 13 more

Work Order Templates
Pre-built workflows to keep your asset running smoothly.
- Daily Electrical System Inspection
- Replace Roller and Pulley
- Install Engine B-120
+ 29 more

Procedures
Integrate maintenance plans directly into your work orders.
- Motion Industries
- Applied Industrial Technologies
- Electrical Brothers
+ 5 more

Parts
Access the parts list for your equipment in MaintainX.
- Drive Motor
- B2 Rollers
- Tensioning System
+ 40 more
Bobcat Side Discharge Mower 942631
Create an account to install this asset package.
Maintenance Plans for Bobcat Side Discharge Mower Model 942631
Integrate maintenance plans directly into your work orders in MaintainX.
1 Daily Engine Oil Level Check
Warning: Do not perform engine maintenance without the engine off, spark plug wires disconnected and PTO disengaged.
Check oil level with the dipstick.
If oil is needed, add fresh oil of proper viscosity and grade. See engine manual for oil specifications. Do not overfill.
Replace dipstick before starting engine.

Parking Brake Adjustment
NOTE: There are 2 brakes, 1 on each transaxle.
Parking brake keeps the machine from moving
To check the parking brake, park the machine on a level surface, open the bypass valves and set the parking brake to ON. Attempt to move the machine forward and backward by pushing it.
If the machine moves, adjust the parking brake linkage as follows:
Move the machine to a flat horizontal surface.
Move the parking brake handle to the OFF position.
Remove cotter pin P from each brake link K and brake rod R. Slide brake rod R out of each brake link K and insure that the brake links are rotated toward the rear of the machine. Reinsert rod R into each link K and secure with cotter pin P.
The parking brake handle should be approximately horizontal when in the Off position. If the brakes need to be adjusted, loosen the inner nut M of the brake rod B. Tighten the outer nut L as needed for the brakes to be engaged. Tighten inner nut M.
Tighten brake nut N as needed. The length of the threads protruding past the nut should measure 1/4\ - 3/8\"."
Side Discharge Mower Cleaning
Warning: Improperly washing a machine can cause water to enter bearings and other components. This can greatly reduce component life.
Machine free of clippings and other debris
CAUTION: Do not use a pressure washer. Do not direct water at bearings or seals. High pressure water can blow past seals and enter sealed bearings.
Machine cooled down before washing?
Avoid getting electrical connections wet. Water can cause electrical faults and corrosion of electrical components.
Electrical connections dry?
Sign off on the machine cleaning
Battery Maintenance
Warning: Battery acid is caustic and fumes are explosive and can cause serious injury or death.
NOTE: If your unit has a AGM type battery an AGM type battery charger should be used when charging.
Use insulated tools, wear protective glasses or goggles and protective clothing when working with batteries. Read and obey the battery manufacturer’s instructions.
Be certain the ignition switch is OFF and the key has been removed before servicing the battery.
Verify battery polarity before connecting or disconnecting the battery cables.
When installing the battery, always assemble the RED, positive ( + ) battery cable first and the BLACK ground, negative ( - ) cable last.
When removing the battery, always remove the BLACK ground, negative ( - ) cable first and the red, positive ( + ) cable last.
Clean the cable ends and battery posts with steel wool.
Use a solution of baking soda and water to clean the battery. Do not allow the solution to enter into the battery cells.
Engine Oil Maintenance
Warning: Do not perform engine maintenance without the engine off, spark plug wires disconnected and PTO disengaged.
See engine manual for oil and filter change intervals after the break-in period.
Follow instructions for first oil change, below.
While the engine is warm:
Release the oil drain hose assembly from the engine clip J. Lay hose assembly over the frame edge or through the frame cutout, which ever is most convenient.
Remove the rubber cap D from the tip of the hose assembly and turn the drain valve to allow oil to drain from the engine. Dispose of used oil in accordance with local requirements.
Clean drain valve and tighten the plastic portion of the drain valve back into the metal portion of the valve. Replace rubber cap over the tip of the valve. Replace hose assembly back into engine clip.
Change oil filter.
Fill the crankcase with fresh oil to the full mark.
Parts for Bobcat Side Discharge Mower 942631
Access the parts list for your equipment in MaintainX.
Engine-FX691V Kaw, Model 942631
4164367
S-Air Filter Assembly
4164577
Filter-Oil
4164537
Filter-Fuel
4168368
Filter-Air Primary
4152953
Engine-FX691V Kaw, Model 942631
4164367
S-Air Filter Assembly
4164577
Filter-Oil
4164537
Filter-Fuel
4168368
Filter-Air Primary
4152953
Engine-FX691V Kaw, Model 942631
4164367
S-Air Filter Assembly
4164577
Filter-Oil
4164537
Filter-Fuel
4168368
Filter-Air Primary
4152953
Unlock efficiency
with MaintainX CoPilot
MaintainX CoPilot is your expert colleague, on call 24/7, helping your team find the answers they need to keep equipment running.
Reduce Unplanned Downtime
Ensure your team follows consistent procedures to minimize equipment failures and costly delays.
Maximize Asset Availability
Keep your assets running longer and more reliably, with standardized maintenance workflows from OEM manuals.
Lower Maintenance Costs
Turn any technician into an expert to streamline operations, maintain more assets, and reduce overall costs.
Thousands of companies manage their assets with MaintainX

'%3e%3cpath%20fill='url(%23b)'%20d='M66.008%2080.068c-5.084-.786-9.763-3.834-12.442-8.68a16.942%2016.942%200%200%201-1.87-5.18c1.096.19%202.203.476%203.298.87%206.525%202.333%2010.836%207.68%2011.014%2012.99ZM51.47%2061.576c.488-5.524%203.62-10.716%208.847-13.597a17.132%2017.132%200%200%201%2011.335-1.882c-.798%208.145-7.43%2014.848-16.038%2015.599-1.417.119-2.799.07-4.144-.12Zm28.564-11.478a17.513%2017.513%200%200%201%203.727%204.62c4.608%208.335%201.584%2018.813-6.75%2023.409a16.988%2016.988%200%200%201-4.359%201.679%2019.624%2019.624%200%200%201-3.977-12.776c.346-7.561%204.942-13.931%2011.36-16.932Z'/%3e%3cpath%20fill='%23110F0D'%20fill-rule='evenodd'%20d='M142.831%2048.324h4.977V77.03h-4.977V48.324Zm27.278%2013.002c.322%201.048.453%202.263.453%203.62v12.073h-4.787V66.208c0-.75-.047-1.572-.154-2.143-.453-2.382-1.822-3.572-4.215-3.572-2.31%200-3.882%201.274-4.43%203.476-.143.596-.226%201.405-.226%202.25v10.8h-4.787V56.623h4.477v2.989c1.536-2.5%203.906-3.43%206.371-3.43%203.488%200%206.263%201.68%207.298%205.144Zm24.636%207.323c0%203.882-2.358%206.525-5.763%207.727-1.298.453-2.632.643-4.62.643h-10.169V48.324h9.085c1.691%200%203.156.143%204.049.38%203.465.93%205.727%203.68%205.727%207.335%200%202.441-.81%204.156-2.762%205.644%202.905%201.417%204.453%203.727%204.453%206.966Zm-15.634-8.656h4.584c1.024%200%201.917-.143%202.536-.417%201.215-.548%201.905-1.608%201.905-3.167%200-1.548-.643-2.572-1.845-3.132-.691-.31-1.762-.452-2.763-.452h-4.417v7.168Zm10.716%208.465c0-1.536-.893-3.37-3.227-3.893-.428-.095-1.036-.143-1.571-.143h-5.918v8.085h5.501c.56%200%201.429-.048%201.953-.167%201.94-.453%203.262-1.846%203.262-3.882Zm47.747-11.847-8.097%2020.408h-4.429l-8.109-20.408h5.191l5.192%2014.574%205.108-14.574h5.144Zm-20.218%2010.002c0%20.69-.036%201.262-.155%201.94h-15.943c.631%202.87%202.714%204.728%205.882%204.728%202.131%200%203.607-.882%204.703-2.525h4.87c-1.762%204.144-5.204%206.692-9.657%206.692-6.084%200-10.537-4.858-10.537-10.49%200-6.108%204.524-10.776%2010.335-10.776%206.239%200%2010.442%204.954%2010.502%2010.43Zm-4.763-1.405c-.333-2.846-2.643-4.858-5.691-4.858-2.894%200-5.287%201.929-5.621%204.858h11.312Zm-72.667%203.44c0%204.787-3.287%208.371-9.419%208.371H119.363V64.66c-1.917.274-3.87.69-5.811%201.238l4.537%2011.121h-5.418l-3.596-9.585c-5.144%202.084-10.085%205.216-14.217%209.585h-4.786L101.8%2048.312h4.56l5.68%2013.883a44.112%2044.112%200%200%201%207.323-1.774V48.312h9.084c1.703%200%203.156.143%204.061.393%203.453.929%205.727%203.667%205.727%207.323%200%201.917-.738%204.179-2.81%205.691%203.06%201.56%204.501%204.025%204.501%206.93Zm-15.634-8.667a62.664%2062.664%200%200%201%202.06-.036c1.703.012%203.239.131%204.608.37%201.441-.549%202.357-1.727%202.357-3.537%200-1.941-.881-3.144-2.488-3.667-.548-.18-1.358-.286-2.322-.286h-4.215v7.156Zm-16.55%203.905-3.715-9.894-6.394%2016.502c2.833-2.595%206.263-4.858%2010.109-6.608Zm27.254%204.74c0-2.775-3.131-4.347-8.513-4.418-.715%200-1.441.011-2.191.047v8.252h5.918c2.548%200%204.786-1.37%204.786-3.882Z'%20clip-rule='evenodd'/%3e%3c/g%3e%3cdefs%3e%3clinearGradient%20id='b'%20x1='51.47'%20x2='85.916'%20y1='62.946'%20y2='62.946'%20gradientUnits='userSpaceOnUse'%3e%3cstop%20stop-color='%23CD9F28'/%3e%3cstop%20offset='1'%20stop-color='%23ECD80B'/%3e%3c/linearGradient%3e%3cclipPath%20id='a'%3e%3cpath%20fill='%23fff'%20d='M51.47%2045.728h186.104V80.14H51.47z'/%3e%3c/clipPath%3e%3c/defs%3e%3c/svg%3e)


More from Bobcat


Explore Other Assets


© 2026 MaintainX. All rights reserved.