


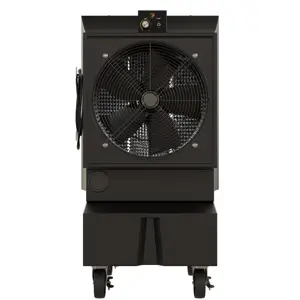
Big Ass Fans Evaporative Cooler Cold Front 300
Need answers fast?
Explore the manual using AI.

Turn manuals into instant answers
with your AI-powered assistantTurn manuals into instant answers
with your AI-powered assistant
Manual for Big Ass Fans Evaporative Cooler Cold Front 300
Complete asset maintenance, one click away
Get instant access to all the maintenance information you need. Empower technicians to perform preventive maintenance with asset packages, ready to use right out of the box.

Documents & Manuals
Find all the essential guides in one place.
 Tensioning Guide
- Belt-diagram
- C-120 pulleys
+ 13 more

Work Order Templates
Pre-built workflows to keep your asset running smoothly.
- Daily Electrical System Inspection
- Replace Roller and Pulley
- Install Engine B-120
+ 29 more

Procedures
Integrate maintenance plans directly into your work orders.
- Motion Industries
- Applied Industrial Technologies
- Electrical Brothers
+ 5 more

Parts
Access the parts list for your equipment in MaintainX.
- Drive Motor
- B2 Rollers
- Tensioning System
+ 40 more
Big Ass Fans Evaporative Cooler Cold Front 300
Create an account to install this asset package.
Maintenance Plans for Big Ass Fans Evaporative Cooler Model Cold Front 300
Integrate maintenance plans directly into your work orders in MaintainX.
1 Weekly Water Sump Draining
WARNING ELECTRICAL SHOCK HAZARD: Disconnect the power supply before performing any service or maintenance. Failure to do so may result in serious injury or death.
Remove the cooling pads to access the inside of the cooler.
Remove the bolts connecting the pad retainer bar (pad side) from the housing.
Starting with the center pad(s), tilt pads from the top and lift out of the cooler.
NOTE: Reinstall pads correctly according to the markings on the pads.
Periodic maintenance: Shut down the cooler and drain the water sump regularly. Depending on how often you operate the cooler, drain the sump anywhere from every week (heavy use) to monthly (light use). The cooling pads act as a filter to remove dust and other particles from the incoming air stream. Collected particles and any water impurities will flow into the sump and collect there. To keep the cooler operating at peak efficiency, keep the cooling media and sump clear of debris.
Draining the water sump
Close water flow valve and open drain valve or remove drain plug located at bottom of reservoir.
Run pump until sump is dry, and then immediately shut off pump.

1 Weekly Cooler Cleaning
WARNING ELECTRICAL SHOCK HAZARD
Disconnect the power supply before performing any service or maintenance. Failure to do so may result in serious injury or death.
Removing the cooling media
Remove the cooling pads to access the inside of the cooler.
Remove pad grilles from support channel.
Tilt pads from the top and lift out of the cooler.
Drain and clean the cooler weekly. Remove the cooling media and wash with a garden hose.
Drain the cooler
Remove the cooling media
Pump Replacement
Pump repair procedures
CAUTION
Repairs should be performed by a qualified technician!
WARNING ELECTRICAL SHOCK HAZARD
Disconnect the power supply before performing any service or maintenance. Failure to do so may result in serious injury or death.
Pump replacement for Cold Front 300, 400, and 500
1. Unscrew fitting from pump.
2. Unplug cord from top of pump by removing the two (2) screws.
3. Remove pump from water sump and install new pump.
Cooler Check
All hose connections checked
Select the gauge of the cord used
Fresh air intake for the cooler provided and minimum clearance of 3 ft maintained
New cooling media flushed
Cooler filled with water
Pump switched on
Cooler run without the fan running for 5 hours
Cooling media evenly saturated
Cooling media dried out before shutting down the cooler
Seasonal Cooler Maintenance
Spring cleaning
• Remove the cooling media and clean out any debris in the water pan at the bottom of the cooler.
• Remove the distribution tube from the mounting clips. Remove the plug at the end of the tube and flush out. Clean the distribution holes with a small brush and flush with water to verify all holes are clear.
• If the cooling media is heavily stained with minerals or is damaged, replace the media. Replacement cooling media is available at bigassfans.com. Verify the media is installed correctly with the arrows on the side.
• Connect the water line and turn on the water supply. Check the float valve and make sure it is operating properly. Verify that the float valve is shutting the water off before walking away.
• Switch on the fan motor and pump. Make sure the cooling media is being evenly saturated with water by using the flow control valve to adjust the water flow. Small dry streaks are acceptable.
Mid-summer checkup
• Make sure the float valve is working properly. If the valve sticks, the water will run continuously and flood the reservoir. If this occurs, install a new float valve or contact Customer Service.
• Check all other working parts for cracks or damage, including the pump, fan motor, and fan belt.
Unlock efficiency
with MaintainX CoPilot
MaintainX CoPilot is your expert colleague, on call 24/7, helping your team find the answers they need to keep equipment running.
Reduce Unplanned Downtime
Ensure your team follows consistent procedures to minimize equipment failures and costly delays.
Maximize Asset Availability
Keep your assets running longer and more reliably, with standardized maintenance workflows from OEM manuals.
Lower Maintenance Costs
Turn any technician into an expert to streamline operations, maintain more assets, and reduce overall costs.
Thousands of companies manage their assets with MaintainX

'%3e%3cpath%20fill='url(%23b)'%20d='M66.008%2080.068c-5.084-.786-9.763-3.834-12.442-8.68a16.942%2016.942%200%200%201-1.87-5.18c1.096.19%202.203.476%203.298.87%206.525%202.333%2010.836%207.68%2011.014%2012.99ZM51.47%2061.576c.488-5.524%203.62-10.716%208.847-13.597a17.132%2017.132%200%200%201%2011.335-1.882c-.798%208.145-7.43%2014.848-16.038%2015.599-1.417.119-2.799.07-4.144-.12Zm28.564-11.478a17.513%2017.513%200%200%201%203.727%204.62c4.608%208.335%201.584%2018.813-6.75%2023.409a16.988%2016.988%200%200%201-4.359%201.679%2019.624%2019.624%200%200%201-3.977-12.776c.346-7.561%204.942-13.931%2011.36-16.932Z'/%3e%3cpath%20fill='%23110F0D'%20fill-rule='evenodd'%20d='M142.831%2048.324h4.977V77.03h-4.977V48.324Zm27.278%2013.002c.322%201.048.453%202.263.453%203.62v12.073h-4.787V66.208c0-.75-.047-1.572-.154-2.143-.453-2.382-1.822-3.572-4.215-3.572-2.31%200-3.882%201.274-4.43%203.476-.143.596-.226%201.405-.226%202.25v10.8h-4.787V56.623h4.477v2.989c1.536-2.5%203.906-3.43%206.371-3.43%203.488%200%206.263%201.68%207.298%205.144Zm24.636%207.323c0%203.882-2.358%206.525-5.763%207.727-1.298.453-2.632.643-4.62.643h-10.169V48.324h9.085c1.691%200%203.156.143%204.049.38%203.465.93%205.727%203.68%205.727%207.335%200%202.441-.81%204.156-2.762%205.644%202.905%201.417%204.453%203.727%204.453%206.966Zm-15.634-8.656h4.584c1.024%200%201.917-.143%202.536-.417%201.215-.548%201.905-1.608%201.905-3.167%200-1.548-.643-2.572-1.845-3.132-.691-.31-1.762-.452-2.763-.452h-4.417v7.168Zm10.716%208.465c0-1.536-.893-3.37-3.227-3.893-.428-.095-1.036-.143-1.571-.143h-5.918v8.085h5.501c.56%200%201.429-.048%201.953-.167%201.94-.453%203.262-1.846%203.262-3.882Zm47.747-11.847-8.097%2020.408h-4.429l-8.109-20.408h5.191l5.192%2014.574%205.108-14.574h5.144Zm-20.218%2010.002c0%20.69-.036%201.262-.155%201.94h-15.943c.631%202.87%202.714%204.728%205.882%204.728%202.131%200%203.607-.882%204.703-2.525h4.87c-1.762%204.144-5.204%206.692-9.657%206.692-6.084%200-10.537-4.858-10.537-10.49%200-6.108%204.524-10.776%2010.335-10.776%206.239%200%2010.442%204.954%2010.502%2010.43Zm-4.763-1.405c-.333-2.846-2.643-4.858-5.691-4.858-2.894%200-5.287%201.929-5.621%204.858h11.312Zm-72.667%203.44c0%204.787-3.287%208.371-9.419%208.371H119.363V64.66c-1.917.274-3.87.69-5.811%201.238l4.537%2011.121h-5.418l-3.596-9.585c-5.144%202.084-10.085%205.216-14.217%209.585h-4.786L101.8%2048.312h4.56l5.68%2013.883a44.112%2044.112%200%200%201%207.323-1.774V48.312h9.084c1.703%200%203.156.143%204.061.393%203.453.929%205.727%203.667%205.727%207.323%200%201.917-.738%204.179-2.81%205.691%203.06%201.56%204.501%204.025%204.501%206.93Zm-15.634-8.667a62.664%2062.664%200%200%201%202.06-.036c1.703.012%203.239.131%204.608.37%201.441-.549%202.357-1.727%202.357-3.537%200-1.941-.881-3.144-2.488-3.667-.548-.18-1.358-.286-2.322-.286h-4.215v7.156Zm-16.55%203.905-3.715-9.894-6.394%2016.502c2.833-2.595%206.263-4.858%2010.109-6.608Zm27.254%204.74c0-2.775-3.131-4.347-8.513-4.418-.715%200-1.441.011-2.191.047v8.252h5.918c2.548%200%204.786-1.37%204.786-3.882Z'%20clip-rule='evenodd'/%3e%3c/g%3e%3cdefs%3e%3clinearGradient%20id='b'%20x1='51.47'%20x2='85.916'%20y1='62.946'%20y2='62.946'%20gradientUnits='userSpaceOnUse'%3e%3cstop%20stop-color='%23CD9F28'/%3e%3cstop%20offset='1'%20stop-color='%23ECD80B'/%3e%3c/linearGradient%3e%3cclipPath%20id='a'%3e%3cpath%20fill='%23fff'%20d='M51.47%2045.728h186.104V80.14H51.47z'/%3e%3c/clipPath%3e%3c/defs%3e%3c/svg%3e)


More from Big Ass Fans


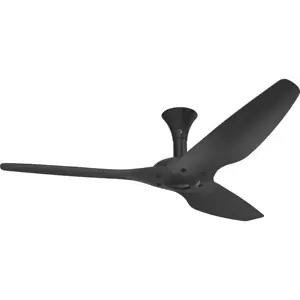

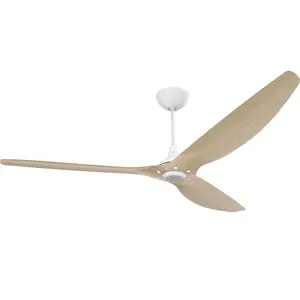


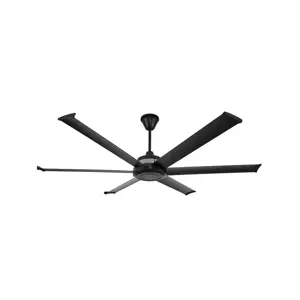
Explore Other Assets


© 2026 MaintainX. All rights reserved.