


Sullair Industrial Air Compressor 1812
Need answers fast?
Explore the manual using AI.
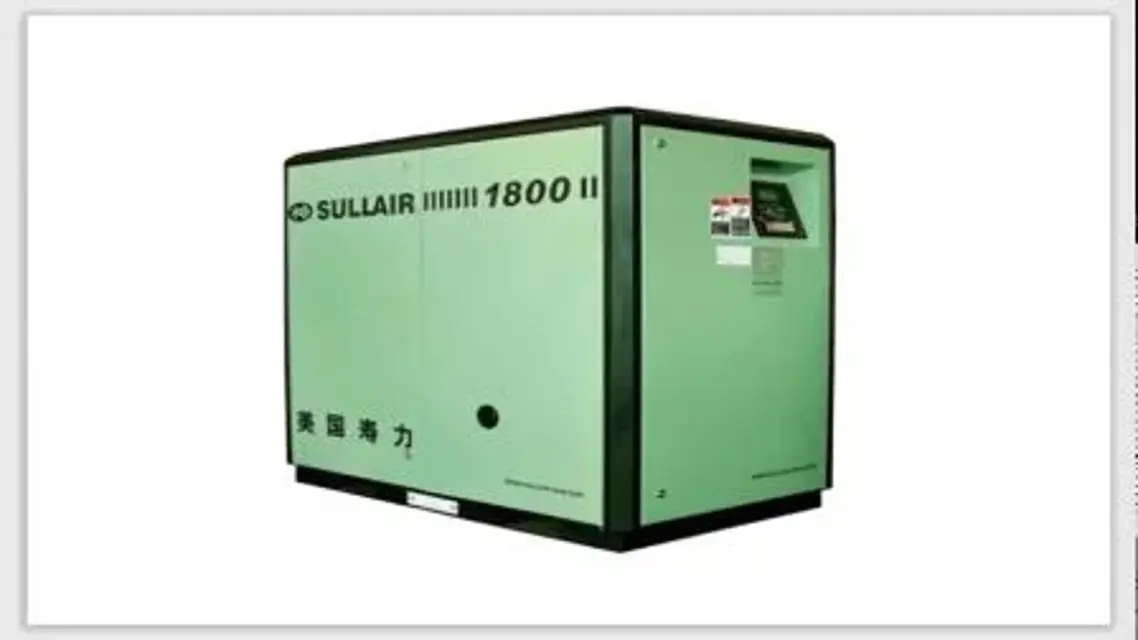
The Sullair Industrial Air Compressor 1812 is a robust and efficient solution for various industrial applications. Known for its reliability and performance, this model is designed to deliver high-quality compressed air while minimizing downtime and maintenance costs. Ideal for demanding environments, it ensures optimal productivity and operational efficiency.
Turn manuals into instant answers
with your AI-powered assistantTurn manuals into instant answers
with your AI-powered assistant
Manual for Sullair Industrial Air Compressor 1812
Complete asset maintenance, one click away
Get instant access to all the maintenance information you need. Empower technicians to perform preventive maintenance with asset packages, ready to use right out of the box.

Documents & Manuals
Find all the essential guides in one place.
 Tensioning Guide
- Belt-diagram
- C-120 pulleys
+ 13 more

Work Order Templates
Pre-built workflows to keep your asset running smoothly.
- Daily Electrical System Inspection
- Replace Roller and Pulley
- Install Engine B-120
+ 29 more

Procedures
Integrate maintenance plans directly into your work orders.
- Motion Industries
- Applied Industrial Technologies
- Electrical Brothers
+ 5 more

Parts
Access the parts list for your equipment in MaintainX.
- Drive Motor
- B2 Rollers
- Tensioning System
+ 40 more
Sullair Industrial Air Compressor 1812
Create an account to install this asset package.
Maintenance Plans for Sullair Industrial Air Compressor Model 1812
Integrate maintenance plans directly into your work orders in MaintainX.
1 Yearly Control Line Strainer Cleaning
Warning: This procedure requires trained personnel with PPE!
Is the strainer screen damaged?
If the screen is damaged, replace the strainer assembly (P/N 241772)
Strainer screen cleaned and reinstalled?
Sign off on the strainer cleaning

2000 Hourly Fluid Filter Replacement
Replace your fluid filter element under any of the following conditions, whichever occurs first:
1. As indicated by the WS Controller.
2. Every fluid change.
Fluid Filter Element Replacement
1. Using a wrench, remove the filter canister.
2. Remove and dispose of filter element. Observe all laws and regulations for filter disposal.
3. Clean gasket seating surface.
4. Apply a light film of fluid to the element seal.
5. Install the element into the filter canister.
Shaft Coupling Maintenance
The compressor unit and motor are rigidly connected via a mounting adapter housing.
This arrangement makes coupling alignment unnecessary.
The coupling is a jaw type in shear. If the elastomeric element requires replacement due to wear or breakage, order replacement element no. 02250152-669, and follow the following steps:
1. Remove the protective grill from the adapter housing.
2. Loosen the retaining screw located on the outer sleeve. Slide the sleeve to one side, exposing the coupling element.
3. Unwrap the coupling element from the coupling jaws.
4. Install the new element by wrapping it around the jaws, engaging the cogs on the element into the jaws.
5. Reinstall the outer sleeve and torque the securing screws to 10 in·lb (1.13 N·m). Install the protective grill.;
Initial 50 Hours Compressor Maintenance
Warning: Ensure the compressor is turned off and cooled down before performing any maintenance tasks.
Clean the return line strainer
Refer to Discharge, Cooling and Lubrication System, Air-Cooled Centrifugal Fan, 50/60Hz 40HP on page 30 for location.
Clean the return line orifice
Sign off on the initial 50 hours compressor maintenance
1 Yearly Separator Replacement
Warning: Relieve all pressure from the separator/sump tank and all compressor lines before starting.
Loosen and remove the six (6) hex head cap screws (8.8 M12 x 40 mm) from the cover plate.
Lift the cover plate from the separator/sump tank.
Remove the separator element.
Inspect the separator/sump tank for rust, dirt, etc.
Reinsert the separator element into the separator/sump tank taking care not to dent the element against the tank opening.
Install a new O-ring in the O-ring groove on the underside of the separator/sump tank cover.
Replace the cover plate, washers and cap screws. Torque to 70 ft·lbs (95 N·m).
Clean the return line strainer before restart.
Parts for Sullair Industrial Air Compressor 1812
Access the parts list for your equipment in MaintainX.
Valve, Check 1/4”-NPT
02250115-272
Motor
MTR_VAR
Strainer, V-Type 300PSIX1/4
241771
Valve, Relief 1/2” 200#
250006-938
Cooler, Air/Oil 2200
02250156-137
Valve, Check 1/4”-NPT
02250115-272
Motor
MTR_VAR
Strainer, V-Type 300PSIX1/4
241771
Valve, Relief 1/2” 200#
250006-938
Cooler, Air/Oil 2200
02250156-137
Valve, Check 1/4”-NPT
02250115-272
Motor
MTR_VAR
Strainer, V-Type 300PSIX1/4
241771
Valve, Relief 1/2” 200#
250006-938
Cooler, Air/Oil 2200
02250156-137
Unlock efficiency
with MaintainX CoPilot
MaintainX CoPilot is your expert colleague, on call 24/7, helping your team find the answers they need to keep equipment running.
Reduce Unplanned Downtime
Ensure your team follows consistent procedures to minimize equipment failures and costly delays.
Maximize Asset Availability
Keep your assets running longer and more reliably, with standardized maintenance workflows from OEM manuals.
Lower Maintenance Costs
Turn any technician into an expert to streamline operations, maintain more assets, and reduce overall costs.
Thousands of companies manage their assets with MaintainX

'%3e%3cpath%20fill='url(%23b)'%20d='M66.008%2080.068c-5.084-.786-9.763-3.834-12.442-8.68a16.942%2016.942%200%200%201-1.87-5.18c1.096.19%202.203.476%203.298.87%206.525%202.333%2010.836%207.68%2011.014%2012.99ZM51.47%2061.576c.488-5.524%203.62-10.716%208.847-13.597a17.132%2017.132%200%200%201%2011.335-1.882c-.798%208.145-7.43%2014.848-16.038%2015.599-1.417.119-2.799.07-4.144-.12Zm28.564-11.478a17.513%2017.513%200%200%201%203.727%204.62c4.608%208.335%201.584%2018.813-6.75%2023.409a16.988%2016.988%200%200%201-4.359%201.679%2019.624%2019.624%200%200%201-3.977-12.776c.346-7.561%204.942-13.931%2011.36-16.932Z'/%3e%3cpath%20fill='%23110F0D'%20fill-rule='evenodd'%20d='M142.831%2048.324h4.977V77.03h-4.977V48.324Zm27.278%2013.002c.322%201.048.453%202.263.453%203.62v12.073h-4.787V66.208c0-.75-.047-1.572-.154-2.143-.453-2.382-1.822-3.572-4.215-3.572-2.31%200-3.882%201.274-4.43%203.476-.143.596-.226%201.405-.226%202.25v10.8h-4.787V56.623h4.477v2.989c1.536-2.5%203.906-3.43%206.371-3.43%203.488%200%206.263%201.68%207.298%205.144Zm24.636%207.323c0%203.882-2.358%206.525-5.763%207.727-1.298.453-2.632.643-4.62.643h-10.169V48.324h9.085c1.691%200%203.156.143%204.049.38%203.465.93%205.727%203.68%205.727%207.335%200%202.441-.81%204.156-2.762%205.644%202.905%201.417%204.453%203.727%204.453%206.966Zm-15.634-8.656h4.584c1.024%200%201.917-.143%202.536-.417%201.215-.548%201.905-1.608%201.905-3.167%200-1.548-.643-2.572-1.845-3.132-.691-.31-1.762-.452-2.763-.452h-4.417v7.168Zm10.716%208.465c0-1.536-.893-3.37-3.227-3.893-.428-.095-1.036-.143-1.571-.143h-5.918v8.085h5.501c.56%200%201.429-.048%201.953-.167%201.94-.453%203.262-1.846%203.262-3.882Zm47.747-11.847-8.097%2020.408h-4.429l-8.109-20.408h5.191l5.192%2014.574%205.108-14.574h5.144Zm-20.218%2010.002c0%20.69-.036%201.262-.155%201.94h-15.943c.631%202.87%202.714%204.728%205.882%204.728%202.131%200%203.607-.882%204.703-2.525h4.87c-1.762%204.144-5.204%206.692-9.657%206.692-6.084%200-10.537-4.858-10.537-10.49%200-6.108%204.524-10.776%2010.335-10.776%206.239%200%2010.442%204.954%2010.502%2010.43Zm-4.763-1.405c-.333-2.846-2.643-4.858-5.691-4.858-2.894%200-5.287%201.929-5.621%204.858h11.312Zm-72.667%203.44c0%204.787-3.287%208.371-9.419%208.371H119.363V64.66c-1.917.274-3.87.69-5.811%201.238l4.537%2011.121h-5.418l-3.596-9.585c-5.144%202.084-10.085%205.216-14.217%209.585h-4.786L101.8%2048.312h4.56l5.68%2013.883a44.112%2044.112%200%200%201%207.323-1.774V48.312h9.084c1.703%200%203.156.143%204.061.393%203.453.929%205.727%203.667%205.727%207.323%200%201.917-.738%204.179-2.81%205.691%203.06%201.56%204.501%204.025%204.501%206.93Zm-15.634-8.667a62.664%2062.664%200%200%201%202.06-.036c1.703.012%203.239.131%204.608.37%201.441-.549%202.357-1.727%202.357-3.537%200-1.941-.881-3.144-2.488-3.667-.548-.18-1.358-.286-2.322-.286h-4.215v7.156Zm-16.55%203.905-3.715-9.894-6.394%2016.502c2.833-2.595%206.263-4.858%2010.109-6.608Zm27.254%204.74c0-2.775-3.131-4.347-8.513-4.418-.715%200-1.441.011-2.191.047v8.252h5.918c2.548%200%204.786-1.37%204.786-3.882Z'%20clip-rule='evenodd'/%3e%3c/g%3e%3cdefs%3e%3clinearGradient%20id='b'%20x1='51.47'%20x2='85.916'%20y1='62.946'%20y2='62.946'%20gradientUnits='userSpaceOnUse'%3e%3cstop%20stop-color='%23CD9F28'/%3e%3cstop%20offset='1'%20stop-color='%23ECD80B'/%3e%3c/linearGradient%3e%3cclipPath%20id='a'%3e%3cpath%20fill='%23fff'%20d='M51.47%2045.728h186.104V80.14H51.47z'/%3e%3c/clipPath%3e%3c/defs%3e%3c/svg%3e)


More from Sullair


Explore Other Assets


© 2026 MaintainX. All rights reserved.