


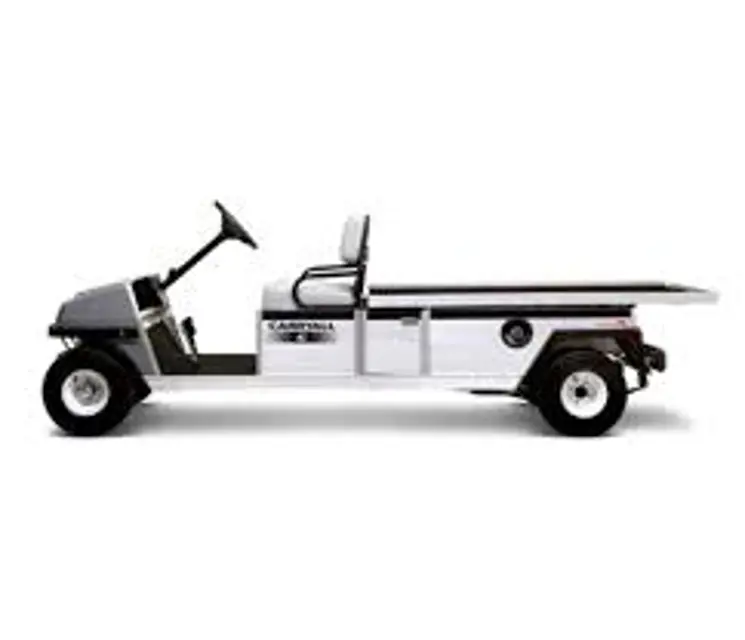
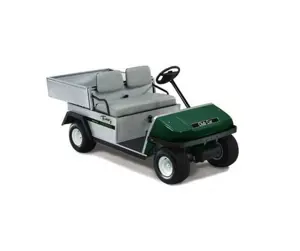
Ingersoll Rand Vehicle Turf 6/Carryall 6
Need answers fast?
Explore the manual using AI.
Turn manuals into instant answers
with your AI-powered assistantTurn manuals into instant answers
with your AI-powered assistant
Manual for Ingersoll Rand Vehicle Turf 6/Carryall 6
Complete asset maintenance, one click away
Get instant access to all the maintenance information you need. Empower technicians to perform preventive maintenance with asset packages, ready to use right out of the box.

Documents & Manuals
Find all the essential guides in one place.
 Tensioning Guide
- Belt-diagram
- C-120 pulleys
+ 13 more

Work Order Templates
Pre-built workflows to keep your asset running smoothly.
- Daily Electrical System Inspection
- Replace Roller and Pulley
- Install Engine B-120
+ 29 more

Procedures
Integrate maintenance plans directly into your work orders.
- Motion Industries
- Applied Industrial Technologies
- Electrical Brothers
+ 5 more

Parts
Access the parts list for your equipment in MaintainX.
- Drive Motor
- B2 Rollers
- Tensioning System
+ 40 more
Ingersoll Rand Vehicle Turf 6/Carryall 6
Create an account to install this asset package.
Maintenance Plans for Ingersoll Rand Vehicle Model Turf 6/Carryall 6
Integrate maintenance plans directly into your work orders in MaintainX.
1 Yearly Vehicle Maintenance
- Electrical Vehicle - By trained technician only
Batteries - If batteries are not performing as expected, see the Batteries section in the appropriate maintenance and service manual.
Safety decals - Check safety decals. Replace if damaged or illegible.
- Gasoline Vehicle - By trained technician only
Engine - Check for leaks around gaskets, fill plugs, etc.
Engine - Inspect, clean and gap spark plug, replace if necessary.
Engine air intake system - Check air filter element, clean or replace if necessary.
Engine air intake system - Check clamps for tightness, check hose for cracks.
General vehicle - Check for loose hardware and tighten if necessary.

Battery Maintenance
To keep batteries in good working condition, follow this maintenance program on a regular basis. Proper battery maintenance is critical not only for good performance, but also for safe operation.
WARNING
• Ensure battery connections are clean and properly tightened.
• Use only 4-gauge (AWG) wires with low-resistance terminals to replace battery wires on IQ Plus models.
• If battery wire terminals are damaged or corroded, replace or clean them as necessary. Failure to do so may cause them to overheat during operation and could result in a fire, property damage, or personal injury.
1. Batteries should be kept clean and free of corrosion. Wash tops and terminals of batteries with a solution of baking soda and water (1 cup baking soda (237 mL) per 1 gallon (3.8 L) of water). Rinse solution off batteries. Do not allow this solution to enter the battery. Be sure terminals are tight. Let the terminals dry and then spray them with Battery Terminal Protector Spray (CC P/N 1014305).
NOTE: Dispose of waste water properly.
2. The electrolyte level in the batteries should be checked weekly (Figure 25). Add water only after charging unless the electrolyte level is below the top of the plates. In this case, add just enough water to cover the plates, charge and then check the level again. Never charge batteries if plates are exposed above electrolyte level. For best battery life, use only distilled water.
CAUTION
200 Hourly / 1 Yearly Vehicle Lubrication
Turn the key switch to the OFF position, then remove the key. Place the Forward/Reverse handle in the neutral POSITION. Chock the front wheels.
Access the engine compartment.
Disconnect battery and spark plug wire(s).
Position a pan designed for oil changes under the front drain plug.
Use a 14 mm socket or wrench to remove the drain plug, turning it counterclockwise, and allow the engine oil to drain into the pan.
WARNING: Do not attempt to change engine oil when the engine is hot or even warm. Engine oil can cause skin burns. Wear safety glasses or approved eye protection when servicing the vehicle. Wear rubber gloves when handling oil drain plug, oil filter, and oil drain pan.
Clean the oil drain plug threads with solvent to remove oil and oil residue. Make sure that the compression washer remains on the drain plug.
Use a 14 mm socket or wrench and replace the front oil drain plug, turning it clockwise, and tighten to 18 ft-lb (24.4 N·m).
Relocate the oil drain pan to a position under the engine oil filter.
Initial 100 Hours Vehicle Lubrication
Warning: Do not attempt to change engine oil when the engine is hot or even warm. Engine oil can cause skin burns. Wear safety glasses or approved eye protection when servicing the vehicle. Wear rubber gloves when handling oil drain plug, oil filter, and oil drain pan.
Turn the key switch to the OFF position, then remove the key. Place the Forward/Reverse handle in the neutral POSITION. Chock the front wheels.
Access the engine compartment.
Disconnect battery and spark plug wire(s).
Position a pan designed for oil changes under the front drain plug.
Use a 14 mm socket or wrench to remove the drain plug, turning it counterclockwise, and allow the engine oil to drain into the pan.
Clean the oil drain plug threads with solvent to remove oil and oil residue. Make sure that the compression washer remains on the drain plug.
Use a 14 mm socket or wrench and replace the front oil drain plug, turning it clockwise, and tighten to 18 ft-lb (24.4 N·m).
Relocate the oil drain pan to a position under the engine oil filter.
50 Hourly / 6 Monthly Vehicle Maintenance
- Electrical Vehicle - By trained technician only
Brake system:
1) Check brake shoes; replace if necessary or adjust as required.
2) Lubricate brake slides per Lubrication Schedule.
3) Check brake cables for damage, replace if necessary.
4) Check brake cable equalizer adjustment, adjust if necessary.
Electrical wiring and connections - Check for tightness and damage.
Forward/Reverse switch - Check condition of contacts and wire connections; make sure connections are tight.
Front wheel alignment and camber - Check and adjust as required.
Parts for Ingersoll Rand Vehicle Turf 6/Carryall 6
Access the parts list for your equipment in MaintainX.
Engine Oil Filter
1016467
Engine Air Filter
1015426
Engine Fuel Filter
102003201
Battery Terminal Protector Spray
1014305
Dry Moly Lube
1012151
Engine Oil Filter
1016467
Engine Air Filter
1015426
Engine Fuel Filter
102003201
Battery Terminal Protector Spray
1014305
Dry Moly Lube
1012151
Engine Oil Filter
1016467
Engine Air Filter
1015426
Engine Fuel Filter
102003201
Battery Terminal Protector Spray
1014305
Dry Moly Lube
1012151
Unlock efficiency
with MaintainX CoPilot
MaintainX CoPilot is your expert colleague, on call 24/7, helping your team find the answers they need to keep equipment running.
Reduce Unplanned Downtime
Ensure your team follows consistent procedures to minimize equipment failures and costly delays.
Maximize Asset Availability
Keep your assets running longer and more reliably, with standardized maintenance workflows from OEM manuals.
Lower Maintenance Costs
Turn any technician into an expert to streamline operations, maintain more assets, and reduce overall costs.
Thousands of companies manage their assets with MaintainX

'%3e%3cpath%20fill='url(%23b)'%20d='M66.008%2080.068c-5.084-.786-9.763-3.834-12.442-8.68a16.942%2016.942%200%200%201-1.87-5.18c1.096.19%202.203.476%203.298.87%206.525%202.333%2010.836%207.68%2011.014%2012.99ZM51.47%2061.576c.488-5.524%203.62-10.716%208.847-13.597a17.132%2017.132%200%200%201%2011.335-1.882c-.798%208.145-7.43%2014.848-16.038%2015.599-1.417.119-2.799.07-4.144-.12Zm28.564-11.478a17.513%2017.513%200%200%201%203.727%204.62c4.608%208.335%201.584%2018.813-6.75%2023.409a16.988%2016.988%200%200%201-4.359%201.679%2019.624%2019.624%200%200%201-3.977-12.776c.346-7.561%204.942-13.931%2011.36-16.932Z'/%3e%3cpath%20fill='%23110F0D'%20fill-rule='evenodd'%20d='M142.831%2048.324h4.977V77.03h-4.977V48.324Zm27.278%2013.002c.322%201.048.453%202.263.453%203.62v12.073h-4.787V66.208c0-.75-.047-1.572-.154-2.143-.453-2.382-1.822-3.572-4.215-3.572-2.31%200-3.882%201.274-4.43%203.476-.143.596-.226%201.405-.226%202.25v10.8h-4.787V56.623h4.477v2.989c1.536-2.5%203.906-3.43%206.371-3.43%203.488%200%206.263%201.68%207.298%205.144Zm24.636%207.323c0%203.882-2.358%206.525-5.763%207.727-1.298.453-2.632.643-4.62.643h-10.169V48.324h9.085c1.691%200%203.156.143%204.049.38%203.465.93%205.727%203.68%205.727%207.335%200%202.441-.81%204.156-2.762%205.644%202.905%201.417%204.453%203.727%204.453%206.966Zm-15.634-8.656h4.584c1.024%200%201.917-.143%202.536-.417%201.215-.548%201.905-1.608%201.905-3.167%200-1.548-.643-2.572-1.845-3.132-.691-.31-1.762-.452-2.763-.452h-4.417v7.168Zm10.716%208.465c0-1.536-.893-3.37-3.227-3.893-.428-.095-1.036-.143-1.571-.143h-5.918v8.085h5.501c.56%200%201.429-.048%201.953-.167%201.94-.453%203.262-1.846%203.262-3.882Zm47.747-11.847-8.097%2020.408h-4.429l-8.109-20.408h5.191l5.192%2014.574%205.108-14.574h5.144Zm-20.218%2010.002c0%20.69-.036%201.262-.155%201.94h-15.943c.631%202.87%202.714%204.728%205.882%204.728%202.131%200%203.607-.882%204.703-2.525h4.87c-1.762%204.144-5.204%206.692-9.657%206.692-6.084%200-10.537-4.858-10.537-10.49%200-6.108%204.524-10.776%2010.335-10.776%206.239%200%2010.442%204.954%2010.502%2010.43Zm-4.763-1.405c-.333-2.846-2.643-4.858-5.691-4.858-2.894%200-5.287%201.929-5.621%204.858h11.312Zm-72.667%203.44c0%204.787-3.287%208.371-9.419%208.371H119.363V64.66c-1.917.274-3.87.69-5.811%201.238l4.537%2011.121h-5.418l-3.596-9.585c-5.144%202.084-10.085%205.216-14.217%209.585h-4.786L101.8%2048.312h4.56l5.68%2013.883a44.112%2044.112%200%200%201%207.323-1.774V48.312h9.084c1.703%200%203.156.143%204.061.393%203.453.929%205.727%203.667%205.727%207.323%200%201.917-.738%204.179-2.81%205.691%203.06%201.56%204.501%204.025%204.501%206.93Zm-15.634-8.667a62.664%2062.664%200%200%201%202.06-.036c1.703.012%203.239.131%204.608.37%201.441-.549%202.357-1.727%202.357-3.537%200-1.941-.881-3.144-2.488-3.667-.548-.18-1.358-.286-2.322-.286h-4.215v7.156Zm-16.55%203.905-3.715-9.894-6.394%2016.502c2.833-2.595%206.263-4.858%2010.109-6.608Zm27.254%204.74c0-2.775-3.131-4.347-8.513-4.418-.715%200-1.441.011-2.191.047v8.252h5.918c2.548%200%204.786-1.37%204.786-3.882Z'%20clip-rule='evenodd'/%3e%3c/g%3e%3cdefs%3e%3clinearGradient%20id='b'%20x1='51.47'%20x2='85.916'%20y1='62.946'%20y2='62.946'%20gradientUnits='userSpaceOnUse'%3e%3cstop%20stop-color='%23CD9F28'/%3e%3cstop%20offset='1'%20stop-color='%23ECD80B'/%3e%3c/linearGradient%3e%3cclipPath%20id='a'%3e%3cpath%20fill='%23fff'%20d='M51.47%2045.728h186.104V80.14H51.47z'/%3e%3c/clipPath%3e%3c/defs%3e%3c/svg%3e)


More from Ingersoll Rand


Explore Other Assets


© 2026 MaintainX. All rights reserved.