


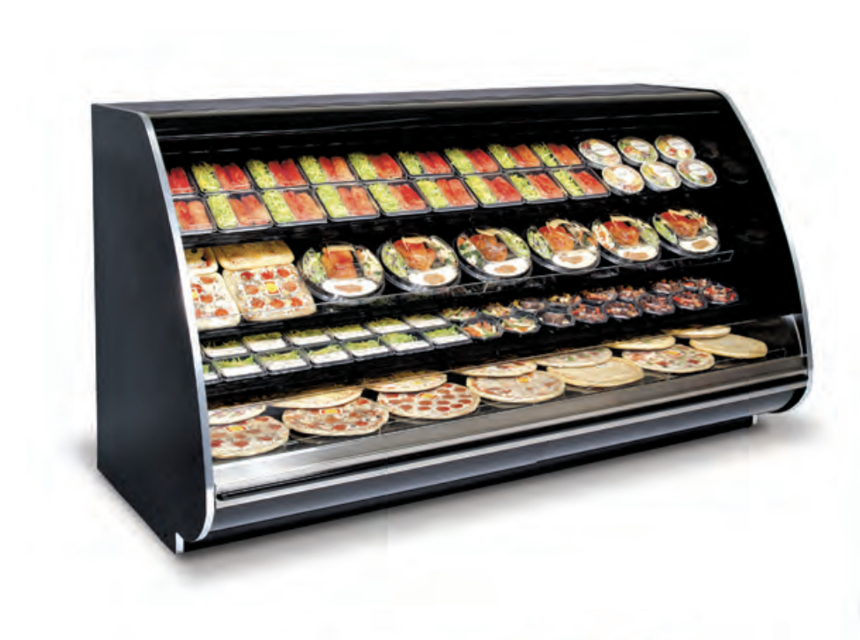
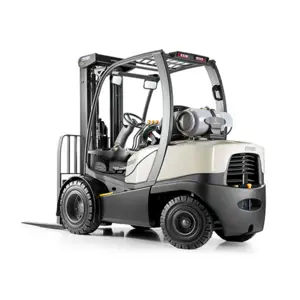
The Hussmann Merchandiser E3 is a high-performance refrigeration unit designed for retail environments. This model offers efficient cooling solutions, ensuring optimal product preservation and visibility. Ideal for supermarkets and convenience stores, the E3 combines advanced technology with reliable performance to meet diverse merchandising needs.
Turn manuals into instant answers
with your AI-powered assistantTurn manuals into instant answers
with your AI-powered assistant
Complete asset maintenance, one click away
Get instant access to all the maintenance information you need. Empower technicians to perform preventive maintenance with asset packages, ready to use right out of the box.

Documents & Manuals
Find all the essential guides in one place.
 Tensioning Guide
- Belt-diagram
- C-120 pulleys
+ 13 more

Work Order Templates
Pre-built workflows to keep your asset running smoothly.
- Daily Electrical System Inspection
- Replace Roller and Pulley
- Install Engine B-120
+ 29 more

Procedures
Integrate maintenance plans directly into your work orders.
- Motion Industries
- Applied Industrial Technologies
- Electrical Brothers
+ 5 more

Parts
Access the parts list for your equipment in MaintainX.
- Drive Motor
- B2 Rollers
- Tensioning System
+ 40 more
Hussmann Merchandiser E3
Create an account to install this asset package.
Maintenance Plans for Hussmann Merchandiser Model E3
Integrate maintenance plans directly into your work orders in MaintainX.
Merchandiser Cleaning
1. Cleaning Coils
* NEVER USE SHARP OBJECTS AROUND COILS. Use a soft brush or vacuum brush to clean debris from coils. Do not puncture coils!
• Do not bend fins. Contact an authorized service technician if a coil is punctured, cracked, or otherwise damaged.
• ICE in or on the coil indicates the refrigeration and defrost cycle is not operating properly.
• Contact an authorized service technician to determine the cause of icing and to make adjustments as necesssary. To maintain product integrity, move all product to a cooler until the unit has returned to normal operating temperatures.
2. Cleaning Bumpers
• Clean bumpers with household spray cleaner.
• To remove marks from a ballpoint pen, use hair spray or dry erase cleaner.
3. Removing Scratchers From Bumper

Led Power Supplies Replacement
The LED power supplies for canopy lights and shelf lights are located at the top of the merchandiser inside the canopy.
Disconnect power to the merchandiser
Remove light bars from the canopy
Remove the screws that secure the lamp panel
Grasp the lamp panel at its front edge and carefully pull down. It will swing freely from its hinged rear edge
Replace power supply and reassemble parts in reverse order
Reconnect the electrical power
Sign off on the LED power supplies replacement
6 Monthly Honeycomb Assemblies Cleaning
• Honeycombs should be cleaned every six months. Dirty honeycombs will cause merchandisers to perform poorly. The honeycombs may be cleaned with a vacuum cleaner. Soap and water may be used if all water is removed from the honeycomb cells before replacing. Be careful not to damage the honeycombs.
1. Using a flat object such as a screw driver, compress the honeycomb and remove it from its retainer.
2. Clean and dry the honeycomb.
3. After cleaning, replace in reverse order.
• The interior back panels may be removed for cleaning and to gain access to the evaporator coils. Remove the rear interior back panels as follows:
1. Disconnect the electrical power to the merchandiser.
2. Remove shelving.
3. Remove the lower panel first: lift the panel up, then pull forward and out.
4. Remove the top panel.
Stainless Steel Surfaces Cleaning
Warning: Always use non-abrasive cleaning materials and polish with grain of the steel.
Used warm water or added a mild detergent to the water and applied with a cloth?
Wiped rails dry after wetting?
Select the type of cleaner used
Did you avoid cleaners containing salts?
Did you avoid using bleach?
Cleaned frequently to avoid build-up of hard, stubborn stains?
Used a stainless steel cleaning solution periodically to minimize scratching and remove stains?
Rinsed and wiped dry immediately after cleaning?
Led Canopy & Shelf Light Bars Replacement
Warning: Ensure power to the merchandiser is turned off and canopy light switch is off before starting.
Check if there are two rows of canopy LED lights.
Check if the front and rear light bars are labeled correctly and have different shaped lenses.
Check if the light bars are attached to the lamp panel using clips.
Enter the part number of the clip used.
Check if the clips are color coded.
Check if the light bars are connected through a two-conductor connector.
Check if the LED power source is 24-volts.
Check if the LED shelf light bars are held in place using a magnetic surface.
Unlock efficiency
with MaintainX CoPilot
MaintainX CoPilot is your expert colleague, on call 24/7, helping your team find the answers they need to keep equipment running.
Reduce Unplanned Downtime
Ensure your team follows consistent procedures to minimize equipment failures and costly delays.
Maximize Asset Availability
Keep your assets running longer and more reliably, with standardized maintenance workflows from OEM manuals.
Lower Maintenance Costs
Turn any technician into an expert to streamline operations, maintain more assets, and reduce overall costs.
Thousands of companies manage their assets with MaintainX

'%3e%3cpath%20fill='url(%23b)'%20d='M66.008%2080.068c-5.084-.786-9.763-3.834-12.442-8.68a16.942%2016.942%200%200%201-1.87-5.18c1.096.19%202.203.476%203.298.87%206.525%202.333%2010.836%207.68%2011.014%2012.99ZM51.47%2061.576c.488-5.524%203.62-10.716%208.847-13.597a17.132%2017.132%200%200%201%2011.335-1.882c-.798%208.145-7.43%2014.848-16.038%2015.599-1.417.119-2.799.07-4.144-.12Zm28.564-11.478a17.513%2017.513%200%200%201%203.727%204.62c4.608%208.335%201.584%2018.813-6.75%2023.409a16.988%2016.988%200%200%201-4.359%201.679%2019.624%2019.624%200%200%201-3.977-12.776c.346-7.561%204.942-13.931%2011.36-16.932Z'/%3e%3cpath%20fill='%23110F0D'%20fill-rule='evenodd'%20d='M142.831%2048.324h4.977V77.03h-4.977V48.324Zm27.278%2013.002c.322%201.048.453%202.263.453%203.62v12.073h-4.787V66.208c0-.75-.047-1.572-.154-2.143-.453-2.382-1.822-3.572-4.215-3.572-2.31%200-3.882%201.274-4.43%203.476-.143.596-.226%201.405-.226%202.25v10.8h-4.787V56.623h4.477v2.989c1.536-2.5%203.906-3.43%206.371-3.43%203.488%200%206.263%201.68%207.298%205.144Zm24.636%207.323c0%203.882-2.358%206.525-5.763%207.727-1.298.453-2.632.643-4.62.643h-10.169V48.324h9.085c1.691%200%203.156.143%204.049.38%203.465.93%205.727%203.68%205.727%207.335%200%202.441-.81%204.156-2.762%205.644%202.905%201.417%204.453%203.727%204.453%206.966Zm-15.634-8.656h4.584c1.024%200%201.917-.143%202.536-.417%201.215-.548%201.905-1.608%201.905-3.167%200-1.548-.643-2.572-1.845-3.132-.691-.31-1.762-.452-2.763-.452h-4.417v7.168Zm10.716%208.465c0-1.536-.893-3.37-3.227-3.893-.428-.095-1.036-.143-1.571-.143h-5.918v8.085h5.501c.56%200%201.429-.048%201.953-.167%201.94-.453%203.262-1.846%203.262-3.882Zm47.747-11.847-8.097%2020.408h-4.429l-8.109-20.408h5.191l5.192%2014.574%205.108-14.574h5.144Zm-20.218%2010.002c0%20.69-.036%201.262-.155%201.94h-15.943c.631%202.87%202.714%204.728%205.882%204.728%202.131%200%203.607-.882%204.703-2.525h4.87c-1.762%204.144-5.204%206.692-9.657%206.692-6.084%200-10.537-4.858-10.537-10.49%200-6.108%204.524-10.776%2010.335-10.776%206.239%200%2010.442%204.954%2010.502%2010.43Zm-4.763-1.405c-.333-2.846-2.643-4.858-5.691-4.858-2.894%200-5.287%201.929-5.621%204.858h11.312Zm-72.667%203.44c0%204.787-3.287%208.371-9.419%208.371H119.363V64.66c-1.917.274-3.87.69-5.811%201.238l4.537%2011.121h-5.418l-3.596-9.585c-5.144%202.084-10.085%205.216-14.217%209.585h-4.786L101.8%2048.312h4.56l5.68%2013.883a44.112%2044.112%200%200%201%207.323-1.774V48.312h9.084c1.703%200%203.156.143%204.061.393%203.453.929%205.727%203.667%205.727%207.323%200%201.917-.738%204.179-2.81%205.691%203.06%201.56%204.501%204.025%204.501%206.93Zm-15.634-8.667a62.664%2062.664%200%200%201%202.06-.036c1.703.012%203.239.131%204.608.37%201.441-.549%202.357-1.727%202.357-3.537%200-1.941-.881-3.144-2.488-3.667-.548-.18-1.358-.286-2.322-.286h-4.215v7.156Zm-16.55%203.905-3.715-9.894-6.394%2016.502c2.833-2.595%206.263-4.858%2010.109-6.608Zm27.254%204.74c0-2.775-3.131-4.347-8.513-4.418-.715%200-1.441.011-2.191.047v8.252h5.918c2.548%200%204.786-1.37%204.786-3.882Z'%20clip-rule='evenodd'/%3e%3c/g%3e%3cdefs%3e%3clinearGradient%20id='b'%20x1='51.47'%20x2='85.916'%20y1='62.946'%20y2='62.946'%20gradientUnits='userSpaceOnUse'%3e%3cstop%20stop-color='%23CD9F28'/%3e%3cstop%20offset='1'%20stop-color='%23ECD80B'/%3e%3c/linearGradient%3e%3cclipPath%20id='a'%3e%3cpath%20fill='%23fff'%20d='M51.47%2045.728h186.104V80.14H51.47z'/%3e%3c/clipPath%3e%3c/defs%3e%3c/svg%3e)


More from Hussmann


Explore Other Assets


© 2026 MaintainX. All rights reserved.