


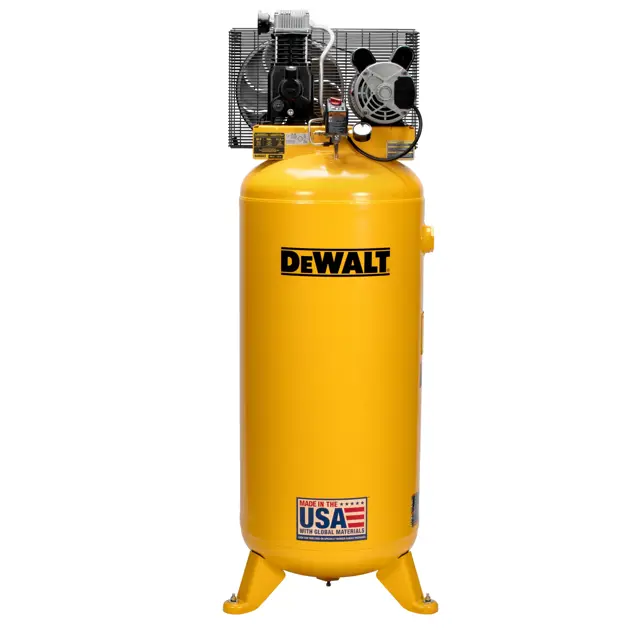
DeWalt Air Compressor DXCM601
Need answers fast?
Explore the manual using AI.
Turn manuals into instant answers
with your AI-powered assistantTurn manuals into instant answers
with your AI-powered assistant
Manual for DeWalt Air Compressor DXCM601
Complete asset maintenance, one click away
Get instant access to all the maintenance information you need. Empower technicians to perform preventive maintenance with asset packages, ready to use right out of the box.

Documents & Manuals
Find all the essential guides in one place.
 Tensioning Guide
- Belt-diagram
- C-120 pulleys
+ 13 more

Work Order Templates
Pre-built workflows to keep your asset running smoothly.
- Daily Electrical System Inspection
- Replace Roller and Pulley
- Install Engine B-120
+ 29 more

Procedures
Integrate maintenance plans directly into your work orders.
- Motion Industries
- Applied Industrial Technologies
- Electrical Brothers
+ 5 more

Parts
Access the parts list for your equipment in MaintainX.
- Drive Motor
- B2 Rollers
- Tensioning System
+ 40 more
DeWalt Air Compressor DXCM601
Create an account to install this asset package.
Maintenance Plans for DeWalt Air Compressor Model DXCM601
Integrate maintenance plans directly into your work orders in MaintainX.
1 Weekly Air Compressor Maintenance
WARNING: Hot surfaces. Risk of burn. Tubes, pump head, and surrounding parts are very hot, do not touch. Allow compressor to cool prior to servicing.
Is the Auto/Off switch (B) in the OFF (O) Position?
Has the unit cooled down?
A dirty air filter will not allow the compressor to operate at full capacity. Keep the air filter clean at all times.
Is the air filter cover (S) removed?
Check the filter element (T)
Is the element placed into housing and the air filter cover reattached?
CAUTION: Risk of unsafe operation. Do not operate without air filter.
Is the compressor exterior clean?

Air Compressor Maintenance
WARNING: This unit starts automatically. ALWAYS shut off and unplug the compressor, and bleed all pressure from the system before servicing the compressor, and when the compressor is not in use.
Do not use the unit with the shrouds or belt guard removed. Serious injury could occur from contact with moving parts. Hot surfaces. Risk of burn. Pump head, and surrounding parts are very hot, do not touch. Allow compressor to cool prior to servicing.
Set the Auto/Off lever to “OFF (O)”, unplug the unit, and relieve all air pressure from the air tank.
Remove the outer belt guard (Z).
Mark motor position on saddle.
Loosen the motor mounting screws and slide the motor toward the air compressor pump.
Remove the belt and replace with a new one.
See the Adjusting Belt Tension before tightening motor mounting screws.
The air compressor pump head bolts should be kept properly torqued. Check the torques of the head bolts after the first five hours of operation. Torque to 15-20 ft.‑lbs. (20.3-27.1 Nm).
1 Monthly Drive Belt Tension Check
Slide motor into original position, line the motor up with the mark made earlier on saddle.
Tighten two outside motor mounting screws enough to hold the motor in place for checking pulley and flywheel alignment.
The belt should deflect 1/4\ (6.5 mm) at midway between the pulley and the flywheel when a 10 pound (4.5 kg.) weight is applied at the midway point."
When proper belt tension is achieved, tighten motor mounting screws. Torque to 20-25 ft-lbs (27.1-33.9 Nm)
NOTE: Once the motor pulley has been moved from its factory set location, the grooves of the flywheel and pulley must be aligned to within 1/16\ (1.6 mm) to prevent excessive belt wear."
Verify the alignment by performing the following Motor Pulley/Flywheel - Alignment.
Sign off on the belt tension check
1 Daily Air Compressor Maintenance
WARNING: Hot surfaces. Risk of burn. Tubes, pump head, and surrounding parts are very hot, do not touch. Allow compressor to cool prior to servicing.
WARNING: Risk of bursting. If the safety valve does not work properly, over-pressurization may occur, causing air tank rupture or an explosion.
WARNING: Risk from flying objects. Always wear certified safety equipment: ANSI Z87.1 eye protection (CAN/CSA Z94.3) with side shields.
WARNING: Risk from noise. Use ear protection (ANSI S12.6 (S3.19) as air flow noise is loud when draining.
Safety valve operates freely?
WARNING: Risk of unsafe operation. Air tanks contain high pressure air. Keep face and other body parts away from outlet of drain. Use eye protection [ANSI Z87.1 (CAN/CSA Z94.3)] when draining as debris can be kicked up into face.
WARNING: Risk from noise. Use ear protection (ANSI S12.6 (S3.19) as air flow noise is loud when draining.
NOTE: All compressed air systems generate condensation that accumulates in any drain point (e.g., tanks, filter, aftercoolers, dryers). This condensate contains lubricating oil and/or substances which may be regulated and must be disposed of in accordance with local, state, and federal laws and regulations.
Air tank drained?
1 Yearly / 100 Hourly Air Compressor Maintenance
WARNING: Drain tank to release air pressure before removing the oil fill plug or oil drain plug.
Remove the oil fill plug (Y)
Remove the oil drain plug (W) and drain oil into a suitable container
Replace the oil drain plug (W) and tighten securely
Slowly add compressor oil until it reaches the middle of the sight glass (X)
CAUTION: Overfilling with oil will cause premature compressor failure. Do not overfill.
Replace oil fill plug (Y) and tighten securely
NOTE: Once the motor pulley has been moved from its factory set location, the grooves of the flywheel and pulley must be aligned to within 1/16" (1.6 mm) to prevent excessive belt wear.
Set the Auto/Off lever to “OFF (O)”, unplug the unit, and relieve all air pressure from the air tank
Unlock efficiency
with MaintainX CoPilot
MaintainX CoPilot is your expert colleague, on call 24/7, helping your team find the answers they need to keep equipment running.
Reduce Unplanned Downtime
Ensure your team follows consistent procedures to minimize equipment failures and costly delays.
Maximize Asset Availability
Keep your assets running longer and more reliably, with standardized maintenance workflows from OEM manuals.
Lower Maintenance Costs
Turn any technician into an expert to streamline operations, maintain more assets, and reduce overall costs.
Thousands of companies manage their assets with MaintainX

'%3e%3cpath%20fill='url(%23b)'%20d='M66.008%2080.068c-5.084-.786-9.763-3.834-12.442-8.68a16.942%2016.942%200%200%201-1.87-5.18c1.096.19%202.203.476%203.298.87%206.525%202.333%2010.836%207.68%2011.014%2012.99ZM51.47%2061.576c.488-5.524%203.62-10.716%208.847-13.597a17.132%2017.132%200%200%201%2011.335-1.882c-.798%208.145-7.43%2014.848-16.038%2015.599-1.417.119-2.799.07-4.144-.12Zm28.564-11.478a17.513%2017.513%200%200%201%203.727%204.62c4.608%208.335%201.584%2018.813-6.75%2023.409a16.988%2016.988%200%200%201-4.359%201.679%2019.624%2019.624%200%200%201-3.977-12.776c.346-7.561%204.942-13.931%2011.36-16.932Z'/%3e%3cpath%20fill='%23110F0D'%20fill-rule='evenodd'%20d='M142.831%2048.324h4.977V77.03h-4.977V48.324Zm27.278%2013.002c.322%201.048.453%202.263.453%203.62v12.073h-4.787V66.208c0-.75-.047-1.572-.154-2.143-.453-2.382-1.822-3.572-4.215-3.572-2.31%200-3.882%201.274-4.43%203.476-.143.596-.226%201.405-.226%202.25v10.8h-4.787V56.623h4.477v2.989c1.536-2.5%203.906-3.43%206.371-3.43%203.488%200%206.263%201.68%207.298%205.144Zm24.636%207.323c0%203.882-2.358%206.525-5.763%207.727-1.298.453-2.632.643-4.62.643h-10.169V48.324h9.085c1.691%200%203.156.143%204.049.38%203.465.93%205.727%203.68%205.727%207.335%200%202.441-.81%204.156-2.762%205.644%202.905%201.417%204.453%203.727%204.453%206.966Zm-15.634-8.656h4.584c1.024%200%201.917-.143%202.536-.417%201.215-.548%201.905-1.608%201.905-3.167%200-1.548-.643-2.572-1.845-3.132-.691-.31-1.762-.452-2.763-.452h-4.417v7.168Zm10.716%208.465c0-1.536-.893-3.37-3.227-3.893-.428-.095-1.036-.143-1.571-.143h-5.918v8.085h5.501c.56%200%201.429-.048%201.953-.167%201.94-.453%203.262-1.846%203.262-3.882Zm47.747-11.847-8.097%2020.408h-4.429l-8.109-20.408h5.191l5.192%2014.574%205.108-14.574h5.144Zm-20.218%2010.002c0%20.69-.036%201.262-.155%201.94h-15.943c.631%202.87%202.714%204.728%205.882%204.728%202.131%200%203.607-.882%204.703-2.525h4.87c-1.762%204.144-5.204%206.692-9.657%206.692-6.084%200-10.537-4.858-10.537-10.49%200-6.108%204.524-10.776%2010.335-10.776%206.239%200%2010.442%204.954%2010.502%2010.43Zm-4.763-1.405c-.333-2.846-2.643-4.858-5.691-4.858-2.894%200-5.287%201.929-5.621%204.858h11.312Zm-72.667%203.44c0%204.787-3.287%208.371-9.419%208.371H119.363V64.66c-1.917.274-3.87.69-5.811%201.238l4.537%2011.121h-5.418l-3.596-9.585c-5.144%202.084-10.085%205.216-14.217%209.585h-4.786L101.8%2048.312h4.56l5.68%2013.883a44.112%2044.112%200%200%201%207.323-1.774V48.312h9.084c1.703%200%203.156.143%204.061.393%203.453.929%205.727%203.667%205.727%207.323%200%201.917-.738%204.179-2.81%205.691%203.06%201.56%204.501%204.025%204.501%206.93Zm-15.634-8.667a62.664%2062.664%200%200%201%202.06-.036c1.703.012%203.239.131%204.608.37%201.441-.549%202.357-1.727%202.357-3.537%200-1.941-.881-3.144-2.488-3.667-.548-.18-1.358-.286-2.322-.286h-4.215v7.156Zm-16.55%203.905-3.715-9.894-6.394%2016.502c2.833-2.595%206.263-4.858%2010.109-6.608Zm27.254%204.74c0-2.775-3.131-4.347-8.513-4.418-.715%200-1.441.011-2.191.047v8.252h5.918c2.548%200%204.786-1.37%204.786-3.882Z'%20clip-rule='evenodd'/%3e%3c/g%3e%3cdefs%3e%3clinearGradient%20id='b'%20x1='51.47'%20x2='85.916'%20y1='62.946'%20y2='62.946'%20gradientUnits='userSpaceOnUse'%3e%3cstop%20stop-color='%23CD9F28'/%3e%3cstop%20offset='1'%20stop-color='%23ECD80B'/%3e%3c/linearGradient%3e%3cclipPath%20id='a'%3e%3cpath%20fill='%23fff'%20d='M51.47%2045.728h186.104V80.14H51.47z'/%3e%3c/clipPath%3e%3c/defs%3e%3c/svg%3e)


More from DeWalt
Explore Other Assets


© 2026 MaintainX. All rights reserved.