


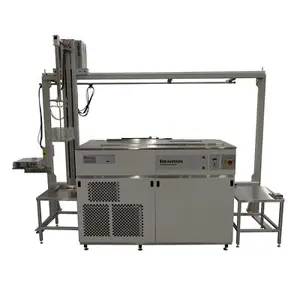
Branson Ultrasonics Ultrasonic Vapor Degreaser B3550R
Need answers fast?
Explore the manual using AI.

Turn manuals into instant answers
with your AI-powered assistantTurn manuals into instant answers
with your AI-powered assistant
Manual for Branson Ultrasonics Ultrasonic Vapor Degreaser B3550R
Complete asset maintenance, one click away
Get instant access to all the maintenance information you need. Empower technicians to perform preventive maintenance with asset packages, ready to use right out of the box.

Documents & Manuals
Find all the essential guides in one place.
 Tensioning Guide
- Belt-diagram
- C-120 pulleys
+ 13 more

Work Order Templates
Pre-built workflows to keep your asset running smoothly.
- Daily Electrical System Inspection
- Replace Roller and Pulley
- Install Engine B-120
+ 29 more

Procedures
Integrate maintenance plans directly into your work orders.
- Motion Industries
- Applied Industrial Technologies
- Electrical Brothers
+ 5 more

Parts
Access the parts list for your equipment in MaintainX.
- Drive Motor
- B2 Rollers
- Tensioning System
+ 40 more
Branson Ultrasonics Ultrasonic Vapor Degreaser B3550R
Create an account to install this asset package.
Maintenance Plans for Branson Ultrasonics Ultrasonic Vapor Degreaser Model B3550R
Integrate maintenance plans directly into your work orders in MaintainX.
Dessicant Replacement
Desiccant is used with solvents containing alcohol or other additives that are soluble in water.
Consult the solvent manufacturer to determine if your solvent requires desiccant.
Desiccant must be tested routinely and changed when necessary. It may be regenerated and reused; check with the desiccant manufacturer for regeneration instructions.
5.5.1 Testing Frequency
The rate of desiccant exhaustion is determined by the amount of water introduced by the parts, the ambient humidity and the temperature of the condensing and cold trap coils.
Note: For maximum solvent and equipment life, do not allow the desiccant to become fully loaded with water. Change the desiccant before the desiccant test shows positive. Use the following guidelines to determine testing frequency for your local conditions. The guidelines also detail how to obtain the maximum life from the desiccant.
• Each working shift, test the solvent leaving the water separator until you can establish a baseline. For example: After testing the desiccant twice per shift and changing the desiccant three times, you may determine that the SHORTEST desiccant life is four days and the LONGEST desiccant life is six days.
• Revise your testing schedule. Continuing the example above: Test on the third day and then daily until the desiccant needs to be changed.
• If you observe free water in the desiccant chamber, then change the desiccant regardless of the test results.

1 Daily Separator Cleaning
Draining Water From Water Separator
Is the desiccator bag removed?
Open the water separator water drain
Is the water drain open?
Collect the discharge into a container
Is the discharge collected?
Close the drain when the flow stops
Is the drain closed?
Dispose of the residue in accordance with local regulations
6 Monthly Pump Lubrication
Lubricate pump motors with machine oil every 6 months.
The vertical air cylinder may occasionally require a few drops of mineral oil to lubricate the seals. Add lubricant if the lift lowers from an intermediate held position.
An air lubricator may be used on the incoming air supply. Oil residues will be discharged from the solenoid valve exhaust ports. The mufflers may be replaced by hoses exhausting to an oil trap to prevent oil accumulations or oil mists within the degreaser enclosure.
The cylinder may be lubricated directly:
• Raise the lift to the fully up position
• Remove the top air hose
• Remove the top exhaust flow control valve
• Place one or two squirts from an oil can into the port
• Replace the flow control valve and air hose
Degreaser Inspection
Warning: Ensure to wear appropriate safety gear during the inspection.
Check for loosening of plumbing connections
Upload a photo of the plumbing connections
Check for dampness or cold spots caused by evaporative cooling
Upload a photo of the areas checked for dampness or cold spots
Did you add dyes to the solvent for leak detection?
Note: These dyes may be difficult to remove when the degreaser is later used for cleaning.
Enter the CPN of the electronic leak detector used
Pass the leak detector’s sensor around all plumbing joints and tank seams
Controller Replacement
Warning: Disconnect the degreaser from electrical power before starting the procedure.
Degreaser disconnected from electrical power?
To replace the control or relay board
All wires transferred to the new board?
Mounting screws removed?
New board replaced?
Screws reinstalled?
To replace the control board
Voltage Switch (SW1) placed in the 230V position?
Parts for Branson Ultrasonics Ultrasonic Vapor Degreaser B3550R
Access the parts list for your equipment in MaintainX.
Electronic Leak Detector
CPN-068-005
Filter Bag
CPN-163-018
O-ring Teflon Enc Silicone
CPN-142-210
Dessicator Test Kit
000-870-901
O-ring Teflon Cleanout
CPN-087-015
Electronic Leak Detector
CPN-068-005
Filter Bag
CPN-163-018
O-ring Teflon Enc Silicone
CPN-142-210
Dessicator Test Kit
000-870-901
O-ring Teflon Cleanout
CPN-087-015
Electronic Leak Detector
CPN-068-005
Filter Bag
CPN-163-018
O-ring Teflon Enc Silicone
CPN-142-210
Dessicator Test Kit
000-870-901
O-ring Teflon Cleanout
CPN-087-015
Unlock efficiency
with MaintainX CoPilot
MaintainX CoPilot is your expert colleague, on call 24/7, helping your team find the answers they need to keep equipment running.
Reduce Unplanned Downtime
Ensure your team follows consistent procedures to minimize equipment failures and costly delays.
Maximize Asset Availability
Keep your assets running longer and more reliably, with standardized maintenance workflows from OEM manuals.
Lower Maintenance Costs
Turn any technician into an expert to streamline operations, maintain more assets, and reduce overall costs.
Thousands of companies manage their assets with MaintainX

'%3e%3cpath%20fill='url(%23b)'%20d='M66.008%2080.068c-5.084-.786-9.763-3.834-12.442-8.68a16.942%2016.942%200%200%201-1.87-5.18c1.096.19%202.203.476%203.298.87%206.525%202.333%2010.836%207.68%2011.014%2012.99ZM51.47%2061.576c.488-5.524%203.62-10.716%208.847-13.597a17.132%2017.132%200%200%201%2011.335-1.882c-.798%208.145-7.43%2014.848-16.038%2015.599-1.417.119-2.799.07-4.144-.12Zm28.564-11.478a17.513%2017.513%200%200%201%203.727%204.62c4.608%208.335%201.584%2018.813-6.75%2023.409a16.988%2016.988%200%200%201-4.359%201.679%2019.624%2019.624%200%200%201-3.977-12.776c.346-7.561%204.942-13.931%2011.36-16.932Z'/%3e%3cpath%20fill='%23110F0D'%20fill-rule='evenodd'%20d='M142.831%2048.324h4.977V77.03h-4.977V48.324Zm27.278%2013.002c.322%201.048.453%202.263.453%203.62v12.073h-4.787V66.208c0-.75-.047-1.572-.154-2.143-.453-2.382-1.822-3.572-4.215-3.572-2.31%200-3.882%201.274-4.43%203.476-.143.596-.226%201.405-.226%202.25v10.8h-4.787V56.623h4.477v2.989c1.536-2.5%203.906-3.43%206.371-3.43%203.488%200%206.263%201.68%207.298%205.144Zm24.636%207.323c0%203.882-2.358%206.525-5.763%207.727-1.298.453-2.632.643-4.62.643h-10.169V48.324h9.085c1.691%200%203.156.143%204.049.38%203.465.93%205.727%203.68%205.727%207.335%200%202.441-.81%204.156-2.762%205.644%202.905%201.417%204.453%203.727%204.453%206.966Zm-15.634-8.656h4.584c1.024%200%201.917-.143%202.536-.417%201.215-.548%201.905-1.608%201.905-3.167%200-1.548-.643-2.572-1.845-3.132-.691-.31-1.762-.452-2.763-.452h-4.417v7.168Zm10.716%208.465c0-1.536-.893-3.37-3.227-3.893-.428-.095-1.036-.143-1.571-.143h-5.918v8.085h5.501c.56%200%201.429-.048%201.953-.167%201.94-.453%203.262-1.846%203.262-3.882Zm47.747-11.847-8.097%2020.408h-4.429l-8.109-20.408h5.191l5.192%2014.574%205.108-14.574h5.144Zm-20.218%2010.002c0%20.69-.036%201.262-.155%201.94h-15.943c.631%202.87%202.714%204.728%205.882%204.728%202.131%200%203.607-.882%204.703-2.525h4.87c-1.762%204.144-5.204%206.692-9.657%206.692-6.084%200-10.537-4.858-10.537-10.49%200-6.108%204.524-10.776%2010.335-10.776%206.239%200%2010.442%204.954%2010.502%2010.43Zm-4.763-1.405c-.333-2.846-2.643-4.858-5.691-4.858-2.894%200-5.287%201.929-5.621%204.858h11.312Zm-72.667%203.44c0%204.787-3.287%208.371-9.419%208.371H119.363V64.66c-1.917.274-3.87.69-5.811%201.238l4.537%2011.121h-5.418l-3.596-9.585c-5.144%202.084-10.085%205.216-14.217%209.585h-4.786L101.8%2048.312h4.56l5.68%2013.883a44.112%2044.112%200%200%201%207.323-1.774V48.312h9.084c1.703%200%203.156.143%204.061.393%203.453.929%205.727%203.667%205.727%207.323%200%201.917-.738%204.179-2.81%205.691%203.06%201.56%204.501%204.025%204.501%206.93Zm-15.634-8.667a62.664%2062.664%200%200%201%202.06-.036c1.703.012%203.239.131%204.608.37%201.441-.549%202.357-1.727%202.357-3.537%200-1.941-.881-3.144-2.488-3.667-.548-.18-1.358-.286-2.322-.286h-4.215v7.156Zm-16.55%203.905-3.715-9.894-6.394%2016.502c2.833-2.595%206.263-4.858%2010.109-6.608Zm27.254%204.74c0-2.775-3.131-4.347-8.513-4.418-.715%200-1.441.011-2.191.047v8.252h5.918c2.548%200%204.786-1.37%204.786-3.882Z'%20clip-rule='evenodd'/%3e%3c/g%3e%3cdefs%3e%3clinearGradient%20id='b'%20x1='51.47'%20x2='85.916'%20y1='62.946'%20y2='62.946'%20gradientUnits='userSpaceOnUse'%3e%3cstop%20stop-color='%23CD9F28'/%3e%3cstop%20offset='1'%20stop-color='%23ECD80B'/%3e%3c/linearGradient%3e%3cclipPath%20id='a'%3e%3cpath%20fill='%23fff'%20d='M51.47%2045.728h186.104V80.14H51.47z'/%3e%3c/clipPath%3e%3c/defs%3e%3c/svg%3e)


More from Branson Ultrasonics


Explore Other Assets


© 2026 MaintainX. All rights reserved.