


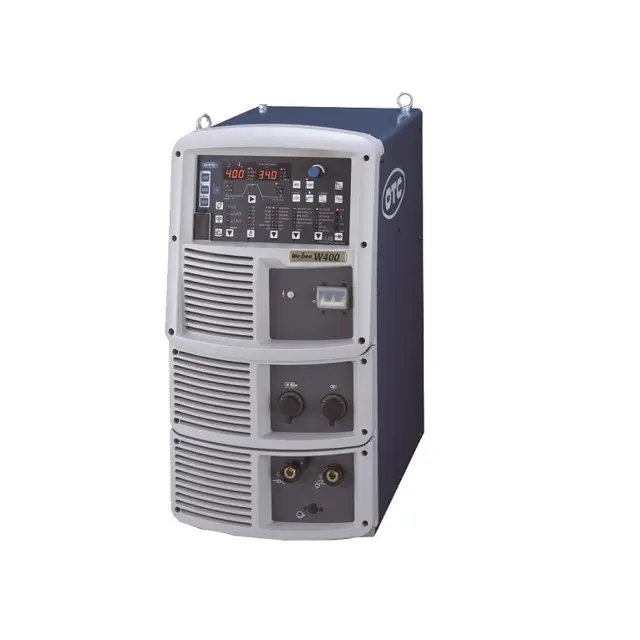
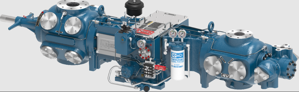
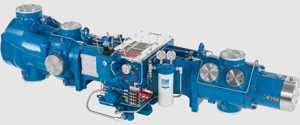
Daihen Inverter OTC WEE BEE 400
Need answers fast?
Explore the manual using AI.
Turn manuals into instant answers
with your AI-powered assistantTurn manuals into instant answers
with your AI-powered assistant
Manual for Daihen Inverter OTC WEE BEE 400
Complete asset maintenance, one click away
Get instant access to all the maintenance information you need. Empower technicians to perform preventive maintenance with asset packages, ready to use right out of the box.

Documents & Manuals
Find all the essential guides in one place.
 Tensioning Guide
- Belt-diagram
- C-120 pulleys
+ 13 more

Work Order Templates
Pre-built workflows to keep your asset running smoothly.
- Daily Electrical System Inspection
- Replace Roller and Pulley
- Install Engine B-120
+ 29 more

Procedures
Integrate maintenance plans directly into your work orders.
- Motion Industries
- Applied Industrial Technologies
- Electrical Brothers
+ 5 more

Parts
Access the parts list for your equipment in MaintainX.
- Drive Motor
- B2 Rollers
- Tensioning System
+ 40 more
Daihen Inverter OTC WEE BEE 400
Create an account to install this asset package.
Maintenance Plans for Daihen Inverter Model OTC WEE BEE 400
Integrate maintenance plans directly into your work orders in MaintainX.
5 Yearly Inverter Parts Replacement
Warning: This procedure requires trained personnel with PPE!
CAUTION: Do not turn on the power switch of welding power source when the connector of printed circuit board is disconnected.
Printed circuit board PCB7 present?
Is the number printed on the printed circuit board the same as the number indicated on the connector?
Is the connector inserted firmly to the end?
Choose the type of service done
Issues found during the replacement
Sign off on the inverter parts replacement

3 Monthly Inverter Inspection
This section explains the periodical inspection of the welding power source. Check the items in the table below every three (3) to six (6) months.
1) Grounding wire and Each cables (Primary power cable for facility side, cables for base metal side/torch side, torch cable, voltage detection cable, etc.)
2) Welding torch
• Check that there is no deterioration, damage or other abnormality in consumable parts of the welding torch. Abnormality in consumable parts can prevent smooth wire introduction.
3) Cleaning inside the welding power source
• Blow with dry compressed air from the front slit (ventilation hole) to the back side to remove dust inside the welding power source.
Dust accumulating on the heat sink of transistor and rectifier may prevent heat radiation, adversely affecting the transistor. Also, accumulation of dusts between the winding of transducer could deteriorate insulation.
4) Cleaning inside the welding power source (When an abnormal temperature error code is displayed)
• Dust accumulating on the fin or winding of heat sink can cause insufficient heat radiation.
Inverter Maintenance
WARNING: The customer MUST NOT perform the withstand voltage test. If necessary, contact your dealer.
Insulation resistance measurement should be conducted by qualified persons or persons familiar with the welding machine.
CAUTION: Conducting insulation resistance measurement by customer may result in injury or equipment failure.
When measuring insulation resistance and testing withstand voltage, follow the steps below.
Disconnect the input power cable and grounding cable from the disconnect switch and short-circuit the input terminal.
Short-circuit the positive (+) and the negative ( - ) sides of the output terminal.
Unground all the case grounding cables (line No.80, total of 6 positions) and insulate them with insulation tape.
For DR1, short-circuit the AC side and positive (+) output side and the AC side and negative ( - ) output side respectively.
For DR2, short-circuit between the anode and the cathode.
1 Daily Inverter Inspection
Warning: This inspection requires trained personnel with PPE!
Ensure to follow the instructions below to prevent electric shock or fire caused by the damage on polycarbonate resin.
When cleaning the welding power source, do not expose the cooling fan directly to compressed air.
When using a vacuum cleaner to remove powder dust accumulating on the welding power source, do not vacuum between the rotating part of cooling fan and the main body.
If there is any abnormality in the plastic parts such as front and rear panels, immediately stop the use and contact your dealer.
Perform periodical maintenance and repair damaged parts if any before use.
Maintenance, inspection and repair should be performed by qualified persons or persons familiar with the Welding power source.
Before starting maintenance and inspection, make sure to cut the input power with the disconnect switch in the box connected with the welding power source and wait three minutes or more.
During maintenance and inspection, take an appropriate measure to prevent turning on the input power.
Parts for Daihen Inverter OTC WEE BEE 400
Access the parts list for your equipment in MaintainX.
Surge Absorber TND14V-911KB0LLAA0
6100-052
Carbon Resistor RD20S 1KΩJ
100-0234
Metal Film Resistor RPM200Z 5Ω
100-1430
Thermistor EC2F103A2-40113
100-0662
Winding Resistor FH50 471J/RO
100-1432
Surge Absorber TND14V-911KB0LLAA0
6100-052
Carbon Resistor RD20S 1KΩJ
100-0234
Metal Film Resistor RPM200Z 5Ω
100-1430
Thermistor EC2F103A2-40113
100-0662
Winding Resistor FH50 471J/RO
100-1432
Surge Absorber TND14V-911KB0LLAA0
6100-052
Carbon Resistor RD20S 1KΩJ
100-0234
Metal Film Resistor RPM200Z 5Ω
100-1430
Thermistor EC2F103A2-40113
100-0662
Winding Resistor FH50 471J/RO
100-1432
Unlock efficiency
with MaintainX CoPilot
MaintainX CoPilot is your expert colleague, on call 24/7, helping your team find the answers they need to keep equipment running.
Reduce Unplanned Downtime
Ensure your team follows consistent procedures to minimize equipment failures and costly delays.
Maximize Asset Availability
Keep your assets running longer and more reliably, with standardized maintenance workflows from OEM manuals.
Lower Maintenance Costs
Turn any technician into an expert to streamline operations, maintain more assets, and reduce overall costs.
Thousands of companies manage their assets with MaintainX

'%3e%3cpath%20fill='url(%23b)'%20d='M66.008%2080.068c-5.084-.786-9.763-3.834-12.442-8.68a16.942%2016.942%200%200%201-1.87-5.18c1.096.19%202.203.476%203.298.87%206.525%202.333%2010.836%207.68%2011.014%2012.99ZM51.47%2061.576c.488-5.524%203.62-10.716%208.847-13.597a17.132%2017.132%200%200%201%2011.335-1.882c-.798%208.145-7.43%2014.848-16.038%2015.599-1.417.119-2.799.07-4.144-.12Zm28.564-11.478a17.513%2017.513%200%200%201%203.727%204.62c4.608%208.335%201.584%2018.813-6.75%2023.409a16.988%2016.988%200%200%201-4.359%201.679%2019.624%2019.624%200%200%201-3.977-12.776c.346-7.561%204.942-13.931%2011.36-16.932Z'/%3e%3cpath%20fill='%23110F0D'%20fill-rule='evenodd'%20d='M142.831%2048.324h4.977V77.03h-4.977V48.324Zm27.278%2013.002c.322%201.048.453%202.263.453%203.62v12.073h-4.787V66.208c0-.75-.047-1.572-.154-2.143-.453-2.382-1.822-3.572-4.215-3.572-2.31%200-3.882%201.274-4.43%203.476-.143.596-.226%201.405-.226%202.25v10.8h-4.787V56.623h4.477v2.989c1.536-2.5%203.906-3.43%206.371-3.43%203.488%200%206.263%201.68%207.298%205.144Zm24.636%207.323c0%203.882-2.358%206.525-5.763%207.727-1.298.453-2.632.643-4.62.643h-10.169V48.324h9.085c1.691%200%203.156.143%204.049.38%203.465.93%205.727%203.68%205.727%207.335%200%202.441-.81%204.156-2.762%205.644%202.905%201.417%204.453%203.727%204.453%206.966Zm-15.634-8.656h4.584c1.024%200%201.917-.143%202.536-.417%201.215-.548%201.905-1.608%201.905-3.167%200-1.548-.643-2.572-1.845-3.132-.691-.31-1.762-.452-2.763-.452h-4.417v7.168Zm10.716%208.465c0-1.536-.893-3.37-3.227-3.893-.428-.095-1.036-.143-1.571-.143h-5.918v8.085h5.501c.56%200%201.429-.048%201.953-.167%201.94-.453%203.262-1.846%203.262-3.882Zm47.747-11.847-8.097%2020.408h-4.429l-8.109-20.408h5.191l5.192%2014.574%205.108-14.574h5.144Zm-20.218%2010.002c0%20.69-.036%201.262-.155%201.94h-15.943c.631%202.87%202.714%204.728%205.882%204.728%202.131%200%203.607-.882%204.703-2.525h4.87c-1.762%204.144-5.204%206.692-9.657%206.692-6.084%200-10.537-4.858-10.537-10.49%200-6.108%204.524-10.776%2010.335-10.776%206.239%200%2010.442%204.954%2010.502%2010.43Zm-4.763-1.405c-.333-2.846-2.643-4.858-5.691-4.858-2.894%200-5.287%201.929-5.621%204.858h11.312Zm-72.667%203.44c0%204.787-3.287%208.371-9.419%208.371H119.363V64.66c-1.917.274-3.87.69-5.811%201.238l4.537%2011.121h-5.418l-3.596-9.585c-5.144%202.084-10.085%205.216-14.217%209.585h-4.786L101.8%2048.312h4.56l5.68%2013.883a44.112%2044.112%200%200%201%207.323-1.774V48.312h9.084c1.703%200%203.156.143%204.061.393%203.453.929%205.727%203.667%205.727%207.323%200%201.917-.738%204.179-2.81%205.691%203.06%201.56%204.501%204.025%204.501%206.93Zm-15.634-8.667a62.664%2062.664%200%200%201%202.06-.036c1.703.012%203.239.131%204.608.37%201.441-.549%202.357-1.727%202.357-3.537%200-1.941-.881-3.144-2.488-3.667-.548-.18-1.358-.286-2.322-.286h-4.215v7.156Zm-16.55%203.905-3.715-9.894-6.394%2016.502c2.833-2.595%206.263-4.858%2010.109-6.608Zm27.254%204.74c0-2.775-3.131-4.347-8.513-4.418-.715%200-1.441.011-2.191.047v8.252h5.918c2.548%200%204.786-1.37%204.786-3.882Z'%20clip-rule='evenodd'/%3e%3c/g%3e%3cdefs%3e%3clinearGradient%20id='b'%20x1='51.47'%20x2='85.916'%20y1='62.946'%20y2='62.946'%20gradientUnits='userSpaceOnUse'%3e%3cstop%20stop-color='%23CD9F28'/%3e%3cstop%20offset='1'%20stop-color='%23ECD80B'/%3e%3c/linearGradient%3e%3cclipPath%20id='a'%3e%3cpath%20fill='%23fff'%20d='M51.47%2045.728h186.104V80.14H51.47z'/%3e%3c/clipPath%3e%3c/defs%3e%3c/svg%3e)


Explore Other Assets


© 2026 MaintainX. All rights reserved.