


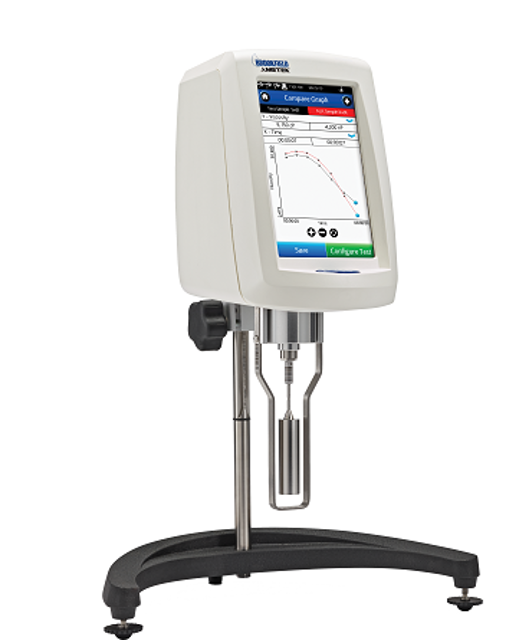
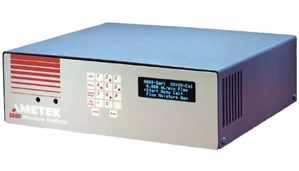
Ametek Rheometer DVNext HA
Need answers fast?
Explore the manual using AI.
Turn manuals into instant answers
with your AI-powered assistantTurn manuals into instant answers
with your AI-powered assistant
Manual for Ametek Rheometer DVNext HA
Complete asset maintenance, one click away
Get instant access to all the maintenance information you need. Empower technicians to perform preventive maintenance with asset packages, ready to use right out of the box.

Documents & Manuals
Find all the essential guides in one place.
 Tensioning Guide
- Belt-diagram
- C-120 pulleys
+ 13 more

Work Order Templates
Pre-built workflows to keep your asset running smoothly.
- Daily Electrical System Inspection
- Replace Roller and Pulley
- Install Engine B-120
+ 29 more

Procedures
Integrate maintenance plans directly into your work orders.
- Motion Industries
- Applied Industrial Technologies
- Electrical Brothers
+ 5 more

Parts
Access the parts list for your equipment in MaintainX.
- Drive Motor
- B2 Rollers
- Tensioning System
+ 40 more
Ametek Rheometer DVNext HA
Create an account to install this asset package.
Maintenance Plans for Ametek Rheometer Model DVNext HA
Integrate maintenance plans directly into your work orders in MaintainX.
Oscillation Check
Warning: This check requires trained personnel. Do not disturb the DV Rheometer during the check.
Spindle removed?
AutoZero performed?
Oscillation test started?
The device will now perform a series of steps automatically. This should take approximately 3 minutes.
Did the %Torque decrease smoothly?
Enter the final value of %Torque
Any value above 0.3 % or below -0.3% indicates that a calibration check should be performed.
Is a calibration check required?

1 Yearly Viscosity Standard Fluid Replacement
Warning: This procedure requires trained personnel with PPE!
Date of last fluid replacement
Check for any contamination in the fluid
If contamination is found, proceed with fluid replacement
Upload a photo of the fluid before replacement
Upload a photo of the fluid after replacement
Sign off on the fluid replacement
Dispose of the old fluid in accordance with state, local and federal regulations
Do not re-certify Viscosity Standard Fluids. If needed, request a duplicate copy of the Certificate of Calibration from AMETEK Brookfield within two years of the purchase date.
Rheometer Cleaning
Ensure the instrument is in a clean, dry working environment (dust free, moderate temperature, low humidity, etc.)
Is the instrument on a level surface?
Are hands/fingers clean and free of sample residue?
Remove the spindle from the instrument prior to cleaning. Note left-handed thread. Severe instrument damage may result if the spindle is cleaned in place.
Do not apply excessive force when cleaning, which may result in bending spindles.
Instrument and Display: Cleaned with a dry, non-abrasive cloth?
Do not use solvents or cleaners. The instrument housing is manufactured from polycarbonate ABS. Clean Instrument housing with mild soap and water. Do not apply solvent to the instrument!
Immersed Components (spindles): Cleaned with a non-abrasive cloth and solvent appropriate for sample material?
Sign off on the rheometer cleaning
1 Yearly Screen Protector Replacement
Warning: Failure to properly install the screen protector may result in a disabled touch screen.
Turn off the DVNext rheometer (power down) prior to installation.
Clean the DVNext touch screen with the screen cloth prior to installation.
Identify Tab 1 and Tab 2 prior to removing any protective layer.
Peel back adhesive Tab 1, from the bottom, to expose half of the protector.
Do not touch the exposed surface of the adhesive side of the screen protector.
Align the screen protector to the bezel (frame) of the DVNext.
Completely remove Tab 1.
Lightly press the screen protector to the touch screen.
Rheometer Leveling
Warning: Only trained personnel should perform this procedure.
Is the DVNext device powered up?
Is the centering dot red?
If the centering dot is red, adjust the leveling screws on the base.
Is the centering dot yellow?
If the centering dot is yellow, continue adjusting until it turns green.
Is the centering dot green?
If the centering dot is green, the DVNext is now level and ready to operate.
Did the device move onto the autozero function?
Parts for Ametek Rheometer DVNext HA
Access the parts list for your equipment in MaintainX.
Laboratory Stand Model G Lab Stand
MODEL G
Model QB Lab Stand
MODEL QB
Spindle Set DVNext HA/HB Set Of Six Spindles
SSH
RTD Temperature Probe
DVP-94Y
Carrying Case
GV-1302Y
Laboratory Stand Model G Lab Stand
MODEL G
Model QB Lab Stand
MODEL QB
Spindle Set DVNext HA/HB Set Of Six Spindles
SSH
RTD Temperature Probe
DVP-94Y
Carrying Case
GV-1302Y
Laboratory Stand Model G Lab Stand
MODEL G
Model QB Lab Stand
MODEL QB
Spindle Set DVNext HA/HB Set Of Six Spindles
SSH
RTD Temperature Probe
DVP-94Y
Carrying Case
GV-1302Y
Unlock efficiency
with MaintainX CoPilot
MaintainX CoPilot is your expert colleague, on call 24/7, helping your team find the answers they need to keep equipment running.
Reduce Unplanned Downtime
Ensure your team follows consistent procedures to minimize equipment failures and costly delays.
Maximize Asset Availability
Keep your assets running longer and more reliably, with standardized maintenance workflows from OEM manuals.
Lower Maintenance Costs
Turn any technician into an expert to streamline operations, maintain more assets, and reduce overall costs.
Thousands of companies manage their assets with MaintainX

'%3e%3cpath%20fill='url(%23b)'%20d='M66.008%2080.068c-5.084-.786-9.763-3.834-12.442-8.68a16.942%2016.942%200%200%201-1.87-5.18c1.096.19%202.203.476%203.298.87%206.525%202.333%2010.836%207.68%2011.014%2012.99ZM51.47%2061.576c.488-5.524%203.62-10.716%208.847-13.597a17.132%2017.132%200%200%201%2011.335-1.882c-.798%208.145-7.43%2014.848-16.038%2015.599-1.417.119-2.799.07-4.144-.12Zm28.564-11.478a17.513%2017.513%200%200%201%203.727%204.62c4.608%208.335%201.584%2018.813-6.75%2023.409a16.988%2016.988%200%200%201-4.359%201.679%2019.624%2019.624%200%200%201-3.977-12.776c.346-7.561%204.942-13.931%2011.36-16.932Z'/%3e%3cpath%20fill='%23110F0D'%20fill-rule='evenodd'%20d='M142.831%2048.324h4.977V77.03h-4.977V48.324Zm27.278%2013.002c.322%201.048.453%202.263.453%203.62v12.073h-4.787V66.208c0-.75-.047-1.572-.154-2.143-.453-2.382-1.822-3.572-4.215-3.572-2.31%200-3.882%201.274-4.43%203.476-.143.596-.226%201.405-.226%202.25v10.8h-4.787V56.623h4.477v2.989c1.536-2.5%203.906-3.43%206.371-3.43%203.488%200%206.263%201.68%207.298%205.144Zm24.636%207.323c0%203.882-2.358%206.525-5.763%207.727-1.298.453-2.632.643-4.62.643h-10.169V48.324h9.085c1.691%200%203.156.143%204.049.38%203.465.93%205.727%203.68%205.727%207.335%200%202.441-.81%204.156-2.762%205.644%202.905%201.417%204.453%203.727%204.453%206.966Zm-15.634-8.656h4.584c1.024%200%201.917-.143%202.536-.417%201.215-.548%201.905-1.608%201.905-3.167%200-1.548-.643-2.572-1.845-3.132-.691-.31-1.762-.452-2.763-.452h-4.417v7.168Zm10.716%208.465c0-1.536-.893-3.37-3.227-3.893-.428-.095-1.036-.143-1.571-.143h-5.918v8.085h5.501c.56%200%201.429-.048%201.953-.167%201.94-.453%203.262-1.846%203.262-3.882Zm47.747-11.847-8.097%2020.408h-4.429l-8.109-20.408h5.191l5.192%2014.574%205.108-14.574h5.144Zm-20.218%2010.002c0%20.69-.036%201.262-.155%201.94h-15.943c.631%202.87%202.714%204.728%205.882%204.728%202.131%200%203.607-.882%204.703-2.525h4.87c-1.762%204.144-5.204%206.692-9.657%206.692-6.084%200-10.537-4.858-10.537-10.49%200-6.108%204.524-10.776%2010.335-10.776%206.239%200%2010.442%204.954%2010.502%2010.43Zm-4.763-1.405c-.333-2.846-2.643-4.858-5.691-4.858-2.894%200-5.287%201.929-5.621%204.858h11.312Zm-72.667%203.44c0%204.787-3.287%208.371-9.419%208.371H119.363V64.66c-1.917.274-3.87.69-5.811%201.238l4.537%2011.121h-5.418l-3.596-9.585c-5.144%202.084-10.085%205.216-14.217%209.585h-4.786L101.8%2048.312h4.56l5.68%2013.883a44.112%2044.112%200%200%201%207.323-1.774V48.312h9.084c1.703%200%203.156.143%204.061.393%203.453.929%205.727%203.667%205.727%207.323%200%201.917-.738%204.179-2.81%205.691%203.06%201.56%204.501%204.025%204.501%206.93Zm-15.634-8.667a62.664%2062.664%200%200%201%202.06-.036c1.703.012%203.239.131%204.608.37%201.441-.549%202.357-1.727%202.357-3.537%200-1.941-.881-3.144-2.488-3.667-.548-.18-1.358-.286-2.322-.286h-4.215v7.156Zm-16.55%203.905-3.715-9.894-6.394%2016.502c2.833-2.595%206.263-4.858%2010.109-6.608Zm27.254%204.74c0-2.775-3.131-4.347-8.513-4.418-.715%200-1.441.011-2.191.047v8.252h5.918c2.548%200%204.786-1.37%204.786-3.882Z'%20clip-rule='evenodd'/%3e%3c/g%3e%3cdefs%3e%3clinearGradient%20id='b'%20x1='51.47'%20x2='85.916'%20y1='62.946'%20y2='62.946'%20gradientUnits='userSpaceOnUse'%3e%3cstop%20stop-color='%23CD9F28'/%3e%3cstop%20offset='1'%20stop-color='%23ECD80B'/%3e%3c/linearGradient%3e%3cclipPath%20id='a'%3e%3cpath%20fill='%23fff'%20d='M51.47%2045.728h186.104V80.14H51.47z'/%3e%3c/clipPath%3e%3c/defs%3e%3c/svg%3e)


More from Ametek


Explore Other Assets


© 2026 MaintainX. All rights reserved.