


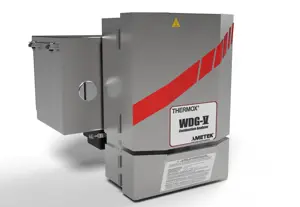
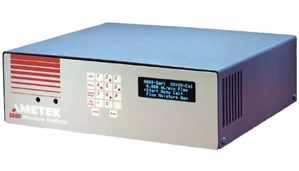
Ametek Combustion Analyzer WDG-VC OC1C
Need answers fast?
Explore the manual using AI.
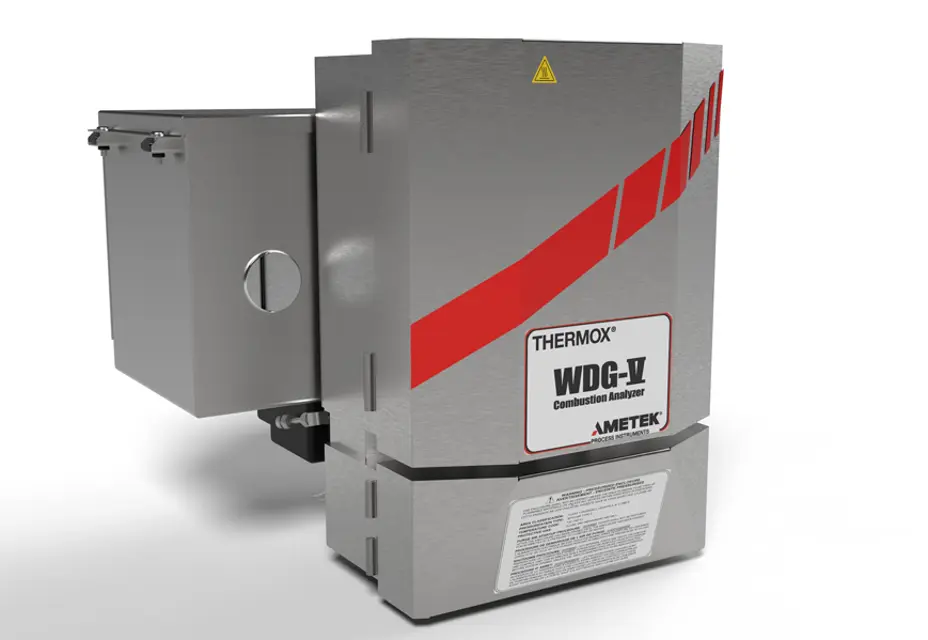
The Ametek Combustion Analyzer WDG-VC OC1C is a high-performance industrial tool designed for precise combustion analysis. This advanced analyzer ensures optimal efficiency and compliance in various applications, making it essential for maintenance professionals in the field.
Turn manuals into instant answers
with your AI-powered assistantTurn manuals into instant answers
with your AI-powered assistant
Complete asset maintenance, one click away
Get instant access to all the maintenance information you need. Empower technicians to perform preventive maintenance with asset packages, ready to use right out of the box.

Documents & Manuals
Find all the essential guides in one place.
 Tensioning Guide
- Belt-diagram
- C-120 pulleys
+ 13 more

Work Order Templates
Pre-built workflows to keep your asset running smoothly.
- Daily Electrical System Inspection
- Replace Roller and Pulley
- Install Engine B-120
+ 29 more

Procedures
Integrate maintenance plans directly into your work orders.
- Motion Industries
- Applied Industrial Technologies
- Electrical Brothers
+ 5 more

Parts
Access the parts list for your equipment in MaintainX.
- Drive Motor
- B2 Rollers
- Tensioning System
+ 40 more
Ametek Combustion Analyzer WDG-VC OC1C
Create an account to install this asset package.
Maintenance Plans for Ametek Combustion Analyzer Model WDG-VC OC1C
Integrate maintenance plans directly into your work orders in MaintainX.
Furnace Replacement
Analyzer opened and components exposed
Isolation valves on the inlet and outlet of the process closed
Cell furnace wires disconnected
Thermocouple assembly removed from the furnace
Cell removed
Flow Sensor removed
Swagelok nut at the bottom of the furnace loosened
Swagelok nut below the flow sensor loosened
Furnace assembly removed

Block Heater Replacement
Warning: Only perform this procedure on Combustibles/Methane Units
Disconnect heater wires
Loosen the 4.0 mm hex screw
Remove the Combustibles Block Heater by sliding it out
Replace the Block Heater
Tighten the hex screw into place
Reconnect the wires on the Sensor board
Sign off on the block heater replacement
Analyzer Maintenance
Warning: Always turn off power before cleaning the enclosure
Analyzer power turned off?
Choose the type of service done
CAUTION: Disconnect power from the analyzer and control unit and allow it to cool before replacing its parts
Analyzer power disconnected and cooled down?
Analyzer cover opened?
Isolation valves on the inlet and outlet of the process closed?
Cell clips removed?
Cell assembly removed?
Box Heater Replacement
NOTE: There is only one heater in the O, version. There are two heaters in the Combustibles/Methane version of the WDG-V
Disconnect heater wires
Remove the speed clip from the mounting tab. Use needle-nose pliers to remove the clip
Remove the box heater by sliding it out
Replace the box heater
Attach a new speed nut to the post
Reconnect the wires on the Sensor board
Sign off on the box heater replacement
Methane Detector Replacement
NOTE: The Combustibles Detector will always face outward, and the Methane detector will always face inward from the factory.
Heater Block removed
Methane Detector (Blue and White) wires disconnected on the Sensor board
Two (2) 4.0 mm hex screws that hold the Methane Detector loosened and detector removed from its housing
New o-ring used when the Methane Detector has been removed
New Methane detector installed in place, screws aligned on the block, and detector element ends not damaged while inserting the assembly
Block reinstalled
Detector leads reconnected to the Sensor board
Sign off on the Methane Detector Replacement
Parts for Ametek Combustion Analyzer WDG-VC OC1C
Access the parts list for your equipment in MaintainX.
Kit
7001-227-TE
Regulator Gauge
37018JE
Standard Cell
7000-568-SE
Analyzer Main Processor Board
8000-119-SE
Kit
7001-226-TE
Kit
7001-227-TE
Regulator Gauge
37018JE
Standard Cell
7000-568-SE
Analyzer Main Processor Board
8000-119-SE
Kit
7001-226-TE
Kit
7001-227-TE
Regulator Gauge
37018JE
Standard Cell
7000-568-SE
Analyzer Main Processor Board
8000-119-SE
Kit
7001-226-TE
Unlock efficiency
with MaintainX CoPilot
MaintainX CoPilot is your expert colleague, on call 24/7, helping your team find the answers they need to keep equipment running.
Reduce Unplanned Downtime
Ensure your team follows consistent procedures to minimize equipment failures and costly delays.
Maximize Asset Availability
Keep your assets running longer and more reliably, with standardized maintenance workflows from OEM manuals.
Lower Maintenance Costs
Turn any technician into an expert to streamline operations, maintain more assets, and reduce overall costs.
Thousands of companies manage their assets with MaintainX

'%3e%3cpath%20fill='url(%23b)'%20d='M66.008%2080.068c-5.084-.786-9.763-3.834-12.442-8.68a16.942%2016.942%200%200%201-1.87-5.18c1.096.19%202.203.476%203.298.87%206.525%202.333%2010.836%207.68%2011.014%2012.99ZM51.47%2061.576c.488-5.524%203.62-10.716%208.847-13.597a17.132%2017.132%200%200%201%2011.335-1.882c-.798%208.145-7.43%2014.848-16.038%2015.599-1.417.119-2.799.07-4.144-.12Zm28.564-11.478a17.513%2017.513%200%200%201%203.727%204.62c4.608%208.335%201.584%2018.813-6.75%2023.409a16.988%2016.988%200%200%201-4.359%201.679%2019.624%2019.624%200%200%201-3.977-12.776c.346-7.561%204.942-13.931%2011.36-16.932Z'/%3e%3cpath%20fill='%23110F0D'%20fill-rule='evenodd'%20d='M142.831%2048.324h4.977V77.03h-4.977V48.324Zm27.278%2013.002c.322%201.048.453%202.263.453%203.62v12.073h-4.787V66.208c0-.75-.047-1.572-.154-2.143-.453-2.382-1.822-3.572-4.215-3.572-2.31%200-3.882%201.274-4.43%203.476-.143.596-.226%201.405-.226%202.25v10.8h-4.787V56.623h4.477v2.989c1.536-2.5%203.906-3.43%206.371-3.43%203.488%200%206.263%201.68%207.298%205.144Zm24.636%207.323c0%203.882-2.358%206.525-5.763%207.727-1.298.453-2.632.643-4.62.643h-10.169V48.324h9.085c1.691%200%203.156.143%204.049.38%203.465.93%205.727%203.68%205.727%207.335%200%202.441-.81%204.156-2.762%205.644%202.905%201.417%204.453%203.727%204.453%206.966Zm-15.634-8.656h4.584c1.024%200%201.917-.143%202.536-.417%201.215-.548%201.905-1.608%201.905-3.167%200-1.548-.643-2.572-1.845-3.132-.691-.31-1.762-.452-2.763-.452h-4.417v7.168Zm10.716%208.465c0-1.536-.893-3.37-3.227-3.893-.428-.095-1.036-.143-1.571-.143h-5.918v8.085h5.501c.56%200%201.429-.048%201.953-.167%201.94-.453%203.262-1.846%203.262-3.882Zm47.747-11.847-8.097%2020.408h-4.429l-8.109-20.408h5.191l5.192%2014.574%205.108-14.574h5.144Zm-20.218%2010.002c0%20.69-.036%201.262-.155%201.94h-15.943c.631%202.87%202.714%204.728%205.882%204.728%202.131%200%203.607-.882%204.703-2.525h4.87c-1.762%204.144-5.204%206.692-9.657%206.692-6.084%200-10.537-4.858-10.537-10.49%200-6.108%204.524-10.776%2010.335-10.776%206.239%200%2010.442%204.954%2010.502%2010.43Zm-4.763-1.405c-.333-2.846-2.643-4.858-5.691-4.858-2.894%200-5.287%201.929-5.621%204.858h11.312Zm-72.667%203.44c0%204.787-3.287%208.371-9.419%208.371H119.363V64.66c-1.917.274-3.87.69-5.811%201.238l4.537%2011.121h-5.418l-3.596-9.585c-5.144%202.084-10.085%205.216-14.217%209.585h-4.786L101.8%2048.312h4.56l5.68%2013.883a44.112%2044.112%200%200%201%207.323-1.774V48.312h9.084c1.703%200%203.156.143%204.061.393%203.453.929%205.727%203.667%205.727%207.323%200%201.917-.738%204.179-2.81%205.691%203.06%201.56%204.501%204.025%204.501%206.93Zm-15.634-8.667a62.664%2062.664%200%200%201%202.06-.036c1.703.012%203.239.131%204.608.37%201.441-.549%202.357-1.727%202.357-3.537%200-1.941-.881-3.144-2.488-3.667-.548-.18-1.358-.286-2.322-.286h-4.215v7.156Zm-16.55%203.905-3.715-9.894-6.394%2016.502c2.833-2.595%206.263-4.858%2010.109-6.608Zm27.254%204.74c0-2.775-3.131-4.347-8.513-4.418-.715%200-1.441.011-2.191.047v8.252h5.918c2.548%200%204.786-1.37%204.786-3.882Z'%20clip-rule='evenodd'/%3e%3c/g%3e%3cdefs%3e%3clinearGradient%20id='b'%20x1='51.47'%20x2='85.916'%20y1='62.946'%20y2='62.946'%20gradientUnits='userSpaceOnUse'%3e%3cstop%20stop-color='%23CD9F28'/%3e%3cstop%20offset='1'%20stop-color='%23ECD80B'/%3e%3c/linearGradient%3e%3cclipPath%20id='a'%3e%3cpath%20fill='%23fff'%20d='M51.47%2045.728h186.104V80.14H51.47z'/%3e%3c/clipPath%3e%3c/defs%3e%3c/svg%3e)


More from Ametek


Explore Other Assets


© 2026 MaintainX. All rights reserved.