


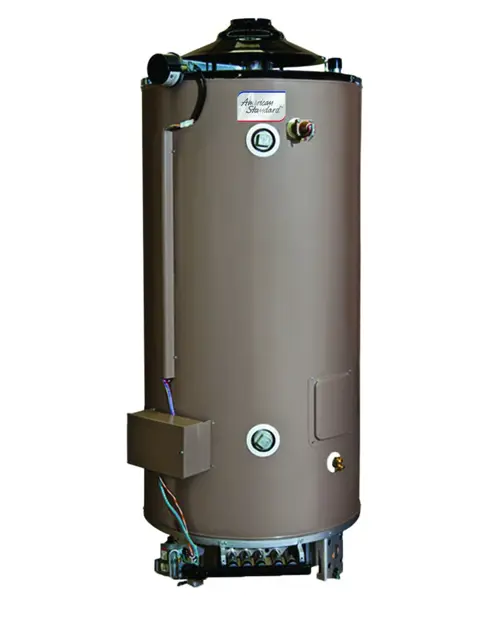
State Industries Heater SUF-100-199-NE300
Need answers fast?
Explore the manual using AI.
Turn manuals into instant answers
with your AI-powered assistantTurn manuals into instant answers
with your AI-powered assistant
Manual for State Industries Heater SUF-100-199-NE300
Complete asset maintenance, one click away
Get instant access to all the maintenance information you need. Empower technicians to perform preventive maintenance with asset packages, ready to use right out of the box.

Documents & Manuals
Find all the essential guides in one place.
 Tensioning Guide
- Belt-diagram
- C-120 pulleys
+ 13 more

Work Order Templates
Pre-built workflows to keep your asset running smoothly.
- Daily Electrical System Inspection
- Replace Roller and Pulley
- Install Engine B-120
+ 29 more

Procedures
Integrate maintenance plans directly into your work orders.
- Motion Industries
- Applied Industrial Technologies
- Electrical Brothers
+ 5 more

Parts
Access the parts list for your equipment in MaintainX.
- Drive Motor
- B2 Rollers
- Tensioning System
+ 40 more
State Industries Heater SUF-100-199-NE300
Create an account to install this asset package.
Maintenance Plans for State Industries Heater Model SUF-100-199-NE300
Integrate maintenance plans directly into your work orders in MaintainX.
6 Monthly Relief Valve Test
Warning: Ensure no one is in front of or around the outlet of the Temperature-Pressure Relief Valve discharge line during the test. The water may be extremely hot. Use care when operating valve as the valve may be hot.
Temperature-Pressure Relief Valve operates freely when lever is lifted several times
Did the valve completely reset and stop releasing water after manual operation?
If the valve did not reset and continues to release water, immediately close the cold water inlet to the water heater and drain the water heater.
Temperature-Pressure Relief Valve replaced with a properly rated/sized new one if it failed the test
Does the Temperature-Pressure Relief Valve weep or discharge periodically?
Note: Excessive water pressure is the most common cause of Temperature-Pressure Relief Valve leakage. Excessive water system pressure is most often caused by 'thermal expansion' in a 'closed system.' The Temperature-Pressure Relief Valve is not intended for the constant relief of thermal expansion.
Temperature-Pressure Relief Valve leakage due to pressure build up in a closed system that does not have a thermal expansion tank installed is not covered under the limited warranty. Thermal expansion tanks must be installed on all closed water systems.
DO NOT PLUG THE TEMPERATURE-PRESSURE RELIEF VALVE OPENING. THIS CAN CAUSE PROPERTY DAMAGE, SERIOUS INJURY OR DEATH.

6 Monthly Lime Scale Removal
LIME SCALE REMOVAL
When water is heated dissolved minerals in the water such as calcium and magnesium carbonate (lime scale) become less soluble. As the water temperature rises these minerals will precipitate or “fall out” of solution.
The amount of lime scale released from water is in direct proportion to water temperature and usage. The higher the water temperature or water usage, the more lime deposits are dropped out of the water.
Water hardness also affects lime scale accumulation. With the temperature and usage being the same, hard water will release more lime scale than softer water.
Lime scale reduces heating efficiency as it accumulates inside a water heater. Heating transfer surfaces become coated with lime scale deposits which increases fuel costs to operate the water heater.
Lime scale deposits can also cause rumbling and pounding noises as air molecules trapped in the lime scale escape when heated. Lime scale accumulation also reduces the life span of water heaters. For these reasons a regular schedule for deliming should be set up.
The depth of lime accumulation in the bottom of the water heater should be measured periodically. Inspect by removing the cleanout cover once every 6 months at first. Deliming maintenance should then be performed based on the time it takes for 1 inch (2.5 cm) of lime to accumulate in the bottom of the water heater.
Sediment and lime scale removal may be accomplished manually through the cleanout opening furnished on the water heater.
MANUAL LIME SCALE REMOVAL
6 Monthly Sediment Removal
DRAINING AND FLUSHING
It is recommended that the water heater storage tank be drained and flushed every 6 months to reduce sediment buildup. The water heater should be drained if being shut down during freezing temperatures.
To drain the water heater storage tank:
1. Turn off the electrical supply to the water heater.
2. Turn off the gas supply at the Main Gas Shutoff Valve if the water heater is going to be shut down for an extended period.
3. Ensure the cold water inlet valve is open.
4. Open a nearby hot water faucet and let the water run until the water is no longer hot.
5. Connect a hose to the water heater drain valve and terminate it to an adequate drain.
6. Close the cold water inlet valve.
1 Yearly Vent System Inspection
Examine the vent system every 6 months. Points of inspection are as follows:
1. Check for obstructions and/or deterioration of the intake air and/or vent piping and the intake air and vent terminations.
Replace immediately where needed.
2. The debris screens in the intake air and vent terminations should be should be cleaned of foreign material and soot.
NOTE: Do not reach inside the vent termination when the heater is in operation.
3. Check all vent system connections for leakage and repair or reseal as necessary.
4. Inspect and clean the built-in condensate trap of any debris.
1 Yearly Anode Rods Inspection
Warning: This procedure requires trained personnel with PPE!
Anode rod(s) undamaged?
If anode rod(s) are damaged, report the issues to the maintenance team and stop the procedure
Upload a photo of the anode rod(s) before removal
Remove the powered anodes from the water heater by loosening the 3/4\ NPT bushing that forms the top of the anodes."
Do not disassemble the retaining nut and wire terminal from the top while installed in the water heater, the anode's electrode may fall inside the tank.
Remove the entire anode rod from the water heater prior to inspection.
Upload a photo of the anode rod(s) after removal
Anode rod(s) cleaned with a soft cloth?
Parts for State Industries Heater SUF-100-199-NE300
Access the parts list for your equipment in MaintainX.
4" Concentric Termination
9006328005
3" Low Profile Termination
9008933005
4" Low Profile Termination
9008934005
3′′ Flush Mount Vent Kit
196985
4′′ Flush Mount Vent Kit
196986
4" Concentric Termination
9006328005
3" Low Profile Termination
9008933005
4" Low Profile Termination
9008934005
3′′ Flush Mount Vent Kit
196985
4′′ Flush Mount Vent Kit
196986
4" Concentric Termination
9006328005
3" Low Profile Termination
9008933005
4" Low Profile Termination
9008934005
3′′ Flush Mount Vent Kit
196985
4′′ Flush Mount Vent Kit
196986
Unlock efficiency
with MaintainX CoPilot
MaintainX CoPilot is your expert colleague, on call 24/7, helping your team find the answers they need to keep equipment running.
Reduce Unplanned Downtime
Ensure your team follows consistent procedures to minimize equipment failures and costly delays.
Maximize Asset Availability
Keep your assets running longer and more reliably, with standardized maintenance workflows from OEM manuals.
Lower Maintenance Costs
Turn any technician into an expert to streamline operations, maintain more assets, and reduce overall costs.
Thousands of companies manage their assets with MaintainX

'%3e%3cpath%20fill='url(%23b)'%20d='M66.008%2080.068c-5.084-.786-9.763-3.834-12.442-8.68a16.942%2016.942%200%200%201-1.87-5.18c1.096.19%202.203.476%203.298.87%206.525%202.333%2010.836%207.68%2011.014%2012.99ZM51.47%2061.576c.488-5.524%203.62-10.716%208.847-13.597a17.132%2017.132%200%200%201%2011.335-1.882c-.798%208.145-7.43%2014.848-16.038%2015.599-1.417.119-2.799.07-4.144-.12Zm28.564-11.478a17.513%2017.513%200%200%201%203.727%204.62c4.608%208.335%201.584%2018.813-6.75%2023.409a16.988%2016.988%200%200%201-4.359%201.679%2019.624%2019.624%200%200%201-3.977-12.776c.346-7.561%204.942-13.931%2011.36-16.932Z'/%3e%3cpath%20fill='%23110F0D'%20fill-rule='evenodd'%20d='M142.831%2048.324h4.977V77.03h-4.977V48.324Zm27.278%2013.002c.322%201.048.453%202.263.453%203.62v12.073h-4.787V66.208c0-.75-.047-1.572-.154-2.143-.453-2.382-1.822-3.572-4.215-3.572-2.31%200-3.882%201.274-4.43%203.476-.143.596-.226%201.405-.226%202.25v10.8h-4.787V56.623h4.477v2.989c1.536-2.5%203.906-3.43%206.371-3.43%203.488%200%206.263%201.68%207.298%205.144Zm24.636%207.323c0%203.882-2.358%206.525-5.763%207.727-1.298.453-2.632.643-4.62.643h-10.169V48.324h9.085c1.691%200%203.156.143%204.049.38%203.465.93%205.727%203.68%205.727%207.335%200%202.441-.81%204.156-2.762%205.644%202.905%201.417%204.453%203.727%204.453%206.966Zm-15.634-8.656h4.584c1.024%200%201.917-.143%202.536-.417%201.215-.548%201.905-1.608%201.905-3.167%200-1.548-.643-2.572-1.845-3.132-.691-.31-1.762-.452-2.763-.452h-4.417v7.168Zm10.716%208.465c0-1.536-.893-3.37-3.227-3.893-.428-.095-1.036-.143-1.571-.143h-5.918v8.085h5.501c.56%200%201.429-.048%201.953-.167%201.94-.453%203.262-1.846%203.262-3.882Zm47.747-11.847-8.097%2020.408h-4.429l-8.109-20.408h5.191l5.192%2014.574%205.108-14.574h5.144Zm-20.218%2010.002c0%20.69-.036%201.262-.155%201.94h-15.943c.631%202.87%202.714%204.728%205.882%204.728%202.131%200%203.607-.882%204.703-2.525h4.87c-1.762%204.144-5.204%206.692-9.657%206.692-6.084%200-10.537-4.858-10.537-10.49%200-6.108%204.524-10.776%2010.335-10.776%206.239%200%2010.442%204.954%2010.502%2010.43Zm-4.763-1.405c-.333-2.846-2.643-4.858-5.691-4.858-2.894%200-5.287%201.929-5.621%204.858h11.312Zm-72.667%203.44c0%204.787-3.287%208.371-9.419%208.371H119.363V64.66c-1.917.274-3.87.69-5.811%201.238l4.537%2011.121h-5.418l-3.596-9.585c-5.144%202.084-10.085%205.216-14.217%209.585h-4.786L101.8%2048.312h4.56l5.68%2013.883a44.112%2044.112%200%200%201%207.323-1.774V48.312h9.084c1.703%200%203.156.143%204.061.393%203.453.929%205.727%203.667%205.727%207.323%200%201.917-.738%204.179-2.81%205.691%203.06%201.56%204.501%204.025%204.501%206.93Zm-15.634-8.667a62.664%2062.664%200%200%201%202.06-.036c1.703.012%203.239.131%204.608.37%201.441-.549%202.357-1.727%202.357-3.537%200-1.941-.881-3.144-2.488-3.667-.548-.18-1.358-.286-2.322-.286h-4.215v7.156Zm-16.55%203.905-3.715-9.894-6.394%2016.502c2.833-2.595%206.263-4.858%2010.109-6.608Zm27.254%204.74c0-2.775-3.131-4.347-8.513-4.418-.715%200-1.441.011-2.191.047v8.252h5.918c2.548%200%204.786-1.37%204.786-3.882Z'%20clip-rule='evenodd'/%3e%3c/g%3e%3cdefs%3e%3clinearGradient%20id='b'%20x1='51.47'%20x2='85.916'%20y1='62.946'%20y2='62.946'%20gradientUnits='userSpaceOnUse'%3e%3cstop%20stop-color='%23CD9F28'/%3e%3cstop%20offset='1'%20stop-color='%23ECD80B'/%3e%3c/linearGradient%3e%3cclipPath%20id='a'%3e%3cpath%20fill='%23fff'%20d='M51.47%2045.728h186.104V80.14H51.47z'/%3e%3c/clipPath%3e%3c/defs%3e%3c/svg%3e)


More from State Industries


Explore Other Assets


© 2026 MaintainX. All rights reserved.