


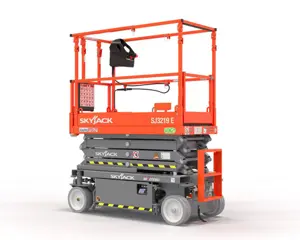
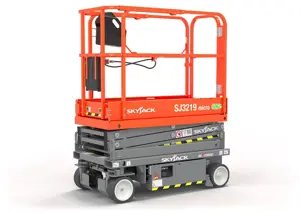
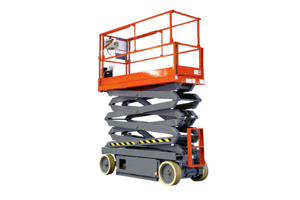
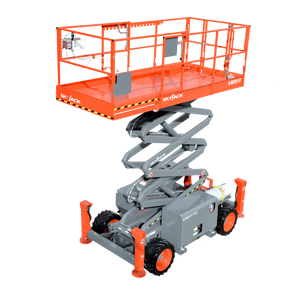
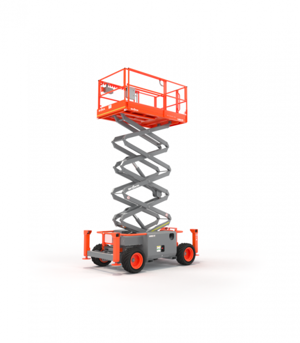
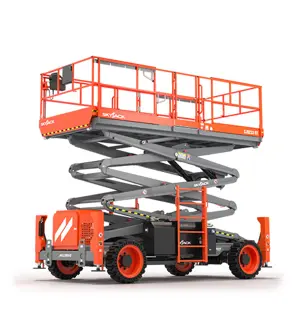
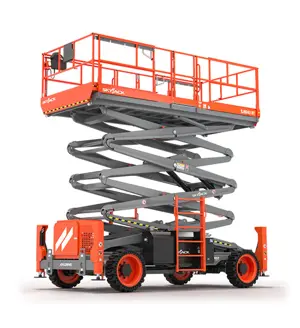
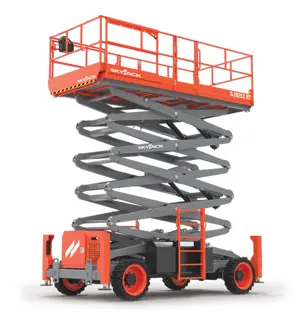
Skyjack Telescopic Boom SJ66 T+
Need answers fast?
Explore the manual using AI.
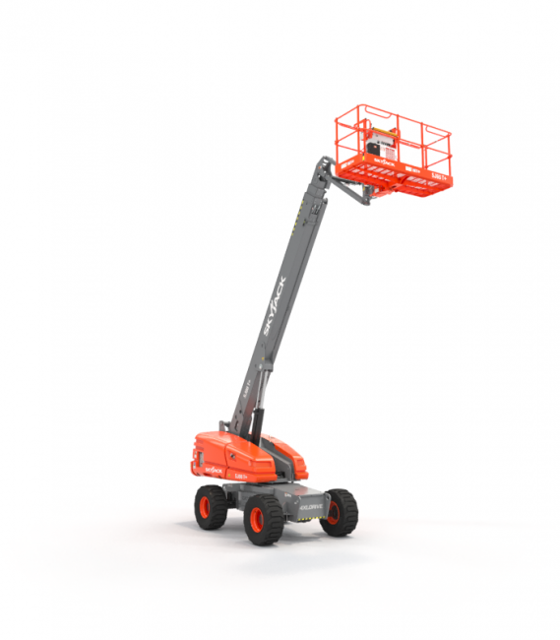
The Skyjack Telescopic Boom SJ66 T+ is a versatile aerial work platform designed for maximum reach and stability. This robust equipment is ideal for construction and maintenance tasks, offering exceptional maneuverability and safety features for operators. Experience enhanced productivity with the SJ66 T+, a reliable choice for heavy-duty lifting applications.
Turn manuals into instant answers
with your AI-powered assistantTurn manuals into instant answers
with your AI-powered assistant
Manual for Skyjack Telescopic Boom SJ66 T+
Complete asset maintenance, one click away
Get instant access to all the maintenance information you need. Empower technicians to perform preventive maintenance with asset packages, ready to use right out of the box.

Documents & Manuals
Find all the essential guides in one place.
 Tensioning Guide
- Belt-diagram
- C-120 pulleys
+ 13 more

Work Order Templates
Pre-built workflows to keep your asset running smoothly.
- Daily Electrical System Inspection
- Replace Roller and Pulley
- Install Engine B-120
+ 29 more

Procedures
Integrate maintenance plans directly into your work orders.
- Motion Industries
- Applied Industrial Technologies
- Electrical Brothers
+ 5 more

Parts
Access the parts list for your equipment in MaintainX.
- Drive Motor
- B2 Rollers
- Tensioning System
+ 40 more
Skyjack Telescopic Boom SJ66 T+
Create an account to install this asset package.
Maintenance Plans for Skyjack Telescopic Boom Model SJ66 T+
Integrate maintenance plans directly into your work orders in MaintainX.
Fuel Filter Replacement
Remove the bolt securing the engine tray to the turret
Pull the locking pin down and swing the engine tray away from the turret
Close the fuel shut-off valve
Place a suitable container under the fuel filter
Remove the fuel filter and catch any escaping fuel
WARNING! Dispose of fuel in accordance with local and federal regulations
Clean any dirt from the filter carrier sealing surface
Apply a thin layer of oil or diesel fuel to the rubber gasket of the new fuel filter
Install the fuel filter and tighten it by hand, then tighten the filter cartridge with a final half-turn

Platform Level Relief Valve Adjustment
Locate the GP2 port on the main manifold
Connect a pressure gauge (5000 psi) to the GP2 port
Start the engine from the base control console and let it run for 2-5 minutes
Raise the main boom to ensure the basket will not contact the ground
Fully raise or lower the platform level and check the reading on the gauge
Is the pressure 3000 psi?
Locate the platform leveling relief valve RV3
Loosen the lock nut on the platform level relief valve RV3. Turn the adjusting stem clockwise to increase the pressure and counterclockwise to decrease the pressure
Tighten the lock nut on the platform level relief valve RV3 once 3000 psi is observed on the gauge. You must fully raise or lower the platform level to activate a pressure reading on the gauge
Reverse Drive Pressure on Drive Pump Testing
NOTE! Make sure the charge pump pressure test is completed first
Locate test port TP2 on the drive pump
Connect a pressure gauge (10000 psi) to test port TP2
WARNING! To protect the gauge, do not activate any controls during this procedure
Start the engine from the platform control console
Unplug the brake solenoid power cable on the brake valve
Activate the drive function slowly in reverse with the engine at high speed. The wheels should not turn
NOTE! Activating the drive function too quickly will stall the engine
Reading on the gauge
Oscillating Cylinder Bolt Replacement
Check if the oscillating cylinder bolts have missing or damaged torque seal
If more than one bolt is replaced, do so one at a time to prevent the cylinder from shifting
Remove the affected bolt
Clean the cylinder’s corresponding internal threaded hole thoroughly
Choose the type of bolt used for replacement
Hand-tighten the bolt
Enter the torque applied to the new bolt
Apply a line of torque seal to each new bolt extending from the bolt head over the washer and to the chassis wall
Sign off on the bolt replacement
1 Yearly Oil Sample Testing
Warning: Only trained personnel should perform this procedure
Oil sample drawn from the reservoir
Oil sample taken when oil is warmed through normal operation
Upload the oil sample test results
Enter the name of the lubrication specialist
Oil sample suitable for continued use
Sign off on the oil sample testing
Parts for Skyjack Telescopic Boom SJ66 T+
Access the parts list for your equipment in MaintainX.
Cylinder (Boom Lift)
230130
Valve, Control (Pressure Dump)
103656
Cylinder (Axle Lock)
212871
Valve, Counterbalance (Jib)
149488
Valve, Control (Boom Down)
166052
Cylinder (Boom Lift)
230130
Valve, Control (Pressure Dump)
103656
Cylinder (Axle Lock)
212871
Valve, Counterbalance (Jib)
149488
Valve, Control (Boom Down)
166052
Cylinder (Boom Lift)
230130
Valve, Control (Pressure Dump)
103656
Cylinder (Axle Lock)
212871
Valve, Counterbalance (Jib)
149488
Valve, Control (Boom Down)
166052
Unlock efficiency
with MaintainX CoPilot
MaintainX CoPilot is your expert colleague, on call 24/7, helping your team find the answers they need to keep equipment running.
Reduce Unplanned Downtime
Ensure your team follows consistent procedures to minimize equipment failures and costly delays.
Maximize Asset Availability
Keep your assets running longer and more reliably, with standardized maintenance workflows from OEM manuals.
Lower Maintenance Costs
Turn any technician into an expert to streamline operations, maintain more assets, and reduce overall costs.
Thousands of companies manage their assets with MaintainX

'%3e%3cpath%20fill='url(%23b)'%20d='M66.008%2080.068c-5.084-.786-9.763-3.834-12.442-8.68a16.942%2016.942%200%200%201-1.87-5.18c1.096.19%202.203.476%203.298.87%206.525%202.333%2010.836%207.68%2011.014%2012.99ZM51.47%2061.576c.488-5.524%203.62-10.716%208.847-13.597a17.132%2017.132%200%200%201%2011.335-1.882c-.798%208.145-7.43%2014.848-16.038%2015.599-1.417.119-2.799.07-4.144-.12Zm28.564-11.478a17.513%2017.513%200%200%201%203.727%204.62c4.608%208.335%201.584%2018.813-6.75%2023.409a16.988%2016.988%200%200%201-4.359%201.679%2019.624%2019.624%200%200%201-3.977-12.776c.346-7.561%204.942-13.931%2011.36-16.932Z'/%3e%3cpath%20fill='%23110F0D'%20fill-rule='evenodd'%20d='M142.831%2048.324h4.977V77.03h-4.977V48.324Zm27.278%2013.002c.322%201.048.453%202.263.453%203.62v12.073h-4.787V66.208c0-.75-.047-1.572-.154-2.143-.453-2.382-1.822-3.572-4.215-3.572-2.31%200-3.882%201.274-4.43%203.476-.143.596-.226%201.405-.226%202.25v10.8h-4.787V56.623h4.477v2.989c1.536-2.5%203.906-3.43%206.371-3.43%203.488%200%206.263%201.68%207.298%205.144Zm24.636%207.323c0%203.882-2.358%206.525-5.763%207.727-1.298.453-2.632.643-4.62.643h-10.169V48.324h9.085c1.691%200%203.156.143%204.049.38%203.465.93%205.727%203.68%205.727%207.335%200%202.441-.81%204.156-2.762%205.644%202.905%201.417%204.453%203.727%204.453%206.966Zm-15.634-8.656h4.584c1.024%200%201.917-.143%202.536-.417%201.215-.548%201.905-1.608%201.905-3.167%200-1.548-.643-2.572-1.845-3.132-.691-.31-1.762-.452-2.763-.452h-4.417v7.168Zm10.716%208.465c0-1.536-.893-3.37-3.227-3.893-.428-.095-1.036-.143-1.571-.143h-5.918v8.085h5.501c.56%200%201.429-.048%201.953-.167%201.94-.453%203.262-1.846%203.262-3.882Zm47.747-11.847-8.097%2020.408h-4.429l-8.109-20.408h5.191l5.192%2014.574%205.108-14.574h5.144Zm-20.218%2010.002c0%20.69-.036%201.262-.155%201.94h-15.943c.631%202.87%202.714%204.728%205.882%204.728%202.131%200%203.607-.882%204.703-2.525h4.87c-1.762%204.144-5.204%206.692-9.657%206.692-6.084%200-10.537-4.858-10.537-10.49%200-6.108%204.524-10.776%2010.335-10.776%206.239%200%2010.442%204.954%2010.502%2010.43Zm-4.763-1.405c-.333-2.846-2.643-4.858-5.691-4.858-2.894%200-5.287%201.929-5.621%204.858h11.312Zm-72.667%203.44c0%204.787-3.287%208.371-9.419%208.371H119.363V64.66c-1.917.274-3.87.69-5.811%201.238l4.537%2011.121h-5.418l-3.596-9.585c-5.144%202.084-10.085%205.216-14.217%209.585h-4.786L101.8%2048.312h4.56l5.68%2013.883a44.112%2044.112%200%200%201%207.323-1.774V48.312h9.084c1.703%200%203.156.143%204.061.393%203.453.929%205.727%203.667%205.727%207.323%200%201.917-.738%204.179-2.81%205.691%203.06%201.56%204.501%204.025%204.501%206.93Zm-15.634-8.667a62.664%2062.664%200%200%201%202.06-.036c1.703.012%203.239.131%204.608.37%201.441-.549%202.357-1.727%202.357-3.537%200-1.941-.881-3.144-2.488-3.667-.548-.18-1.358-.286-2.322-.286h-4.215v7.156Zm-16.55%203.905-3.715-9.894-6.394%2016.502c2.833-2.595%206.263-4.858%2010.109-6.608Zm27.254%204.74c0-2.775-3.131-4.347-8.513-4.418-.715%200-1.441.011-2.191.047v8.252h5.918c2.548%200%204.786-1.37%204.786-3.882Z'%20clip-rule='evenodd'/%3e%3c/g%3e%3cdefs%3e%3clinearGradient%20id='b'%20x1='51.47'%20x2='85.916'%20y1='62.946'%20y2='62.946'%20gradientUnits='userSpaceOnUse'%3e%3cstop%20stop-color='%23CD9F28'/%3e%3cstop%20offset='1'%20stop-color='%23ECD80B'/%3e%3c/linearGradient%3e%3cclipPath%20id='a'%3e%3cpath%20fill='%23fff'%20d='M51.47%2045.728h186.104V80.14H51.47z'/%3e%3c/clipPath%3e%3c/defs%3e%3c/svg%3e)


More from Skyjack


Explore Other Assets


© 2026 MaintainX. All rights reserved.