


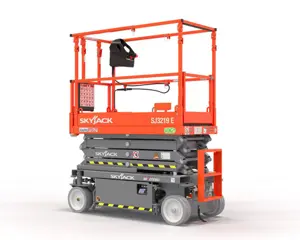
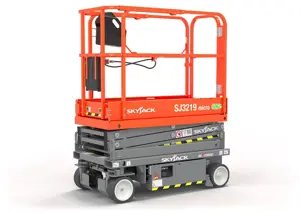
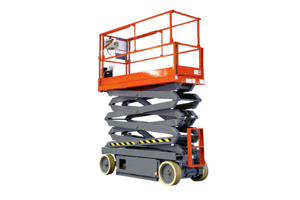
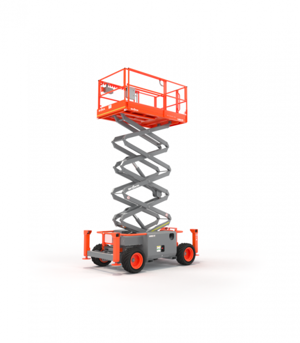
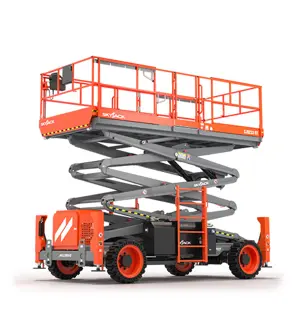
Skyjack Telehandler SJ1056 THS
Need answers fast?
Explore the manual using AI.
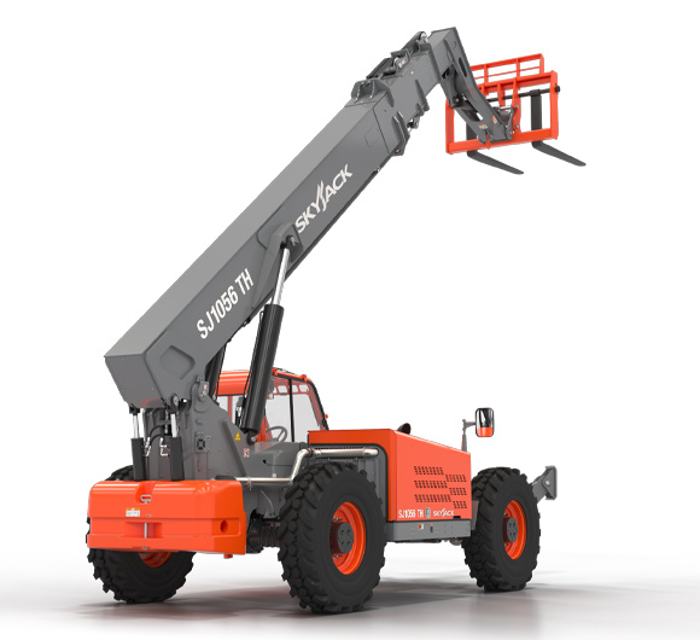
The Skyjack Telehandler SJ1056 THS is a robust and versatile piece of equipment designed for lifting and moving materials in various industrial applications. Known for its reliability and ease of use, this telehandler offers exceptional performance and maneuverability, making it an ideal choice for construction and maintenance tasks.
Turn manuals into instant answers
with your AI-powered assistantTurn manuals into instant answers
with your AI-powered assistant
Manual for Skyjack Telehandler SJ1056 THS
Complete asset maintenance, one click away
Get instant access to all the maintenance information you need. Empower technicians to perform preventive maintenance with asset packages, ready to use right out of the box.

Documents & Manuals
Find all the essential guides in one place.
 Tensioning Guide
- Belt-diagram
- C-120 pulleys
+ 13 more

Work Order Templates
Pre-built workflows to keep your asset running smoothly.
- Daily Electrical System Inspection
- Replace Roller and Pulley
- Install Engine B-120
+ 29 more

Procedures
Integrate maintenance plans directly into your work orders.
- Motion Industries
- Applied Industrial Technologies
- Electrical Brothers
+ 5 more

Parts
Access the parts list for your equipment in MaintainX.
- Drive Motor
- B2 Rollers
- Tensioning System
+ 40 more
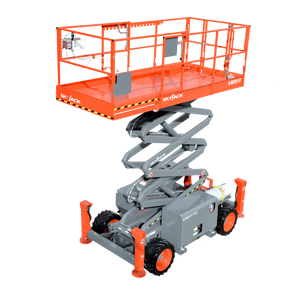
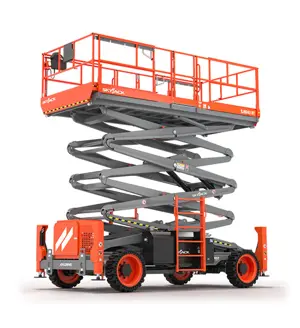
Skyjack Telehandler SJ1056 THS
Create an account to install this asset package.
Maintenance Plans for Skyjack Telehandler Model SJ1056 THS
Integrate maintenance plans directly into your work orders in MaintainX.
3 Monthly / 250 Hourly E-chain and Hoses Inspection
Boom fully retracted
Servicing windows found on the sides of the boom
Covers removed from the servicing windows
E-chain and hoses examined for damage or wear
Upload a photo of the e-chain and hoses
Sign off on the e-chain and hoses inspection

1 Daily / 10 Hourly Coolant Level, Radiator and Hoses Check
WARNING! Pressurized fluid present in radiator. Never open radiator cap when hot
NOTE! Do not intermix different brands of coolant. If the existing coolant cannot be identified, drain and flush the remaining coolant and refill with new coolant. Refer to section 5.4-5 for instructions on changing engine coolant
Radiator cap removed
Radiator filled completely through the radiator neck, until coolant is visible
Enter the time engine was run without radiator cap to achieve operating temperature
Engine shut down
Coolant level and coolant strength in the radiator checked. Mixture adjusted as required. Refilled until coolant is visible
Radiator cap tightened, engine started, and checked for leaks
Sign off on the coolant level, radiator and hoses check
Hydraulic Pressure Test
IMPORTANT! All checks and adjustments are to be made with the engine running at low idle, the transmission shifter in Neutral and the parking brake applied
CAUTION! The addition of a hydraulic accumulator on this system causes residual pressure to be present AFTER the engine has been turned OFF. Prior to opening any hydraulic fitting in this system, move the joystick several times in each direction to relieve this residual pressure. Failure to do so may result in personal injury
Load Sense Compensator Pressure Check
Load Sense Compensator Pressure Reading
Load Sense Compensator Adjustment
System Pressure (Compensator Pressure) Check
System Pressure (Compensator Pressure) Reading
System Pressure (Compensator Pressure) Adjustment
Steering Pressure Check
Slide Pads Replacement
Warning: This procedure requires trained personnel with PPE!
Slide pads are designed to protect the structural integrity of the boom sections. They partially carry the weight of the boom sections and will wear out over time and based on daily operation. Ensure to check slide pads quarterly.
NOTE! The wear pads located at the rear-top and bottom-front of the boom sections wear faster than the other wear pads. The basic procedure for removing wear pads is the same regardless of their location in the boom assembly.
IMPORTANT! Pay attention to high-load slide pads (Front-Lower & Rear-Upper of boom) as most of the weight is exerted on them.
Fully retract the boom
Remove the rear cover from the outer boom
Remove screw, wear pad, shims, and spacer from the boom. For ease of installation, keep all parts that were removed together as an assembly.
Before removing the screws from the wear pads, use a pry bar under the shims of the side wear pads. The bar prevents the shims from falling when the screws are removed.
Remove the screws, shims, and wear pads while holding the bar under the shim. For easier installation, keep all parts removed together as an assembly.
Boom Hoses and Sheaves Replacement
Park telehandler on a firm level surface, apply park brake
Fully retract and lower the boom then shutdown engine and remove key from ignition switch
Remove the rear boom cover
Remove the 2 bolts holding each sheave guard bracket to the finger weldment
Using a allen key or pipe-wrench remove shoulder screw holding the rollers in place
Slowly remove hose sheaves (rollers) and keep thrust washers intact in the same order
Remove end of Fork Tilt hoses at front bulkheads on main boom assembly
Cap/plug all open lines and fittings
Remove other end of Auxilliary Hydraulics hoses at front bulkheads on main boom assembly
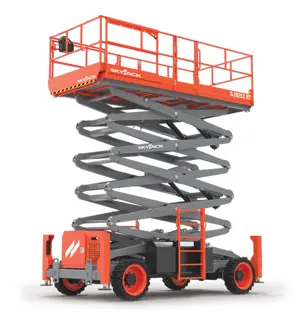
Parts for Skyjack Telehandler SJ1056 THS
Access the parts list for your equipment in MaintainX.
Relay, Top Wiper
9-931298
Relay, Power Relay
9-921734
Relay, Glow Plug
9-165029
Fuse, Auxiliary Hydraulics (5A)
9-156202
Fuse, Blower Motor (30A)
9-156164
Relay, Top Wiper
9-931298
Relay, Power Relay
9-921734
Relay, Glow Plug
9-165029
Fuse, Auxiliary Hydraulics (5A)
9-156202
Fuse, Blower Motor (30A)
9-156164
Relay, Top Wiper
9-931298
Relay, Power Relay
9-921734
Relay, Glow Plug
9-165029
Fuse, Auxiliary Hydraulics (5A)
9-156202
Fuse, Blower Motor (30A)
9-156164
Unlock efficiency
with MaintainX CoPilot
MaintainX CoPilot is your expert colleague, on call 24/7, helping your team find the answers they need to keep equipment running.
Reduce Unplanned Downtime
Ensure your team follows consistent procedures to minimize equipment failures and costly delays.
Maximize Asset Availability
Keep your assets running longer and more reliably, with standardized maintenance workflows from OEM manuals.
Lower Maintenance Costs
Turn any technician into an expert to streamline operations, maintain more assets, and reduce overall costs.
Thousands of companies manage their assets with MaintainX

'%3e%3cpath%20fill='url(%23b)'%20d='M66.008%2080.068c-5.084-.786-9.763-3.834-12.442-8.68a16.942%2016.942%200%200%201-1.87-5.18c1.096.19%202.203.476%203.298.87%206.525%202.333%2010.836%207.68%2011.014%2012.99ZM51.47%2061.576c.488-5.524%203.62-10.716%208.847-13.597a17.132%2017.132%200%200%201%2011.335-1.882c-.798%208.145-7.43%2014.848-16.038%2015.599-1.417.119-2.799.07-4.144-.12Zm28.564-11.478a17.513%2017.513%200%200%201%203.727%204.62c4.608%208.335%201.584%2018.813-6.75%2023.409a16.988%2016.988%200%200%201-4.359%201.679%2019.624%2019.624%200%200%201-3.977-12.776c.346-7.561%204.942-13.931%2011.36-16.932Z'/%3e%3cpath%20fill='%23110F0D'%20fill-rule='evenodd'%20d='M142.831%2048.324h4.977V77.03h-4.977V48.324Zm27.278%2013.002c.322%201.048.453%202.263.453%203.62v12.073h-4.787V66.208c0-.75-.047-1.572-.154-2.143-.453-2.382-1.822-3.572-4.215-3.572-2.31%200-3.882%201.274-4.43%203.476-.143.596-.226%201.405-.226%202.25v10.8h-4.787V56.623h4.477v2.989c1.536-2.5%203.906-3.43%206.371-3.43%203.488%200%206.263%201.68%207.298%205.144Zm24.636%207.323c0%203.882-2.358%206.525-5.763%207.727-1.298.453-2.632.643-4.62.643h-10.169V48.324h9.085c1.691%200%203.156.143%204.049.38%203.465.93%205.727%203.68%205.727%207.335%200%202.441-.81%204.156-2.762%205.644%202.905%201.417%204.453%203.727%204.453%206.966Zm-15.634-8.656h4.584c1.024%200%201.917-.143%202.536-.417%201.215-.548%201.905-1.608%201.905-3.167%200-1.548-.643-2.572-1.845-3.132-.691-.31-1.762-.452-2.763-.452h-4.417v7.168Zm10.716%208.465c0-1.536-.893-3.37-3.227-3.893-.428-.095-1.036-.143-1.571-.143h-5.918v8.085h5.501c.56%200%201.429-.048%201.953-.167%201.94-.453%203.262-1.846%203.262-3.882Zm47.747-11.847-8.097%2020.408h-4.429l-8.109-20.408h5.191l5.192%2014.574%205.108-14.574h5.144Zm-20.218%2010.002c0%20.69-.036%201.262-.155%201.94h-15.943c.631%202.87%202.714%204.728%205.882%204.728%202.131%200%203.607-.882%204.703-2.525h4.87c-1.762%204.144-5.204%206.692-9.657%206.692-6.084%200-10.537-4.858-10.537-10.49%200-6.108%204.524-10.776%2010.335-10.776%206.239%200%2010.442%204.954%2010.502%2010.43Zm-4.763-1.405c-.333-2.846-2.643-4.858-5.691-4.858-2.894%200-5.287%201.929-5.621%204.858h11.312Zm-72.667%203.44c0%204.787-3.287%208.371-9.419%208.371H119.363V64.66c-1.917.274-3.87.69-5.811%201.238l4.537%2011.121h-5.418l-3.596-9.585c-5.144%202.084-10.085%205.216-14.217%209.585h-4.786L101.8%2048.312h4.56l5.68%2013.883a44.112%2044.112%200%200%201%207.323-1.774V48.312h9.084c1.703%200%203.156.143%204.061.393%203.453.929%205.727%203.667%205.727%207.323%200%201.917-.738%204.179-2.81%205.691%203.06%201.56%204.501%204.025%204.501%206.93Zm-15.634-8.667a62.664%2062.664%200%200%201%202.06-.036c1.703.012%203.239.131%204.608.37%201.441-.549%202.357-1.727%202.357-3.537%200-1.941-.881-3.144-2.488-3.667-.548-.18-1.358-.286-2.322-.286h-4.215v7.156Zm-16.55%203.905-3.715-9.894-6.394%2016.502c2.833-2.595%206.263-4.858%2010.109-6.608Zm27.254%204.74c0-2.775-3.131-4.347-8.513-4.418-.715%200-1.441.011-2.191.047v8.252h5.918c2.548%200%204.786-1.37%204.786-3.882Z'%20clip-rule='evenodd'/%3e%3c/g%3e%3cdefs%3e%3clinearGradient%20id='b'%20x1='51.47'%20x2='85.916'%20y1='62.946'%20y2='62.946'%20gradientUnits='userSpaceOnUse'%3e%3cstop%20stop-color='%23CD9F28'/%3e%3cstop%20offset='1'%20stop-color='%23ECD80B'/%3e%3c/linearGradient%3e%3cclipPath%20id='a'%3e%3cpath%20fill='%23fff'%20d='M51.47%2045.728h186.104V80.14H51.47z'/%3e%3c/clipPath%3e%3c/defs%3e%3c/svg%3e)


More from Skyjack


Explore Other Assets


© 2026 MaintainX. All rights reserved.