


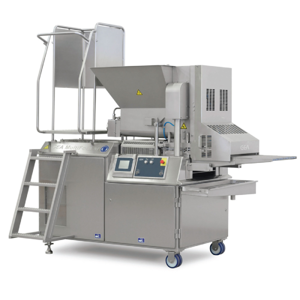
Mitutoyo Microscope TM 505 R
Need answers fast?
Explore the manual using AI.

Turn manuals into instant answers
with your AI-powered assistantTurn manuals into instant answers
with your AI-powered assistant
Manual for Mitutoyo Microscope TM 505 R
Complete asset maintenance, one click away
Get instant access to all the maintenance information you need. Empower technicians to perform preventive maintenance with asset packages, ready to use right out of the box.

Documents & Manuals
Find all the essential guides in one place.
 Tensioning Guide
- Belt-diagram
- C-120 pulleys
+ 13 more

Work Order Templates
Pre-built workflows to keep your asset running smoothly.
- Daily Electrical System Inspection
- Replace Roller and Pulley
- Install Engine B-120
+ 29 more

Procedures
Integrate maintenance plans directly into your work orders.
- Motion Industries
- Applied Industrial Technologies
- Electrical Brothers
+ 5 more

Parts
Access the parts list for your equipment in MaintainX.
- Drive Motor
- B2 Rollers
- Tensioning System
+ 40 more
Mitutoyo Microscope TM 505 R
Create an account to install this asset package.
Maintenance Plans for Mitutoyo Microscope Model TM 505 R
Integrate maintenance plans directly into your work orders in MaintainX.
Microscope Inspection
Warning: Turn off the power switch and pull out the power cord from the AC outlet to prevent electric shocks.
Check the power cord, input connector (AC inlet), voltage selector, GND terminal, surface illuminator connector, and other joints for looseness and poor connections.
Check the power switch
Check that the contour and surface illuminators light by turning on the illumination switch.
Check that the light intensity of each illuminator changes by turning on the light control knob.
Check the focusing knob for any abnormal tightness, play, unevenness, and sound.
Check the stage glass for scratches and contaminants.
Move the XY stage over the measuring range by hand to check for any abnormal tightness, play, unevenness, and sound.
Loosen the angle dial clamp knob and turn the dial to check for any abnormal tightness, play, unevenness, and sound.

Microscope Service
(1) Replacing the fuse
- When a fuse holder is as in the upper left figure
1. Turn off the contour and surface illumination switches and the power switch, and the pull out the power cord.
2. Insert a screwdriver in the rectangular hole of the fuse holder and raise the screwdriver grip, then a latch will separate and the fuse holder will come out from the front.
3. Replace the fuse, and replace the fuse holder.
- When a fuse holder is as in the lower left figure
1. Turn off the contour and surface illuminator switches and the power switch and pull out the power cord.
2. Insert a screwdriver in the rectangular hole on the fuse holder and turn it counterclockwise, then a latch will separate and a fuse holder will come out from the front.
3. Replace the fuse, and replace the fuse holder.
Microscope Maintenance
(1) Main unit
Periodically apply a thin layer of grease over the slide guide surfaces and rack of the optical tube using a brush.
(2) XY stage
Apply a thin layer of spindle oil to guide rails. After dusting the stage glass wipe it gently with a soft cloth.
(3) Eyepiece and objective
Since the optical glass used for lenses is soft and subject to scratches, always use an air-blower or a feather to dust the lens surface. To remove contaminants such as oil and fingerprints, gently wipe them in a circular motion with gauze dampened in high-grade alcohol.
Parts for Mitutoyo Microscope TM 505 R
Access the parts list for your equipment in MaintainX.
Vinyl Cover
512555
Illumination Bulb (24V)
383038
Fuse (1A) For Other Than Ce
350279
Fuse (1A) For Ce
384204
Leaf Spring
380240
Vinyl Cover
512555
Illumination Bulb (24V)
383038
Fuse (1A) For Other Than Ce
350279
Fuse (1A) For Ce
384204
Leaf Spring
380240
Vinyl Cover
512555
Illumination Bulb (24V)
383038
Fuse (1A) For Other Than Ce
350279
Fuse (1A) For Ce
384204
Leaf Spring
380240
Unlock efficiency
with MaintainX CoPilot
MaintainX CoPilot is your expert colleague, on call 24/7, helping your team find the answers they need to keep equipment running.
Reduce Unplanned Downtime
Ensure your team follows consistent procedures to minimize equipment failures and costly delays.
Maximize Asset Availability
Keep your assets running longer and more reliably, with standardized maintenance workflows from OEM manuals.
Lower Maintenance Costs
Turn any technician into an expert to streamline operations, maintain more assets, and reduce overall costs.
Thousands of companies manage their assets with MaintainX

'%3e%3cpath%20fill='url(%23b)'%20d='M66.008%2080.068c-5.084-.786-9.763-3.834-12.442-8.68a16.942%2016.942%200%200%201-1.87-5.18c1.096.19%202.203.476%203.298.87%206.525%202.333%2010.836%207.68%2011.014%2012.99ZM51.47%2061.576c.488-5.524%203.62-10.716%208.847-13.597a17.132%2017.132%200%200%201%2011.335-1.882c-.798%208.145-7.43%2014.848-16.038%2015.599-1.417.119-2.799.07-4.144-.12Zm28.564-11.478a17.513%2017.513%200%200%201%203.727%204.62c4.608%208.335%201.584%2018.813-6.75%2023.409a16.988%2016.988%200%200%201-4.359%201.679%2019.624%2019.624%200%200%201-3.977-12.776c.346-7.561%204.942-13.931%2011.36-16.932Z'/%3e%3cpath%20fill='%23110F0D'%20fill-rule='evenodd'%20d='M142.831%2048.324h4.977V77.03h-4.977V48.324Zm27.278%2013.002c.322%201.048.453%202.263.453%203.62v12.073h-4.787V66.208c0-.75-.047-1.572-.154-2.143-.453-2.382-1.822-3.572-4.215-3.572-2.31%200-3.882%201.274-4.43%203.476-.143.596-.226%201.405-.226%202.25v10.8h-4.787V56.623h4.477v2.989c1.536-2.5%203.906-3.43%206.371-3.43%203.488%200%206.263%201.68%207.298%205.144Zm24.636%207.323c0%203.882-2.358%206.525-5.763%207.727-1.298.453-2.632.643-4.62.643h-10.169V48.324h9.085c1.691%200%203.156.143%204.049.38%203.465.93%205.727%203.68%205.727%207.335%200%202.441-.81%204.156-2.762%205.644%202.905%201.417%204.453%203.727%204.453%206.966Zm-15.634-8.656h4.584c1.024%200%201.917-.143%202.536-.417%201.215-.548%201.905-1.608%201.905-3.167%200-1.548-.643-2.572-1.845-3.132-.691-.31-1.762-.452-2.763-.452h-4.417v7.168Zm10.716%208.465c0-1.536-.893-3.37-3.227-3.893-.428-.095-1.036-.143-1.571-.143h-5.918v8.085h5.501c.56%200%201.429-.048%201.953-.167%201.94-.453%203.262-1.846%203.262-3.882Zm47.747-11.847-8.097%2020.408h-4.429l-8.109-20.408h5.191l5.192%2014.574%205.108-14.574h5.144Zm-20.218%2010.002c0%20.69-.036%201.262-.155%201.94h-15.943c.631%202.87%202.714%204.728%205.882%204.728%202.131%200%203.607-.882%204.703-2.525h4.87c-1.762%204.144-5.204%206.692-9.657%206.692-6.084%200-10.537-4.858-10.537-10.49%200-6.108%204.524-10.776%2010.335-10.776%206.239%200%2010.442%204.954%2010.502%2010.43Zm-4.763-1.405c-.333-2.846-2.643-4.858-5.691-4.858-2.894%200-5.287%201.929-5.621%204.858h11.312Zm-72.667%203.44c0%204.787-3.287%208.371-9.419%208.371H119.363V64.66c-1.917.274-3.87.69-5.811%201.238l4.537%2011.121h-5.418l-3.596-9.585c-5.144%202.084-10.085%205.216-14.217%209.585h-4.786L101.8%2048.312h4.56l5.68%2013.883a44.112%2044.112%200%200%201%207.323-1.774V48.312h9.084c1.703%200%203.156.143%204.061.393%203.453.929%205.727%203.667%205.727%207.323%200%201.917-.738%204.179-2.81%205.691%203.06%201.56%204.501%204.025%204.501%206.93Zm-15.634-8.667a62.664%2062.664%200%200%201%202.06-.036c1.703.012%203.239.131%204.608.37%201.441-.549%202.357-1.727%202.357-3.537%200-1.941-.881-3.144-2.488-3.667-.548-.18-1.358-.286-2.322-.286h-4.215v7.156Zm-16.55%203.905-3.715-9.894-6.394%2016.502c2.833-2.595%206.263-4.858%2010.109-6.608Zm27.254%204.74c0-2.775-3.131-4.347-8.513-4.418-.715%200-1.441.011-2.191.047v8.252h5.918c2.548%200%204.786-1.37%204.786-3.882Z'%20clip-rule='evenodd'/%3e%3c/g%3e%3cdefs%3e%3clinearGradient%20id='b'%20x1='51.47'%20x2='85.916'%20y1='62.946'%20y2='62.946'%20gradientUnits='userSpaceOnUse'%3e%3cstop%20stop-color='%23CD9F28'/%3e%3cstop%20offset='1'%20stop-color='%23ECD80B'/%3e%3c/linearGradient%3e%3cclipPath%20id='a'%3e%3cpath%20fill='%23fff'%20d='M51.47%2045.728h186.104V80.14H51.47z'/%3e%3c/clipPath%3e%3c/defs%3e%3c/svg%3e)


More from Mitutoyo


Explore Other Assets


© 2026 MaintainX. All rights reserved.