


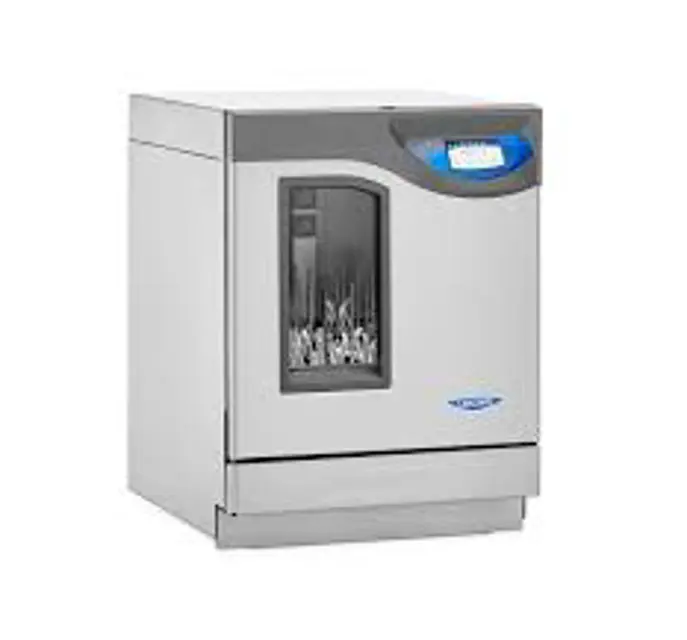
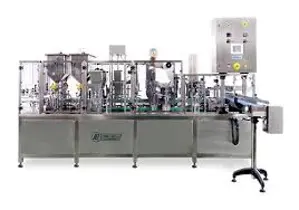
Labconco Washer FlaskScrubber
Need answers fast?
Explore the manual using AI.
Turn manuals into instant answers
with your AI-powered assistantTurn manuals into instant answers
with your AI-powered assistant
Manual for Labconco Washer FlaskScrubber
Complete asset maintenance, one click away
Get instant access to all the maintenance information you need. Empower technicians to perform preventive maintenance with asset packages, ready to use right out of the box.

Documents & Manuals
Find all the essential guides in one place.
 Tensioning Guide
- Belt-diagram
- C-120 pulleys
+ 13 more

Work Order Templates
Pre-built workflows to keep your asset running smoothly.
- Daily Electrical System Inspection
- Replace Roller and Pulley
- Install Engine B-120
+ 29 more

Procedures
Integrate maintenance plans directly into your work orders.
- Motion Industries
- Applied Industrial Technologies
- Electrical Brothers
+ 5 more

Parts
Access the parts list for your equipment in MaintainX.
- Drive Motor
- B2 Rollers
- Tensioning System
+ 40 more
Labconco Washer FlaskScrubber
Create an account to install this asset package.
Maintenance Plans for Labconco Washer Model FlaskScrubber
Integrate maintenance plans directly into your work orders in MaintainX.
Sump Filter Screen Cleaning
Open the washer door and remove the bottom rack
Remove the screw that retains the filter screen
Carefully lift the screen and pull forward, using care not to drop debris into the sump
Upload a photo of the cleaned filter screen
Sign off on the filter screen cleaning

Washer Light Bulb Replacement
Turn off electrical power to the Glassware Washer
Remove the lower and middle panels
Disconnect the springs on each side that connect the pivot brackets to the washer base. Disconnect the hook on the washer base side
Remove the 2 screws on each side of the outer door panel. Lower the panel and remove it
Remove the bulb by pressing in on the bulb and rotating the bulb counterclockwise
Insert the new bulb and rotate clockwise into place
Replace the outer door panel, middle and lower panels
Sign off on the washer light bulb replacement
Water Fill Valve Cleaning
Warning: Ensure the water and electrical power to the washer are turned off before starting the procedure.
Water and electrical power to the washer turned off?
Rear panel removed?
Water supply tube disconnected from the valve?
Valve removed from the base?
Four screws from the valve plate removed and valve separated from the inlet connection?
Valve filter screen removed?
Valve filter screen cleaned under running water?
Screen replaced and valve connection reassembled with the O-ring gasket positioned in the groove in the fill valve body?
Washer Maintenance
Maintaining the Stainless Steel Interior
Stainless steel interior free from scratches and rust?
Describe any visible damage to the stainless steel interior
To remove film or spots from the washer interior:
All glassware removed from the washer?
Choose the Glass Program, Steam OFF, Pure Rinse OFF, and set the drying time to zero
Enter the amount of chlorine bleach poured into the bottom of the tank (in cups)
Enter the amount of 4-8% acetic acid (or white vinegar) added to the bottom of the tank (in cups)
Maintaining the Air Gap in Drain
HEPA Filter Replacement
Open the left door by pressing it in the center
Press down on the lock tab on the top of the HEPA filter and pull the top of the filter outwards
Lift the filter out of the bottom retainer
Upload a photo of the replaced filter
Sign off on the filter replacement
Parts for Labconco Washer FlaskScrubber
Access the parts list for your equipment in MaintainX.
Upper Spindle Rack
4595600
Upper Spindle Rack Without Slides
4595800
8-Place Pipet Washer
4494200
16-Place Pipet Washer
4595200
Glassware Holder – Small
4424600
Upper Spindle Rack
4595600
Upper Spindle Rack Without Slides
4595800
8-Place Pipet Washer
4494200
16-Place Pipet Washer
4595200
Glassware Holder – Small
4424600
Upper Spindle Rack
4595600
Upper Spindle Rack Without Slides
4595800
8-Place Pipet Washer
4494200
16-Place Pipet Washer
4595200
Glassware Holder – Small
4424600
Unlock efficiency
with MaintainX CoPilot
MaintainX CoPilot is your expert colleague, on call 24/7, helping your team find the answers they need to keep equipment running.
Reduce Unplanned Downtime
Ensure your team follows consistent procedures to minimize equipment failures and costly delays.
Maximize Asset Availability
Keep your assets running longer and more reliably, with standardized maintenance workflows from OEM manuals.
Lower Maintenance Costs
Turn any technician into an expert to streamline operations, maintain more assets, and reduce overall costs.
Thousands of companies manage their assets with MaintainX

'%3e%3cpath%20fill='url(%23b)'%20d='M66.008%2080.068c-5.084-.786-9.763-3.834-12.442-8.68a16.942%2016.942%200%200%201-1.87-5.18c1.096.19%202.203.476%203.298.87%206.525%202.333%2010.836%207.68%2011.014%2012.99ZM51.47%2061.576c.488-5.524%203.62-10.716%208.847-13.597a17.132%2017.132%200%200%201%2011.335-1.882c-.798%208.145-7.43%2014.848-16.038%2015.599-1.417.119-2.799.07-4.144-.12Zm28.564-11.478a17.513%2017.513%200%200%201%203.727%204.62c4.608%208.335%201.584%2018.813-6.75%2023.409a16.988%2016.988%200%200%201-4.359%201.679%2019.624%2019.624%200%200%201-3.977-12.776c.346-7.561%204.942-13.931%2011.36-16.932Z'/%3e%3cpath%20fill='%23110F0D'%20fill-rule='evenodd'%20d='M142.831%2048.324h4.977V77.03h-4.977V48.324Zm27.278%2013.002c.322%201.048.453%202.263.453%203.62v12.073h-4.787V66.208c0-.75-.047-1.572-.154-2.143-.453-2.382-1.822-3.572-4.215-3.572-2.31%200-3.882%201.274-4.43%203.476-.143.596-.226%201.405-.226%202.25v10.8h-4.787V56.623h4.477v2.989c1.536-2.5%203.906-3.43%206.371-3.43%203.488%200%206.263%201.68%207.298%205.144Zm24.636%207.323c0%203.882-2.358%206.525-5.763%207.727-1.298.453-2.632.643-4.62.643h-10.169V48.324h9.085c1.691%200%203.156.143%204.049.38%203.465.93%205.727%203.68%205.727%207.335%200%202.441-.81%204.156-2.762%205.644%202.905%201.417%204.453%203.727%204.453%206.966Zm-15.634-8.656h4.584c1.024%200%201.917-.143%202.536-.417%201.215-.548%201.905-1.608%201.905-3.167%200-1.548-.643-2.572-1.845-3.132-.691-.31-1.762-.452-2.763-.452h-4.417v7.168Zm10.716%208.465c0-1.536-.893-3.37-3.227-3.893-.428-.095-1.036-.143-1.571-.143h-5.918v8.085h5.501c.56%200%201.429-.048%201.953-.167%201.94-.453%203.262-1.846%203.262-3.882Zm47.747-11.847-8.097%2020.408h-4.429l-8.109-20.408h5.191l5.192%2014.574%205.108-14.574h5.144Zm-20.218%2010.002c0%20.69-.036%201.262-.155%201.94h-15.943c.631%202.87%202.714%204.728%205.882%204.728%202.131%200%203.607-.882%204.703-2.525h4.87c-1.762%204.144-5.204%206.692-9.657%206.692-6.084%200-10.537-4.858-10.537-10.49%200-6.108%204.524-10.776%2010.335-10.776%206.239%200%2010.442%204.954%2010.502%2010.43Zm-4.763-1.405c-.333-2.846-2.643-4.858-5.691-4.858-2.894%200-5.287%201.929-5.621%204.858h11.312Zm-72.667%203.44c0%204.787-3.287%208.371-9.419%208.371H119.363V64.66c-1.917.274-3.87.69-5.811%201.238l4.537%2011.121h-5.418l-3.596-9.585c-5.144%202.084-10.085%205.216-14.217%209.585h-4.786L101.8%2048.312h4.56l5.68%2013.883a44.112%2044.112%200%200%201%207.323-1.774V48.312h9.084c1.703%200%203.156.143%204.061.393%203.453.929%205.727%203.667%205.727%207.323%200%201.917-.738%204.179-2.81%205.691%203.06%201.56%204.501%204.025%204.501%206.93Zm-15.634-8.667a62.664%2062.664%200%200%201%202.06-.036c1.703.012%203.239.131%204.608.37%201.441-.549%202.357-1.727%202.357-3.537%200-1.941-.881-3.144-2.488-3.667-.548-.18-1.358-.286-2.322-.286h-4.215v7.156Zm-16.55%203.905-3.715-9.894-6.394%2016.502c2.833-2.595%206.263-4.858%2010.109-6.608Zm27.254%204.74c0-2.775-3.131-4.347-8.513-4.418-.715%200-1.441.011-2.191.047v8.252h5.918c2.548%200%204.786-1.37%204.786-3.882Z'%20clip-rule='evenodd'/%3e%3c/g%3e%3cdefs%3e%3clinearGradient%20id='b'%20x1='51.47'%20x2='85.916'%20y1='62.946'%20y2='62.946'%20gradientUnits='userSpaceOnUse'%3e%3cstop%20stop-color='%23CD9F28'/%3e%3cstop%20offset='1'%20stop-color='%23ECD80B'/%3e%3c/linearGradient%3e%3cclipPath%20id='a'%3e%3cpath%20fill='%23fff'%20d='M51.47%2045.728h186.104V80.14H51.47z'/%3e%3c/clipPath%3e%3c/defs%3e%3c/svg%3e)


Explore Other Assets


© 2026 MaintainX. All rights reserved.