


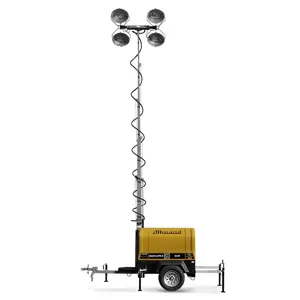
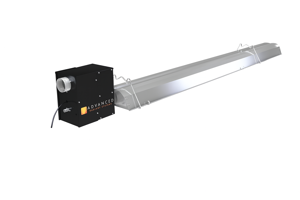
Allmand Bros Light Tower Trailer Maxi-Lite 2
Need answers fast?
Explore the manual using AI.

Turn manuals into instant answers
with your AI-powered assistantTurn manuals into instant answers
with your AI-powered assistant
Manual for Allmand Bros Light Tower Trailer Maxi-Lite 2
Complete asset maintenance, one click away
Get instant access to all the maintenance information you need. Empower technicians to perform preventive maintenance with asset packages, ready to use right out of the box.

Documents & Manuals
Find all the essential guides in one place.
 Tensioning Guide
- Belt-diagram
- C-120 pulleys
+ 13 more

Work Order Templates
Pre-built workflows to keep your asset running smoothly.
- Daily Electrical System Inspection
- Replace Roller and Pulley
- Install Engine B-120
+ 29 more

Procedures
Integrate maintenance plans directly into your work orders.
- Motion Industries
- Applied Industrial Technologies
- Electrical Brothers
+ 5 more

Parts
Access the parts list for your equipment in MaintainX.
- Drive Motor
- B2 Rollers
- Tensioning System
+ 40 more
Allmand Bros Light Tower Trailer Maxi-Lite 2
Create an account to install this asset package.
Maintenance Plans for Allmand Bros Light Tower Trailer Model Maxi-Lite 2
Integrate maintenance plans directly into your work orders in MaintainX.
Optional Fluid Containment System Cleaning
Warning: This procedure should be performed by trained personnel only.
Check if a spill has occurred.
If a spill has occurred, proceed with the following steps.
Enter the estimated amount of spilled fluid.
Upload a photo of the spill.
Position a suitable container beneath the unit.
Check if the bilge drain plug has been removed.
After the fluid has been drained, reinstall the drain plug.
Check if the drain plug has been reinstalled.

Engine Oil Replacement
Use a high-quality engine oil of API (American Petroleum Institute) service class CC/CD/CE.
Refer to the Engine Operator’s Manual for detailed engine oil specifications and service procedures.
All models are equipped with remote oil drains.
Start the engine and let it warm up.
Place a drain pan under the remote oil drain.
Remove the oil drain plug and let the oil drain into the pan until empty.
Replace the oil drain plug and dispose of the old oil in a responsible manner.
Remove the oil fill cap from the top of the engine.
Add clean oil per the stated capacity.
Lamps Replacement
BURN HAZARD: The light bulbs and fixtures become extremely hot during use. Allow the bulbs and fixtures to sufficiently cool down before changing bulbs or severe burns may occur.
Turn off the lights and shut off the engine. Allow the bulbs and fixtures to cool.
Lower the light tower to the full down position.
Loosen the lens channel screws to allow the removal of the lens channel.
Remove the silicone gasket and lens.
Remove the support clip screws and support clip.
Carefully remove the old lamp and install the correct replacement.
Clean the reflector and lens.
Install the support clip and screws.
Trailer Lights Maintenance
TOWING HAZARD! Never tow the trailer with lights that don’t work.
Trailer lights and wiring harness checked for damage or wear
Upload a photo of the wiring harness
Wiring harness is secured to the trailer and does not hang down onto the ground
Tail light housing assemblies checked for damage or leaks
Upload a photo of the tail light housing assemblies
Used silicone or rubber sealant to seal the lens or wiring harness, if needed
Replaced the housing assembly if it can’t be sealed
Used electrical grease to protect the sockets and prevent corrosion
Wheel Bearing Maintenance
Warning: This maintenance check requires trained personnel with PPE!
Wheel bearings clean and fully lubricated?
High-quality wheel bearing grease used?
All components thoroughly cleaned of old grease?
All components inspected for damage or wear?
New grease seal and cotter pin used?
All components kept clean during assembly?
Questionable components replaced?
Bearings and races replaced as a set?
Unlock efficiency
with MaintainX CoPilot
MaintainX CoPilot is your expert colleague, on call 24/7, helping your team find the answers they need to keep equipment running.
Reduce Unplanned Downtime
Ensure your team follows consistent procedures to minimize equipment failures and costly delays.
Maximize Asset Availability
Keep your assets running longer and more reliably, with standardized maintenance workflows from OEM manuals.
Lower Maintenance Costs
Turn any technician into an expert to streamline operations, maintain more assets, and reduce overall costs.
Thousands of companies manage their assets with MaintainX

'%3e%3cpath%20fill='url(%23b)'%20d='M66.008%2080.068c-5.084-.786-9.763-3.834-12.442-8.68a16.942%2016.942%200%200%201-1.87-5.18c1.096.19%202.203.476%203.298.87%206.525%202.333%2010.836%207.68%2011.014%2012.99ZM51.47%2061.576c.488-5.524%203.62-10.716%208.847-13.597a17.132%2017.132%200%200%201%2011.335-1.882c-.798%208.145-7.43%2014.848-16.038%2015.599-1.417.119-2.799.07-4.144-.12Zm28.564-11.478a17.513%2017.513%200%200%201%203.727%204.62c4.608%208.335%201.584%2018.813-6.75%2023.409a16.988%2016.988%200%200%201-4.359%201.679%2019.624%2019.624%200%200%201-3.977-12.776c.346-7.561%204.942-13.931%2011.36-16.932Z'/%3e%3cpath%20fill='%23110F0D'%20fill-rule='evenodd'%20d='M142.831%2048.324h4.977V77.03h-4.977V48.324Zm27.278%2013.002c.322%201.048.453%202.263.453%203.62v12.073h-4.787V66.208c0-.75-.047-1.572-.154-2.143-.453-2.382-1.822-3.572-4.215-3.572-2.31%200-3.882%201.274-4.43%203.476-.143.596-.226%201.405-.226%202.25v10.8h-4.787V56.623h4.477v2.989c1.536-2.5%203.906-3.43%206.371-3.43%203.488%200%206.263%201.68%207.298%205.144Zm24.636%207.323c0%203.882-2.358%206.525-5.763%207.727-1.298.453-2.632.643-4.62.643h-10.169V48.324h9.085c1.691%200%203.156.143%204.049.38%203.465.93%205.727%203.68%205.727%207.335%200%202.441-.81%204.156-2.762%205.644%202.905%201.417%204.453%203.727%204.453%206.966Zm-15.634-8.656h4.584c1.024%200%201.917-.143%202.536-.417%201.215-.548%201.905-1.608%201.905-3.167%200-1.548-.643-2.572-1.845-3.132-.691-.31-1.762-.452-2.763-.452h-4.417v7.168Zm10.716%208.465c0-1.536-.893-3.37-3.227-3.893-.428-.095-1.036-.143-1.571-.143h-5.918v8.085h5.501c.56%200%201.429-.048%201.953-.167%201.94-.453%203.262-1.846%203.262-3.882Zm47.747-11.847-8.097%2020.408h-4.429l-8.109-20.408h5.191l5.192%2014.574%205.108-14.574h5.144Zm-20.218%2010.002c0%20.69-.036%201.262-.155%201.94h-15.943c.631%202.87%202.714%204.728%205.882%204.728%202.131%200%203.607-.882%204.703-2.525h4.87c-1.762%204.144-5.204%206.692-9.657%206.692-6.084%200-10.537-4.858-10.537-10.49%200-6.108%204.524-10.776%2010.335-10.776%206.239%200%2010.442%204.954%2010.502%2010.43Zm-4.763-1.405c-.333-2.846-2.643-4.858-5.691-4.858-2.894%200-5.287%201.929-5.621%204.858h11.312Zm-72.667%203.44c0%204.787-3.287%208.371-9.419%208.371H119.363V64.66c-1.917.274-3.87.69-5.811%201.238l4.537%2011.121h-5.418l-3.596-9.585c-5.144%202.084-10.085%205.216-14.217%209.585h-4.786L101.8%2048.312h4.56l5.68%2013.883a44.112%2044.112%200%200%201%207.323-1.774V48.312h9.084c1.703%200%203.156.143%204.061.393%203.453.929%205.727%203.667%205.727%207.323%200%201.917-.738%204.179-2.81%205.691%203.06%201.56%204.501%204.025%204.501%206.93Zm-15.634-8.667a62.664%2062.664%200%200%201%202.06-.036c1.703.012%203.239.131%204.608.37%201.441-.549%202.357-1.727%202.357-3.537%200-1.941-.881-3.144-2.488-3.667-.548-.18-1.358-.286-2.322-.286h-4.215v7.156Zm-16.55%203.905-3.715-9.894-6.394%2016.502c2.833-2.595%206.263-4.858%2010.109-6.608Zm27.254%204.74c0-2.775-3.131-4.347-8.513-4.418-.715%200-1.441.011-2.191.047v8.252h5.918c2.548%200%204.786-1.37%204.786-3.882Z'%20clip-rule='evenodd'/%3e%3c/g%3e%3cdefs%3e%3clinearGradient%20id='b'%20x1='51.47'%20x2='85.916'%20y1='62.946'%20y2='62.946'%20gradientUnits='userSpaceOnUse'%3e%3cstop%20stop-color='%23CD9F28'/%3e%3cstop%20offset='1'%20stop-color='%23ECD80B'/%3e%3c/linearGradient%3e%3cclipPath%20id='a'%3e%3cpath%20fill='%23fff'%20d='M51.47%2045.728h186.104V80.14H51.47z'/%3e%3c/clipPath%3e%3c/defs%3e%3c/svg%3e)


More from Allmand Bros

Explore Other Assets


© 2026 MaintainX. All rights reserved.