


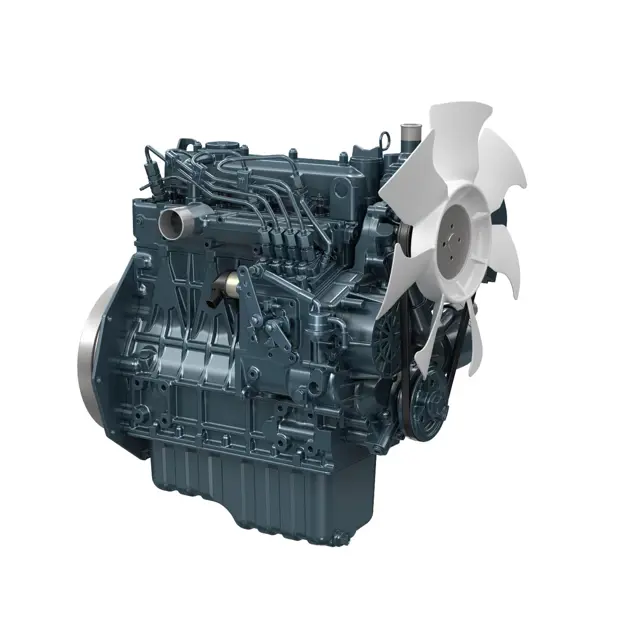
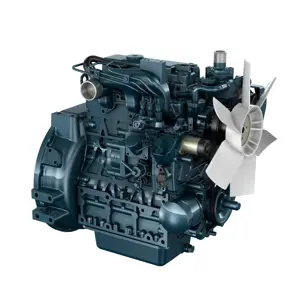
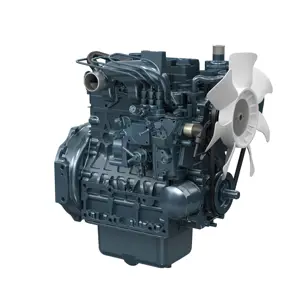
Kubota Diesel Engine V1505
Need answers fast?
Explore the manual using AI.
Turn manuals into instant answers
with your AI-powered assistantTurn manuals into instant answers
with your AI-powered assistant
Manual for Kubota Diesel Engine V1505
Complete asset maintenance, one click away
Get instant access to all the maintenance information you need. Empower technicians to perform preventive maintenance with asset packages, ready to use right out of the box.

Documents & Manuals
Find all the essential guides in one place.
 Tensioning Guide
- Belt-diagram
- C-120 pulleys
+ 13 more

Work Order Templates
Pre-built workflows to keep your asset running smoothly.
- Daily Electrical System Inspection
- Replace Roller and Pulley
- Install Engine B-120
+ 29 more

Procedures
Integrate maintenance plans directly into your work orders.
- Motion Industries
- Applied Industrial Technologies
- Electrical Brothers
+ 5 more

Parts
Access the parts list for your equipment in MaintainX.
- Drive Motor
- B2 Rollers
- Tensioning System
+ 40 more
Kubota Diesel Engine V1505
Create an account to install this asset package.
Maintenance Plans for Kubota Diesel Engine Model V1505
Integrate maintenance plans directly into your work orders in MaintainX.
200 Hourly Engine Oil and Oil Filter Change
Initial Oil Change after 50hours. WARNING! To avoid personal injury or death: Be sure to stop the engine before draining engine oil and changing the oil filter cartridge.
When draining engine oil, place some container underneath the engine and dispose it according to local regulations.
Do not drain oil after running the engine. Allow engine to cool down sufficiently. Oil can be hot and cause burns
1. Change engine oil.
2. Remove the drain plug at the bottom of the engine, and drain all the old oil. Drain oil easier and completely while the engine is hot.
3. When letting out the oil, remove the filler plug too. With the filler plug still in place, it would be difficult to discharge the oil completely.
4. Add new engine oil up to the upper limit of the oil level gauge. Be careful not to add oil above the upper limit of the oil level gauge.
Replacing the oil filter cartridge
1. Replace the oil filter cartridge.

200 Hourly Radiator Check
WARNING! To avoid personal injury or death: Be sure to check radiator hoses and clamp bands periodically. If radiator hose is damaged or coolant leaks, overheats or severe burns could occur.
Check to see if radiator hoses are properly fixed.
If hose clamps are loose or water leaks, tighten hose clamp securely.
Replace hoses and tighten hose clamps securely, if radiator hoses are swollen, hardened or cracked.
Replace hoses and hose clamps every 2 years or earlier, if checked and found that hoses are swollen, hardened or cracked.
Precaution at overheating: The event that the coolant temperature is nearly or more than the boiling point is called 'OVERHEATING'.
If the coolant temperature warning lamp lights up or if steam or coolant does not stop squirting from the radiator overflow pipe, turn off the load and keep the engine idling (COOLING-DOWN) for at least 5 minutes to let it cool down gradually.
Check to see if the coolant runs short or if there is any coolant leak
Check to see if there is any obstacle around the cooling air inlet or outlet
100 Hourly Air Cleaner Element Cleaning
Warning: Never apply oil to the dry type air cleaner element.
Evacuator valve opened to get rid of large particles of dust and dirt.
Inside air cleaner wiped clean.
Avoid touching the element except when cleaning.
Dry dust blown off from the element with compressed air.
Pressure of compressed air used.
Element soaked in detergent, washed, rinsed and dried naturally when carbon or oil adheres.
Element inspected for damage after drying.
Element replaced every year or every six cleanings.
400 Hourly Fuel Filter Replacement
Warning: This procedure requires trained personnel with PPE!
Fuel filter cartridge replaced with a new one
Fuel oil applied thinly over the gasket
Cartridge tightened into position by hand-tightening only
Air vented
IMPORTANT! Replace the fuel filter cartridge periodically to prevent wear of the fuel injection pump plunger or the injection nozzle, due to dirt in the fuel.
NOTE! The fuel filter cartridge and water separator should be replaced more earlier according to the fuel classification in use.
Sign off on the fuel filter replacement
50 Hourly Diesel Engine Check
WARNING! To avoid personal injury or death: Check or replace the fuel pipes after stopping the engine. Broken fuel pipes can cause fires.
Is the clamp band loose?
If the clamp band is loose, apply oil to the screw of the band, and tighten the band securely.
Are the fuel pipes, made of rubber, worn out?
If the fuel pipes, made of rubber, become worn out, replace them and clamp bands every 2 years.
Are the fuel pipes and clamp bands found worn or damaged before 2 years' pass?
If the fuel pipes and clamp bands are found worn or damaged before 2 years' pass, replace or repair them at once.
After replacement of the pipes and bands, air-bleed the fuel system.
Important: When the fuel pipes are not installed, plug them at both ends with clean cloth or paper to prevent dirt from entering. Dirt in the pipes can cause fuel injection pump malfunction.
Unlock efficiency
with MaintainX CoPilot
MaintainX CoPilot is your expert colleague, on call 24/7, helping your team find the answers they need to keep equipment running.
Reduce Unplanned Downtime
Ensure your team follows consistent procedures to minimize equipment failures and costly delays.
Maximize Asset Availability
Keep your assets running longer and more reliably, with standardized maintenance workflows from OEM manuals.
Lower Maintenance Costs
Turn any technician into an expert to streamline operations, maintain more assets, and reduce overall costs.
Thousands of companies manage their assets with MaintainX

'%3e%3cpath%20fill='url(%23b)'%20d='M66.008%2080.068c-5.084-.786-9.763-3.834-12.442-8.68a16.942%2016.942%200%200%201-1.87-5.18c1.096.19%202.203.476%203.298.87%206.525%202.333%2010.836%207.68%2011.014%2012.99ZM51.47%2061.576c.488-5.524%203.62-10.716%208.847-13.597a17.132%2017.132%200%200%201%2011.335-1.882c-.798%208.145-7.43%2014.848-16.038%2015.599-1.417.119-2.799.07-4.144-.12Zm28.564-11.478a17.513%2017.513%200%200%201%203.727%204.62c4.608%208.335%201.584%2018.813-6.75%2023.409a16.988%2016.988%200%200%201-4.359%201.679%2019.624%2019.624%200%200%201-3.977-12.776c.346-7.561%204.942-13.931%2011.36-16.932Z'/%3e%3cpath%20fill='%23110F0D'%20fill-rule='evenodd'%20d='M142.831%2048.324h4.977V77.03h-4.977V48.324Zm27.278%2013.002c.322%201.048.453%202.263.453%203.62v12.073h-4.787V66.208c0-.75-.047-1.572-.154-2.143-.453-2.382-1.822-3.572-4.215-3.572-2.31%200-3.882%201.274-4.43%203.476-.143.596-.226%201.405-.226%202.25v10.8h-4.787V56.623h4.477v2.989c1.536-2.5%203.906-3.43%206.371-3.43%203.488%200%206.263%201.68%207.298%205.144Zm24.636%207.323c0%203.882-2.358%206.525-5.763%207.727-1.298.453-2.632.643-4.62.643h-10.169V48.324h9.085c1.691%200%203.156.143%204.049.38%203.465.93%205.727%203.68%205.727%207.335%200%202.441-.81%204.156-2.762%205.644%202.905%201.417%204.453%203.727%204.453%206.966Zm-15.634-8.656h4.584c1.024%200%201.917-.143%202.536-.417%201.215-.548%201.905-1.608%201.905-3.167%200-1.548-.643-2.572-1.845-3.132-.691-.31-1.762-.452-2.763-.452h-4.417v7.168Zm10.716%208.465c0-1.536-.893-3.37-3.227-3.893-.428-.095-1.036-.143-1.571-.143h-5.918v8.085h5.501c.56%200%201.429-.048%201.953-.167%201.94-.453%203.262-1.846%203.262-3.882Zm47.747-11.847-8.097%2020.408h-4.429l-8.109-20.408h5.191l5.192%2014.574%205.108-14.574h5.144Zm-20.218%2010.002c0%20.69-.036%201.262-.155%201.94h-15.943c.631%202.87%202.714%204.728%205.882%204.728%202.131%200%203.607-.882%204.703-2.525h4.87c-1.762%204.144-5.204%206.692-9.657%206.692-6.084%200-10.537-4.858-10.537-10.49%200-6.108%204.524-10.776%2010.335-10.776%206.239%200%2010.442%204.954%2010.502%2010.43Zm-4.763-1.405c-.333-2.846-2.643-4.858-5.691-4.858-2.894%200-5.287%201.929-5.621%204.858h11.312Zm-72.667%203.44c0%204.787-3.287%208.371-9.419%208.371H119.363V64.66c-1.917.274-3.87.69-5.811%201.238l4.537%2011.121h-5.418l-3.596-9.585c-5.144%202.084-10.085%205.216-14.217%209.585h-4.786L101.8%2048.312h4.56l5.68%2013.883a44.112%2044.112%200%200%201%207.323-1.774V48.312h9.084c1.703%200%203.156.143%204.061.393%203.453.929%205.727%203.667%205.727%207.323%200%201.917-.738%204.179-2.81%205.691%203.06%201.56%204.501%204.025%204.501%206.93Zm-15.634-8.667a62.664%2062.664%200%200%201%202.06-.036c1.703.012%203.239.131%204.608.37%201.441-.549%202.357-1.727%202.357-3.537%200-1.941-.881-3.144-2.488-3.667-.548-.18-1.358-.286-2.322-.286h-4.215v7.156Zm-16.55%203.905-3.715-9.894-6.394%2016.502c2.833-2.595%206.263-4.858%2010.109-6.608Zm27.254%204.74c0-2.775-3.131-4.347-8.513-4.418-.715%200-1.441.011-2.191.047v8.252h5.918c2.548%200%204.786-1.37%204.786-3.882Z'%20clip-rule='evenodd'/%3e%3c/g%3e%3cdefs%3e%3clinearGradient%20id='b'%20x1='51.47'%20x2='85.916'%20y1='62.946'%20y2='62.946'%20gradientUnits='userSpaceOnUse'%3e%3cstop%20stop-color='%23CD9F28'/%3e%3cstop%20offset='1'%20stop-color='%23ECD80B'/%3e%3c/linearGradient%3e%3cclipPath%20id='a'%3e%3cpath%20fill='%23fff'%20d='M51.47%2045.728h186.104V80.14H51.47z'/%3e%3c/clipPath%3e%3c/defs%3e%3c/svg%3e)


More from Kubota


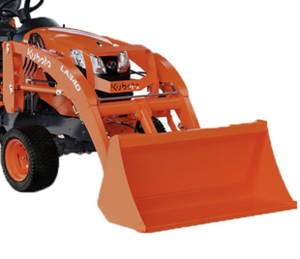


Explore Other Assets


© 2026 MaintainX. All rights reserved.