


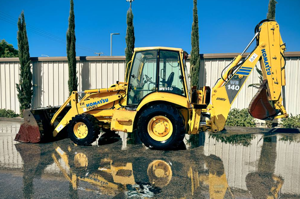
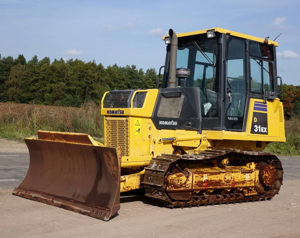
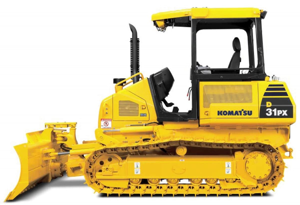
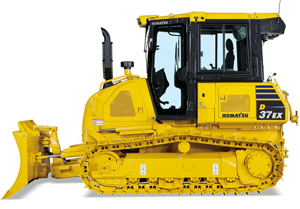
Komatsu Wheel Loader WA320-8
Need answers fast?
Explore the manual using AI.

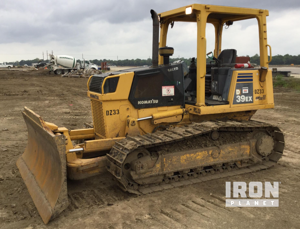
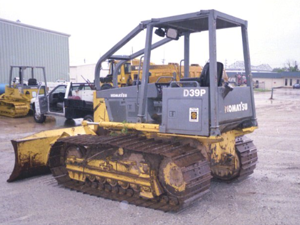
The Komatsu Wheel Loader WA320-8 is a versatile and powerful asset designed for heavy-duty applications. Known for its reliability and efficiency, this wheel loader excels in construction and material handling tasks, making it an essential piece of equipment for any industrial operation.
Turn manuals into instant answers
with your AI-powered assistantTurn manuals into instant answers
with your AI-powered assistant
Complete asset maintenance, one click away
Get instant access to all the maintenance information you need. Empower technicians to perform preventive maintenance with asset packages, ready to use right out of the box.

Documents & Manuals
Find all the essential guides in one place.
 Tensioning Guide
- Belt-diagram
- C-120 pulleys
+ 13 more

Work Order Templates
Pre-built workflows to keep your asset running smoothly.
- Daily Electrical System Inspection
- Replace Roller and Pulley
- Install Engine B-120
+ 29 more

Procedures
Integrate maintenance plans directly into your work orders.
- Motion Industries
- Applied Industrial Technologies
- Electrical Brothers
+ 5 more

Parts
Access the parts list for your equipment in MaintainX.
- Drive Motor
- B2 Rollers
- Tensioning System
+ 40 more
Komatsu Wheel Loader WA320-8
Create an account to install this asset package.
Maintenance Plans for Komatsu Wheel Loader Model WA320-8
Integrate maintenance plans directly into your work orders in MaintainX.
Initial 250 Hours Skid Steer Loader Maintenance
Warning: This maintenance check requires trained personnel with PPE!
Position one final drive so that the oil fill/drain plug is at the bottom.
Did you position the final drive correctly?
Use an 8 mm allen wrench. Remove the oil plugs. Allow the oil to drain into a suitable container.
Did you successfully drain the oil?
Check the drained oil for large metal chips or a significant number of metal particles.
Did you find any large metal chips or a significant number of metal particles in the oil?
Clean the plugs and inspect the plugs. Replace a worn plug or a damaged plug.
Did you clean and inspect the plugs successfully?

50 Hourly Skid Steer Loader Maintenance
Warning: Fingers can be burned from hot pins and bushings. The pins and bushings in a dry joint can become very hot. It is possible to burn the fingers if there is more than brief contact with these components.
Use the recommendations to extend the life of the undercarriage. Use the recommendations to avoid excessive downtime.
During the machine operation, listen for unusual squeaking and for unusual squealing. This noise can indicate a dry joint.
Check the machine for dry joints weekly. Check for dry joints immediately after machine operation.
After machine operation, lightly touch the end of each track pin or bushing. Touch the track pin or the track bushing with the back of your hand. Make a mark on any dry track pin joint that is hot to the touch.
Consult the Custom Track Service expert at any Cat dealer if you detect dry joints or leaks. The Custom Track Service expert at the Cat dealer can perform track inspection.
Sign off on the 50 Hourly Skid Steer Loader Maintenance
1500 Hourly Skid Steer Loader Maintenance
Engine Crankcase Breather - Replace
Note: Only applies to engines with aftertreatment.
Open the engine access door. Refer to Operation and Maintenance Manual, “Access Doors and Covers”.
Tilt the radiator upward. Refer to Operation and Maintenance Manual, “Radiator Tilting”.
The breather is located in the engine compartment on the right-hand side of engine. There is cap on the breather and a replaceable element inside.
Note: This service may be performed without removing the housing from the engine.
Remove the breather cap and remove the filter element.
Note: The C2.2 and C3.3B are equipped with cap on bottom portion of the canister. Use a wrench to remove the breather cap. The C3.8 is equipped with cap on top of canister, remove cap by applying downward pressure on the cap while turning.
Clean the housing and the cap for the breather.
6000 Hourly Skid Steer Loader Maintenance
Cooling System Coolant Extender (ELC) - Add
When a Cat Extended Life Coolant is used, an extender must be added to the cooling system periodically.
Open the engine access door and raise the radiator guard. Refer to Operation and Maintenance Manual, “Access Doors and Covers”.
Note: The radiator cap may be located either on the left side of the radiator (C3.3B and C3.8 engines) or the right side of the radiator (C2.2 engine).
Slowly loosen the radiator cap in order to relieve system pressure. Remove the radiator cap.
If necessary, drain enough coolant from the radiator in order to allow the addition of the coolant additive.
Add 0.17 L (0.18 qt) of cooling system additive.
Inspect the radiator cap and the gasket. If the cap or the gasket is damaged, replace the cap. Install the radiator cap.
Check the coolant level in the sight gauge on the radiator. Maintain the coolant level to the top of the sight gauge with the radiator in the LOWERED position.
500 Hourly Skid Steer Loader Maintenance
Cab Air Filter - Replace
Fresh Air Filter
Note: The cover for the cab air filter is on the lefthand side of the machine behind the cab.
1. Rotate the latch to free the cover from the ductwork. Do NOT use excessive force. Lift on the cover and remove the cover.
2. Replace the element.
3. Reinstall the cover.
Recirculation Filter
1. Turn the thumb screws until the thumb screws are free from the duct. Remove the cover.
2. Replace the element if the element is damaged or if the element seal is damaged. Replace the element if the air conditioner performance is low.
Parts for Komatsu Wheel Loader WA320-8
Access the parts list for your equipment in MaintainX.
Refractometer
360-0774
Refractometer
360-0774
Refractometer
360-0774
Unlock efficiency
with MaintainX CoPilot
MaintainX CoPilot is your expert colleague, on call 24/7, helping your team find the answers they need to keep equipment running.
Reduce Unplanned Downtime
Ensure your team follows consistent procedures to minimize equipment failures and costly delays.
Maximize Asset Availability
Keep your assets running longer and more reliably, with standardized maintenance workflows from OEM manuals.
Lower Maintenance Costs
Turn any technician into an expert to streamline operations, maintain more assets, and reduce overall costs.
Thousands of companies manage their assets with MaintainX

'%3e%3cpath%20fill='url(%23b)'%20d='M66.008%2080.068c-5.084-.786-9.763-3.834-12.442-8.68a16.942%2016.942%200%200%201-1.87-5.18c1.096.19%202.203.476%203.298.87%206.525%202.333%2010.836%207.68%2011.014%2012.99ZM51.47%2061.576c.488-5.524%203.62-10.716%208.847-13.597a17.132%2017.132%200%200%201%2011.335-1.882c-.798%208.145-7.43%2014.848-16.038%2015.599-1.417.119-2.799.07-4.144-.12Zm28.564-11.478a17.513%2017.513%200%200%201%203.727%204.62c4.608%208.335%201.584%2018.813-6.75%2023.409a16.988%2016.988%200%200%201-4.359%201.679%2019.624%2019.624%200%200%201-3.977-12.776c.346-7.561%204.942-13.931%2011.36-16.932Z'/%3e%3cpath%20fill='%23110F0D'%20fill-rule='evenodd'%20d='M142.831%2048.324h4.977V77.03h-4.977V48.324Zm27.278%2013.002c.322%201.048.453%202.263.453%203.62v12.073h-4.787V66.208c0-.75-.047-1.572-.154-2.143-.453-2.382-1.822-3.572-4.215-3.572-2.31%200-3.882%201.274-4.43%203.476-.143.596-.226%201.405-.226%202.25v10.8h-4.787V56.623h4.477v2.989c1.536-2.5%203.906-3.43%206.371-3.43%203.488%200%206.263%201.68%207.298%205.144Zm24.636%207.323c0%203.882-2.358%206.525-5.763%207.727-1.298.453-2.632.643-4.62.643h-10.169V48.324h9.085c1.691%200%203.156.143%204.049.38%203.465.93%205.727%203.68%205.727%207.335%200%202.441-.81%204.156-2.762%205.644%202.905%201.417%204.453%203.727%204.453%206.966Zm-15.634-8.656h4.584c1.024%200%201.917-.143%202.536-.417%201.215-.548%201.905-1.608%201.905-3.167%200-1.548-.643-2.572-1.845-3.132-.691-.31-1.762-.452-2.763-.452h-4.417v7.168Zm10.716%208.465c0-1.536-.893-3.37-3.227-3.893-.428-.095-1.036-.143-1.571-.143h-5.918v8.085h5.501c.56%200%201.429-.048%201.953-.167%201.94-.453%203.262-1.846%203.262-3.882Zm47.747-11.847-8.097%2020.408h-4.429l-8.109-20.408h5.191l5.192%2014.574%205.108-14.574h5.144Zm-20.218%2010.002c0%20.69-.036%201.262-.155%201.94h-15.943c.631%202.87%202.714%204.728%205.882%204.728%202.131%200%203.607-.882%204.703-2.525h4.87c-1.762%204.144-5.204%206.692-9.657%206.692-6.084%200-10.537-4.858-10.537-10.49%200-6.108%204.524-10.776%2010.335-10.776%206.239%200%2010.442%204.954%2010.502%2010.43Zm-4.763-1.405c-.333-2.846-2.643-4.858-5.691-4.858-2.894%200-5.287%201.929-5.621%204.858h11.312Zm-72.667%203.44c0%204.787-3.287%208.371-9.419%208.371H119.363V64.66c-1.917.274-3.87.69-5.811%201.238l4.537%2011.121h-5.418l-3.596-9.585c-5.144%202.084-10.085%205.216-14.217%209.585h-4.786L101.8%2048.312h4.56l5.68%2013.883a44.112%2044.112%200%200%201%207.323-1.774V48.312h9.084c1.703%200%203.156.143%204.061.393%203.453.929%205.727%203.667%205.727%207.323%200%201.917-.738%204.179-2.81%205.691%203.06%201.56%204.501%204.025%204.501%206.93Zm-15.634-8.667a62.664%2062.664%200%200%201%202.06-.036c1.703.012%203.239.131%204.608.37%201.441-.549%202.357-1.727%202.357-3.537%200-1.941-.881-3.144-2.488-3.667-.548-.18-1.358-.286-2.322-.286h-4.215v7.156Zm-16.55%203.905-3.715-9.894-6.394%2016.502c2.833-2.595%206.263-4.858%2010.109-6.608Zm27.254%204.74c0-2.775-3.131-4.347-8.513-4.418-.715%200-1.441.011-2.191.047v8.252h5.918c2.548%200%204.786-1.37%204.786-3.882Z'%20clip-rule='evenodd'/%3e%3c/g%3e%3cdefs%3e%3clinearGradient%20id='b'%20x1='51.47'%20x2='85.916'%20y1='62.946'%20y2='62.946'%20gradientUnits='userSpaceOnUse'%3e%3cstop%20stop-color='%23CD9F28'/%3e%3cstop%20offset='1'%20stop-color='%23ECD80B'/%3e%3c/linearGradient%3e%3cclipPath%20id='a'%3e%3cpath%20fill='%23fff'%20d='M51.47%2045.728h186.104V80.14H51.47z'/%3e%3c/clipPath%3e%3c/defs%3e%3c/svg%3e)


More from Komatsu


Explore Other Assets


© 2026 MaintainX. All rights reserved.