


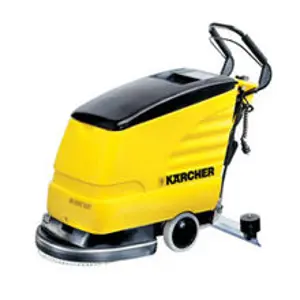
Karcher Floor Scrubber BD 70/75 W Classic Bp
Need answers fast?
Explore the manual using AI.
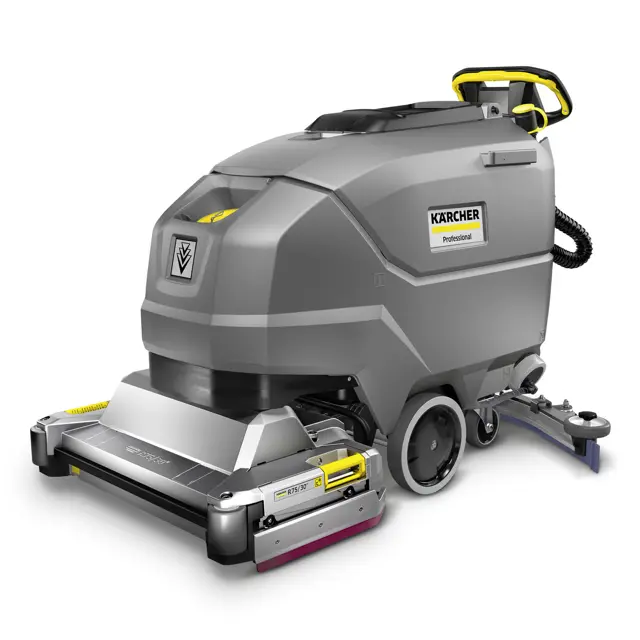
The Karcher Floor Scrubber BD 70/75 W Classic Bp is a robust and efficient cleaning solution designed for commercial use. This battery-powered scrubber offers exceptional maneuverability and cleaning performance, making it ideal for various floor types in industrial settings.
Turn manuals into instant answers
with your AI-powered assistantTurn manuals into instant answers
with your AI-powered assistant
Manual for Karcher Floor Scrubber BD 70/75 W Classic Bp
Complete asset maintenance, one click away
Get instant access to all the maintenance information you need. Empower technicians to perform preventive maintenance with asset packages, ready to use right out of the box.

Documents & Manuals
Find all the essential guides in one place.
 Tensioning Guide
- Belt-diagram
- C-120 pulleys
+ 13 more

Work Order Templates
Pre-built workflows to keep your asset running smoothly.
- Daily Electrical System Inspection
- Replace Roller and Pulley
- Install Engine B-120
+ 29 more

Procedures
Integrate maintenance plans directly into your work orders.
- Motion Industries
- Applied Industrial Technologies
- Electrical Brothers
+ 5 more

Parts
Access the parts list for your equipment in MaintainX.
- Drive Motor
- B2 Rollers
- Tensioning System
+ 40 more
Karcher Floor Scrubber BD 70/75 W Classic Bp
Create an account to install this asset package.
Maintenance Plans for Karcher Floor Scrubber Model BD 70/75 W Classic Bp
Integrate maintenance plans directly into your work orders in MaintainX.
Float and Fluff Filter Cleaning
Open the waste water tank cover
Release the latching hooks
Pull the float housing downwards and off
Remove the float from the float housing and clean it
Remove the fluff filter and clean it
Assemble all parts in the reverse order

Coarse Dirt Filter Cleaning
Open the waste water tank cover
Pull the coarse dirt filter upwards and off
Rinse off the coarse dirt filter under running water
Reinsert the coarse dirt filter into the waste water tank
Sign off on the filter cleaning
1 Monthly Floor Scrubber Maintenance
Drain the fresh water tank and flush out deposits
Clean the fresh water filter
Clean the float and fluff filter
Check battery poles for oxidation, brush off if necessary. Make sure the connection cables are firmly in place
Clean the seals between the waste water tank and the cover, check for leaks and replace if necessary
Check the acid density of the cells if the batteries are not maintenance-free
If the device is not used for a longer period of time, shut down the device when the batteries are fully charged. Fully charge the battery at least once a month
When used regularly, charge the battery fully and without interruption at least once a week
Have the prescribed inspection performed by Customer Service every year
Fresh Water Filter Cleaning
Drain the fresh water
Unscrew the fresh water tank lock
Pull out the fresh water filter and rinse with clean water
Insert the fresh water filter
Fit the fresh water tank lock
Note: Take care to ensure that the hose connection in the fresh water tank cap is positioned at the lowest point in the tank after screwing the cap in place.
Sign off on the fresh water filter cleaning
Roller Brushes Replacement
Raise the cleaning head
Pull out the brush replacement handle
Remove the bearing cover including the squeegee blade
Pull out the roller brush
Fit the new roller brush and centre it on the driver
Install the bearing cover with the squeegee blade
Make sure the roller brush sits on the mounting mandrel and not underneath
Pivot the brush replacement handle upwards and latch it into place
Repeat the entire procedure at the other side
Parts for Karcher Floor Scrubber BD 70/75 W Classic Bp
Access the parts list for your equipment in MaintainX.
Suction Lip Set, Linatex
4.037-175.0
Pad, Red (Medium Soft)
6.369-003.0
Suction Bar, 950 mm, Curved
4.777-111.0
Pad, Brown (SPP)
2.639-290.0
Pad Drive Board
4762-590.0
Suction Lip Set, Linatex
4.037-175.0
Pad, Red (Medium Soft)
6.369-003.0
Suction Bar, 950 mm, Curved
4.777-111.0
Pad, Brown (SPP)
2.639-290.0
Pad Drive Board
4762-590.0
Suction Lip Set, Linatex
4.037-175.0
Pad, Red (Medium Soft)
6.369-003.0
Suction Bar, 950 mm, Curved
4.777-111.0
Pad, Brown (SPP)
2.639-290.0
Pad Drive Board
4762-590.0
Unlock efficiency
with MaintainX CoPilot
MaintainX CoPilot is your expert colleague, on call 24/7, helping your team find the answers they need to keep equipment running.
Reduce Unplanned Downtime
Ensure your team follows consistent procedures to minimize equipment failures and costly delays.
Maximize Asset Availability
Keep your assets running longer and more reliably, with standardized maintenance workflows from OEM manuals.
Lower Maintenance Costs
Turn any technician into an expert to streamline operations, maintain more assets, and reduce overall costs.
Thousands of companies manage their assets with MaintainX

'%3e%3cpath%20fill='url(%23b)'%20d='M66.008%2080.068c-5.084-.786-9.763-3.834-12.442-8.68a16.942%2016.942%200%200%201-1.87-5.18c1.096.19%202.203.476%203.298.87%206.525%202.333%2010.836%207.68%2011.014%2012.99ZM51.47%2061.576c.488-5.524%203.62-10.716%208.847-13.597a17.132%2017.132%200%200%201%2011.335-1.882c-.798%208.145-7.43%2014.848-16.038%2015.599-1.417.119-2.799.07-4.144-.12Zm28.564-11.478a17.513%2017.513%200%200%201%203.727%204.62c4.608%208.335%201.584%2018.813-6.75%2023.409a16.988%2016.988%200%200%201-4.359%201.679%2019.624%2019.624%200%200%201-3.977-12.776c.346-7.561%204.942-13.931%2011.36-16.932Z'/%3e%3cpath%20fill='%23110F0D'%20fill-rule='evenodd'%20d='M142.831%2048.324h4.977V77.03h-4.977V48.324Zm27.278%2013.002c.322%201.048.453%202.263.453%203.62v12.073h-4.787V66.208c0-.75-.047-1.572-.154-2.143-.453-2.382-1.822-3.572-4.215-3.572-2.31%200-3.882%201.274-4.43%203.476-.143.596-.226%201.405-.226%202.25v10.8h-4.787V56.623h4.477v2.989c1.536-2.5%203.906-3.43%206.371-3.43%203.488%200%206.263%201.68%207.298%205.144Zm24.636%207.323c0%203.882-2.358%206.525-5.763%207.727-1.298.453-2.632.643-4.62.643h-10.169V48.324h9.085c1.691%200%203.156.143%204.049.38%203.465.93%205.727%203.68%205.727%207.335%200%202.441-.81%204.156-2.762%205.644%202.905%201.417%204.453%203.727%204.453%206.966Zm-15.634-8.656h4.584c1.024%200%201.917-.143%202.536-.417%201.215-.548%201.905-1.608%201.905-3.167%200-1.548-.643-2.572-1.845-3.132-.691-.31-1.762-.452-2.763-.452h-4.417v7.168Zm10.716%208.465c0-1.536-.893-3.37-3.227-3.893-.428-.095-1.036-.143-1.571-.143h-5.918v8.085h5.501c.56%200%201.429-.048%201.953-.167%201.94-.453%203.262-1.846%203.262-3.882Zm47.747-11.847-8.097%2020.408h-4.429l-8.109-20.408h5.191l5.192%2014.574%205.108-14.574h5.144Zm-20.218%2010.002c0%20.69-.036%201.262-.155%201.94h-15.943c.631%202.87%202.714%204.728%205.882%204.728%202.131%200%203.607-.882%204.703-2.525h4.87c-1.762%204.144-5.204%206.692-9.657%206.692-6.084%200-10.537-4.858-10.537-10.49%200-6.108%204.524-10.776%2010.335-10.776%206.239%200%2010.442%204.954%2010.502%2010.43Zm-4.763-1.405c-.333-2.846-2.643-4.858-5.691-4.858-2.894%200-5.287%201.929-5.621%204.858h11.312Zm-72.667%203.44c0%204.787-3.287%208.371-9.419%208.371H119.363V64.66c-1.917.274-3.87.69-5.811%201.238l4.537%2011.121h-5.418l-3.596-9.585c-5.144%202.084-10.085%205.216-14.217%209.585h-4.786L101.8%2048.312h4.56l5.68%2013.883a44.112%2044.112%200%200%201%207.323-1.774V48.312h9.084c1.703%200%203.156.143%204.061.393%203.453.929%205.727%203.667%205.727%207.323%200%201.917-.738%204.179-2.81%205.691%203.06%201.56%204.501%204.025%204.501%206.93Zm-15.634-8.667a62.664%2062.664%200%200%201%202.06-.036c1.703.012%203.239.131%204.608.37%201.441-.549%202.357-1.727%202.357-3.537%200-1.941-.881-3.144-2.488-3.667-.548-.18-1.358-.286-2.322-.286h-4.215v7.156Zm-16.55%203.905-3.715-9.894-6.394%2016.502c2.833-2.595%206.263-4.858%2010.109-6.608Zm27.254%204.74c0-2.775-3.131-4.347-8.513-4.418-.715%200-1.441.011-2.191.047v8.252h5.918c2.548%200%204.786-1.37%204.786-3.882Z'%20clip-rule='evenodd'/%3e%3c/g%3e%3cdefs%3e%3clinearGradient%20id='b'%20x1='51.47'%20x2='85.916'%20y1='62.946'%20y2='62.946'%20gradientUnits='userSpaceOnUse'%3e%3cstop%20stop-color='%23CD9F28'/%3e%3cstop%20offset='1'%20stop-color='%23ECD80B'/%3e%3c/linearGradient%3e%3cclipPath%20id='a'%3e%3cpath%20fill='%23fff'%20d='M51.47%2045.728h186.104V80.14H51.47z'/%3e%3c/clipPath%3e%3c/defs%3e%3c/svg%3e)


More from Karcher


Explore Other Assets


© 2026 MaintainX. All rights reserved.