


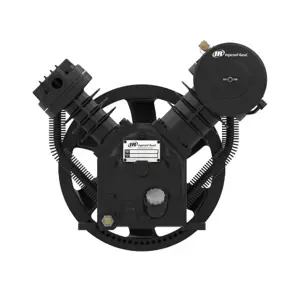
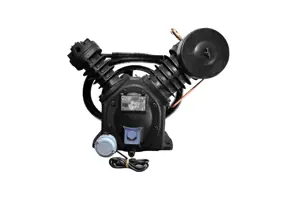
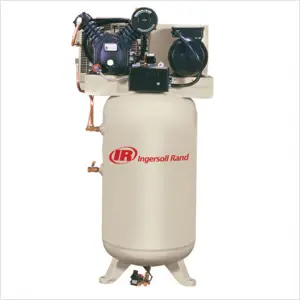
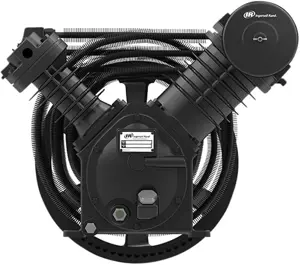
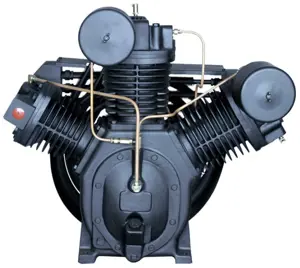
Ingersoll Rand Refrigarated Air Dryer DXR425
Need answers fast?
Explore the manual using AI.
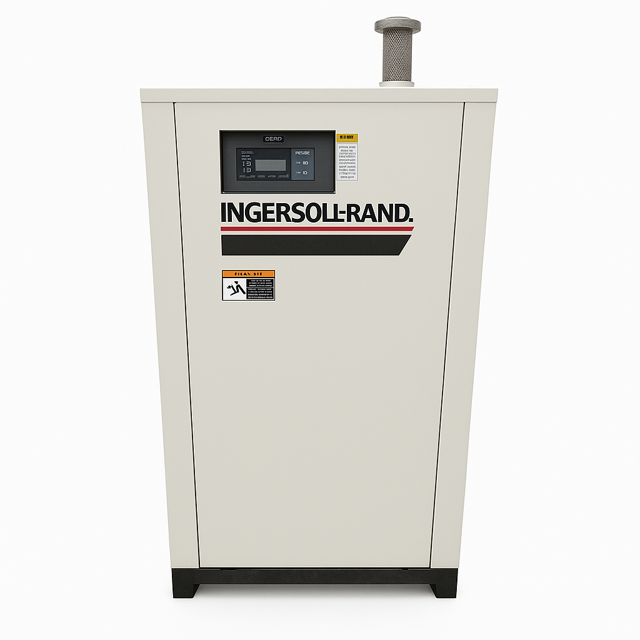
The Ingersoll Rand Refrigerated Air Dryer DXR425 is a high-performance air drying solution designed to efficiently remove moisture from compressed air systems. This model ensures optimal air quality and reliability, making it ideal for industrial applications requiring consistent performance and durability.
Turn manuals into instant answers
with your AI-powered assistantTurn manuals into instant answers
with your AI-powered assistant
Complete asset maintenance, one click away
Get instant access to all the maintenance information you need. Empower technicians to perform preventive maintenance with asset packages, ready to use right out of the box.

Documents & Manuals
Find all the essential guides in one place.
 Tensioning Guide
- Belt-diagram
- C-120 pulleys
+ 13 more

Work Order Templates
Pre-built workflows to keep your asset running smoothly.
- Daily Electrical System Inspection
- Replace Roller and Pulley
- Install Engine B-120
+ 29 more

Procedures
Integrate maintenance plans directly into your work orders.
- Motion Industries
- Applied Industrial Technologies
- Electrical Brothers
+ 5 more

Parts
Access the parts list for your equipment in MaintainX.
- Drive Motor
- B2 Rollers
- Tensioning System
+ 40 more
Ingersoll Rand Refrigarated Air Dryer DXR425
Create an account to install this asset package.
Maintenance Plans for Ingersoll Rand Refrigarated Air Dryer Model DXR425
Integrate maintenance plans directly into your work orders in MaintainX.
1 Daily Dryer Maintenance
DANGER: Dismantling or working on any component of the compressed air system under pressure may cause equipment failure and serious personal injury. Before dismantling any part of the dryer or compressed air system, completely vent the internal pressure to the atmosphere.
For continued good performance of your refrigerated dryer, all refrigeration system maintenance should be performed by a competent refrigeration mechanic.
Before corrective maintenance is done during the warranty period, call your local distributor and proceed according to instructions. Refer to the warranty for limits of your coverage.
Check the operation of the automatic drain valve at least once during each 8-hour shift.
On models 75 to 100 scfm, inspect and clean (if necessary) the drain valve strainer. See the Field Service Guide for remedies to drain valve malfunctions. See the Instrumentation section for drain valve adjustment.
For models with the System Operation Monitor, check the following readouts.
High evaporator temperature
Refrigerant suction temperature
Refrigerant discharge temperature

1 Monthly Dryer Maintenance
Air-cooled condensers maintenance
Inspect the condenser coils
Remove dust, dirt or other particles with a soft brush or with compressed air from an OSHA-approved air nozzle that limits its discharge pressure to 30 psig
If the coils are coated with oil, grease or other substances that reduce the cooling efficiency, clean the coil
Ambient Air Filter Replacement
Replace the ambient air filter
4500 Hourly / 6 Monthly Dryer Maintenance
Service Due Indicator
Enter the current hours of dryer operation
Is the yellow SERVICE DUE indicator light on?
If the SERVICE DUE indicator is on, complete the following steps:
Disassemble and clean automatic drain valve
Disassemble and clean separator bowl (models DXR150 and larger)
Type of condenser
For air-cooled condensers, inspect the condenser coils, clean if necessary. Lubricate fan motors with 20 wt motor oil (if necessary)
For water-cooled condensers, clean customer-supplied strainer
1 Yearly Prefilter Element Replacement
DANGER! Vent internal pressure to atmospheric pressure before performing any maintenance.
Is the filter isolated by opening the bypass valve and closing both isolation valves?
Is the pressure bleed valve open to vent the filter to atmospheric pressure?
Disconnect drain lines at manual and automatic drain valves (if installed).
DANGER! A 'hissing' sound while the bowl is being removed indicates the filter has not been properly depressurized. DO NOT continue to remove the bowl until the filter has been completely vented to atmospheric pressure.
Remove the bottom bowl by unscrewing it from the head. A strap wrench may be needed.
Remove the element from the filter head with a brisk downward pull, or by working the element back and forth until it snaps free. Discard the element in accordance with applicable regulations.
Clean accumulated debris from the bowl with soap and water, and dry thoroughly.
CAUTION! Lubricate the element O-ring with a petroleum-based lubricant that is compatible with your application.
Ambient Air Filter Replacement
Warning: Only perform this procedure if your unit is equipped with the optional ambient air filter (designated by the suffix F in the model number)
Inspect the filter element. Does it need replacement?
Upload a photo of the filter element if replacement is needed
Enter the model number of the replacement element
Record the date of the element change
Upload a photo of the 'Element Change' label with the updated information
Sign off on the filter replacement
Parts for Ingersoll Rand Refrigarated Air Dryer DXR425
Access the parts list for your equipment in MaintainX.
System Operation Monitor
42DE5099AD
On-Off Switch
7DE240JA
Fan Motor
7DE41VN
Compressor 230/3/60
7DE40JF
Power On Light
7DE130FR
System Operation Monitor
42DE5099AD
On-Off Switch
7DE240JA
Fan Motor
7DE41VN
Compressor 230/3/60
7DE40JF
Power On Light
7DE130FR
System Operation Monitor
42DE5099AD
On-Off Switch
7DE240JA
Fan Motor
7DE41VN
Compressor 230/3/60
7DE40JF
Power On Light
7DE130FR
Unlock efficiency
with MaintainX CoPilot
MaintainX CoPilot is your expert colleague, on call 24/7, helping your team find the answers they need to keep equipment running.
Reduce Unplanned Downtime
Ensure your team follows consistent procedures to minimize equipment failures and costly delays.
Maximize Asset Availability
Keep your assets running longer and more reliably, with standardized maintenance workflows from OEM manuals.
Lower Maintenance Costs
Turn any technician into an expert to streamline operations, maintain more assets, and reduce overall costs.
Thousands of companies manage their assets with MaintainX

'%3e%3cpath%20fill='url(%23b)'%20d='M66.008%2080.068c-5.084-.786-9.763-3.834-12.442-8.68a16.942%2016.942%200%200%201-1.87-5.18c1.096.19%202.203.476%203.298.87%206.525%202.333%2010.836%207.68%2011.014%2012.99ZM51.47%2061.576c.488-5.524%203.62-10.716%208.847-13.597a17.132%2017.132%200%200%201%2011.335-1.882c-.798%208.145-7.43%2014.848-16.038%2015.599-1.417.119-2.799.07-4.144-.12Zm28.564-11.478a17.513%2017.513%200%200%201%203.727%204.62c4.608%208.335%201.584%2018.813-6.75%2023.409a16.988%2016.988%200%200%201-4.359%201.679%2019.624%2019.624%200%200%201-3.977-12.776c.346-7.561%204.942-13.931%2011.36-16.932Z'/%3e%3cpath%20fill='%23110F0D'%20fill-rule='evenodd'%20d='M142.831%2048.324h4.977V77.03h-4.977V48.324Zm27.278%2013.002c.322%201.048.453%202.263.453%203.62v12.073h-4.787V66.208c0-.75-.047-1.572-.154-2.143-.453-2.382-1.822-3.572-4.215-3.572-2.31%200-3.882%201.274-4.43%203.476-.143.596-.226%201.405-.226%202.25v10.8h-4.787V56.623h4.477v2.989c1.536-2.5%203.906-3.43%206.371-3.43%203.488%200%206.263%201.68%207.298%205.144Zm24.636%207.323c0%203.882-2.358%206.525-5.763%207.727-1.298.453-2.632.643-4.62.643h-10.169V48.324h9.085c1.691%200%203.156.143%204.049.38%203.465.93%205.727%203.68%205.727%207.335%200%202.441-.81%204.156-2.762%205.644%202.905%201.417%204.453%203.727%204.453%206.966Zm-15.634-8.656h4.584c1.024%200%201.917-.143%202.536-.417%201.215-.548%201.905-1.608%201.905-3.167%200-1.548-.643-2.572-1.845-3.132-.691-.31-1.762-.452-2.763-.452h-4.417v7.168Zm10.716%208.465c0-1.536-.893-3.37-3.227-3.893-.428-.095-1.036-.143-1.571-.143h-5.918v8.085h5.501c.56%200%201.429-.048%201.953-.167%201.94-.453%203.262-1.846%203.262-3.882Zm47.747-11.847-8.097%2020.408h-4.429l-8.109-20.408h5.191l5.192%2014.574%205.108-14.574h5.144Zm-20.218%2010.002c0%20.69-.036%201.262-.155%201.94h-15.943c.631%202.87%202.714%204.728%205.882%204.728%202.131%200%203.607-.882%204.703-2.525h4.87c-1.762%204.144-5.204%206.692-9.657%206.692-6.084%200-10.537-4.858-10.537-10.49%200-6.108%204.524-10.776%2010.335-10.776%206.239%200%2010.442%204.954%2010.502%2010.43Zm-4.763-1.405c-.333-2.846-2.643-4.858-5.691-4.858-2.894%200-5.287%201.929-5.621%204.858h11.312Zm-72.667%203.44c0%204.787-3.287%208.371-9.419%208.371H119.363V64.66c-1.917.274-3.87.69-5.811%201.238l4.537%2011.121h-5.418l-3.596-9.585c-5.144%202.084-10.085%205.216-14.217%209.585h-4.786L101.8%2048.312h4.56l5.68%2013.883a44.112%2044.112%200%200%201%207.323-1.774V48.312h9.084c1.703%200%203.156.143%204.061.393%203.453.929%205.727%203.667%205.727%207.323%200%201.917-.738%204.179-2.81%205.691%203.06%201.56%204.501%204.025%204.501%206.93Zm-15.634-8.667a62.664%2062.664%200%200%201%202.06-.036c1.703.012%203.239.131%204.608.37%201.441-.549%202.357-1.727%202.357-3.537%200-1.941-.881-3.144-2.488-3.667-.548-.18-1.358-.286-2.322-.286h-4.215v7.156Zm-16.55%203.905-3.715-9.894-6.394%2016.502c2.833-2.595%206.263-4.858%2010.109-6.608Zm27.254%204.74c0-2.775-3.131-4.347-8.513-4.418-.715%200-1.441.011-2.191.047v8.252h5.918c2.548%200%204.786-1.37%204.786-3.882Z'%20clip-rule='evenodd'/%3e%3c/g%3e%3cdefs%3e%3clinearGradient%20id='b'%20x1='51.47'%20x2='85.916'%20y1='62.946'%20y2='62.946'%20gradientUnits='userSpaceOnUse'%3e%3cstop%20stop-color='%23CD9F28'/%3e%3cstop%20offset='1'%20stop-color='%23ECD80B'/%3e%3c/linearGradient%3e%3cclipPath%20id='a'%3e%3cpath%20fill='%23fff'%20d='M51.47%2045.728h186.104V80.14H51.47z'/%3e%3c/clipPath%3e%3c/defs%3e%3c/svg%3e)


More from Ingersoll Rand


Explore Other Assets


© 2026 MaintainX. All rights reserved.