


Hussmann Low Temperature Merchandiser LTH-8S
Need answers fast?
Explore the manual using AI.
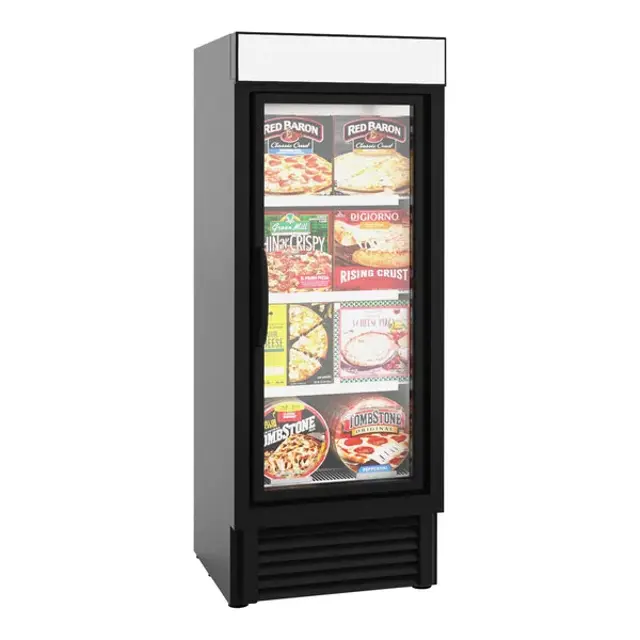
The Hussmann Low Temperature Merchandiser LTH-8S is an efficient refrigeration solution designed for optimal product display and preservation. Ideal for retail environments, this model ensures consistent low temperatures while providing easy access for customers. Enhance your merchandising strategy with this reliable and high-performance unit from Hussmann.
Turn manuals into instant answers
with your AI-powered assistantTurn manuals into instant answers
with your AI-powered assistant
Complete asset maintenance, one click away
Get instant access to all the maintenance information you need. Empower technicians to perform preventive maintenance with asset packages, ready to use right out of the box.

Documents & Manuals
Find all the essential guides in one place.
 Tensioning Guide
- Belt-diagram
- C-120 pulleys
+ 13 more

Work Order Templates
Pre-built workflows to keep your asset running smoothly.
- Daily Electrical System Inspection
- Replace Roller and Pulley
- Install Engine B-120
+ 29 more

Procedures
Integrate maintenance plans directly into your work orders.
- Motion Industries
- Applied Industrial Technologies
- Electrical Brothers
+ 5 more

Parts
Access the parts list for your equipment in MaintainX.
- Drive Motor
- B2 Rollers
- Tensioning System
+ 40 more
Hussmann Low Temperature Merchandiser LTH-8S
Create an account to install this asset package.
Maintenance Plans for Hussmann Low Temperature Merchandiser Model LTH-8S
Integrate maintenance plans directly into your work orders in MaintainX.
Display Lamp Replacement
Power to the merchandiser disconnected
Plastic pins attaching the display lamp panel removed
Number of pins at the bottom of the display cover
Number of pins on top of the display panel
Merchandiser’s display cover panel removed and lamp changed
Display panel cover replaced

Coils Cleaning
To maintain peak operating efficiency, the coil should be cleaned at least once each month.
A dirty coil slows product cooling significantly and increases energy consumption by as much as 20%. Dirt buildup on coils can also cause the compressor to lock up damaging the condenser unit.
Remove screws on top of each side of the louvered from grille, then lift off the grille.
Detach Safe-NET I electrical wire harnesses.
The harnesses are located behind the SafeNET I controller. The power/relay harness on the left has an eight-slot connector. The sensor cable harness on the right has a four-slot connector. When re-installing, be sure to plug this harness in the bottom four-slot connection, not the top connection.
Next, detach the merchandiser’s electrical wire harness located on the right hand side near the coil. For Safe-NET III, detach the interface cable to the display.
Remove the two screws securing refrigeration unit cassette in place.
Use the center black bar to pull the refrigeration unit’s cassette forward to access the coils.
USE ONLY THE CENTER BAR TO PULL OUT THE CASSETTE. PULLING ON REFRIGERATION LINES OR OTHER PARTS WILL CAUSE DAMAGE TO THE REFRIGERATION UNIT.
Fluorescent Lamps Replacement
DANGER! – LOCK OUT / TAG OUT — To avoid serious injury or death from electrical shock, always disconnect the electrical power at the main disconnect when servicing or replacing any electrical component. This includes, but is not limited to, such items as doors, lights, fans, heaters, and thermostats.
Fluorescent lamps have a plastic shield.
When the lamp is replaced, keep the lamp shield to install over the new lamp.
The switch under the display lamp cover operates both the display lamp and interior lamps.
Sign off on the lamp replacement
Wash Out Drain Cleaning
The wash out drain is located behind the refrigeration cassette
Cleaned the drain with water and wiped with a soft cloth
Ensured drain is unobstructed before replacing cassette
The washout drain flows into an auxiliary waste line
Removed the auxiliary waste line cap to drain any excess water
Placed a dry towel over the line to absorb water
Replaced cap, cables and cassette
Sign off on the drain cleaning
Merchandiser Cleaning
WARNING! To reduce the risk of fire, electrical shock or injury when cleaning this merchandiser:
• Unplug the merchandiser before cleaning
• Keep all liquids away from electrical and electronic components
• Do not use any mechanical device or other means to speed the defrost process, except as recommended by the manufacturer.
- Long life and satisfactory performance of any equipment is dependent upon the care it receives. To ensure long life, proper sanitation and minimum maintenance costs, this unit should be thoroughly cleaned, all debris removed and the interiors washed down.
- Cleaning often will control or eliminate odor buildup. Frequency of cleaning is dependent on usage and local health requirements.
WARNING! Do not use HOT water on COLD glass surfaces. This can cause the glass to shatter and could result in personal injury. Allow glass fronts, ends and service doors to warm before applying hot water.
1. Exterior Surfaces
• The exterior surfaces must be cleaned with a mild detergent and warm water to protect and maintain their attractive finish.
Unlock efficiency
with MaintainX CoPilot
MaintainX CoPilot is your expert colleague, on call 24/7, helping your team find the answers they need to keep equipment running.
Reduce Unplanned Downtime
Ensure your team follows consistent procedures to minimize equipment failures and costly delays.
Maximize Asset Availability
Keep your assets running longer and more reliably, with standardized maintenance workflows from OEM manuals.
Lower Maintenance Costs
Turn any technician into an expert to streamline operations, maintain more assets, and reduce overall costs.
Thousands of companies manage their assets with MaintainX

'%3e%3cpath%20fill='url(%23b)'%20d='M66.008%2080.068c-5.084-.786-9.763-3.834-12.442-8.68a16.942%2016.942%200%200%201-1.87-5.18c1.096.19%202.203.476%203.298.87%206.525%202.333%2010.836%207.68%2011.014%2012.99ZM51.47%2061.576c.488-5.524%203.62-10.716%208.847-13.597a17.132%2017.132%200%200%201%2011.335-1.882c-.798%208.145-7.43%2014.848-16.038%2015.599-1.417.119-2.799.07-4.144-.12Zm28.564-11.478a17.513%2017.513%200%200%201%203.727%204.62c4.608%208.335%201.584%2018.813-6.75%2023.409a16.988%2016.988%200%200%201-4.359%201.679%2019.624%2019.624%200%200%201-3.977-12.776c.346-7.561%204.942-13.931%2011.36-16.932Z'/%3e%3cpath%20fill='%23110F0D'%20fill-rule='evenodd'%20d='M142.831%2048.324h4.977V77.03h-4.977V48.324Zm27.278%2013.002c.322%201.048.453%202.263.453%203.62v12.073h-4.787V66.208c0-.75-.047-1.572-.154-2.143-.453-2.382-1.822-3.572-4.215-3.572-2.31%200-3.882%201.274-4.43%203.476-.143.596-.226%201.405-.226%202.25v10.8h-4.787V56.623h4.477v2.989c1.536-2.5%203.906-3.43%206.371-3.43%203.488%200%206.263%201.68%207.298%205.144Zm24.636%207.323c0%203.882-2.358%206.525-5.763%207.727-1.298.453-2.632.643-4.62.643h-10.169V48.324h9.085c1.691%200%203.156.143%204.049.38%203.465.93%205.727%203.68%205.727%207.335%200%202.441-.81%204.156-2.762%205.644%202.905%201.417%204.453%203.727%204.453%206.966Zm-15.634-8.656h4.584c1.024%200%201.917-.143%202.536-.417%201.215-.548%201.905-1.608%201.905-3.167%200-1.548-.643-2.572-1.845-3.132-.691-.31-1.762-.452-2.763-.452h-4.417v7.168Zm10.716%208.465c0-1.536-.893-3.37-3.227-3.893-.428-.095-1.036-.143-1.571-.143h-5.918v8.085h5.501c.56%200%201.429-.048%201.953-.167%201.94-.453%203.262-1.846%203.262-3.882Zm47.747-11.847-8.097%2020.408h-4.429l-8.109-20.408h5.191l5.192%2014.574%205.108-14.574h5.144Zm-20.218%2010.002c0%20.69-.036%201.262-.155%201.94h-15.943c.631%202.87%202.714%204.728%205.882%204.728%202.131%200%203.607-.882%204.703-2.525h4.87c-1.762%204.144-5.204%206.692-9.657%206.692-6.084%200-10.537-4.858-10.537-10.49%200-6.108%204.524-10.776%2010.335-10.776%206.239%200%2010.442%204.954%2010.502%2010.43Zm-4.763-1.405c-.333-2.846-2.643-4.858-5.691-4.858-2.894%200-5.287%201.929-5.621%204.858h11.312Zm-72.667%203.44c0%204.787-3.287%208.371-9.419%208.371H119.363V64.66c-1.917.274-3.87.69-5.811%201.238l4.537%2011.121h-5.418l-3.596-9.585c-5.144%202.084-10.085%205.216-14.217%209.585h-4.786L101.8%2048.312h4.56l5.68%2013.883a44.112%2044.112%200%200%201%207.323-1.774V48.312h9.084c1.703%200%203.156.143%204.061.393%203.453.929%205.727%203.667%205.727%207.323%200%201.917-.738%204.179-2.81%205.691%203.06%201.56%204.501%204.025%204.501%206.93Zm-15.634-8.667a62.664%2062.664%200%200%201%202.06-.036c1.703.012%203.239.131%204.608.37%201.441-.549%202.357-1.727%202.357-3.537%200-1.941-.881-3.144-2.488-3.667-.548-.18-1.358-.286-2.322-.286h-4.215v7.156Zm-16.55%203.905-3.715-9.894-6.394%2016.502c2.833-2.595%206.263-4.858%2010.109-6.608Zm27.254%204.74c0-2.775-3.131-4.347-8.513-4.418-.715%200-1.441.011-2.191.047v8.252h5.918c2.548%200%204.786-1.37%204.786-3.882Z'%20clip-rule='evenodd'/%3e%3c/g%3e%3cdefs%3e%3clinearGradient%20id='b'%20x1='51.47'%20x2='85.916'%20y1='62.946'%20y2='62.946'%20gradientUnits='userSpaceOnUse'%3e%3cstop%20stop-color='%23CD9F28'/%3e%3cstop%20offset='1'%20stop-color='%23ECD80B'/%3e%3c/linearGradient%3e%3cclipPath%20id='a'%3e%3cpath%20fill='%23fff'%20d='M51.47%2045.728h186.104V80.14H51.47z'/%3e%3c/clipPath%3e%3c/defs%3e%3c/svg%3e)


More from Hussmann


Explore Other Assets


© 2026 MaintainX. All rights reserved.