


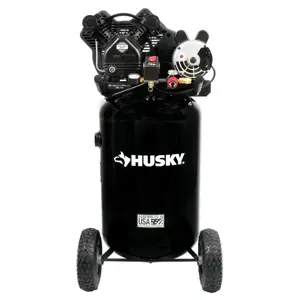
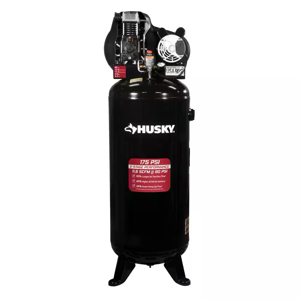
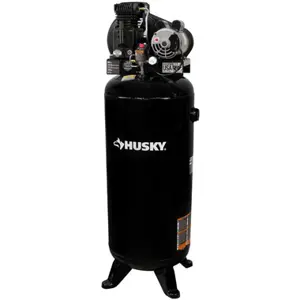
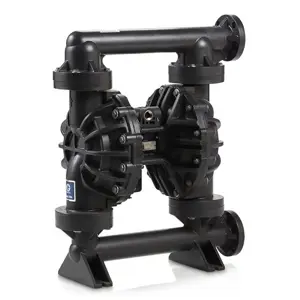
Husky 80-Gallon Stationary Air Compressor C801H
Need answers fast?
Explore the manual using AI.
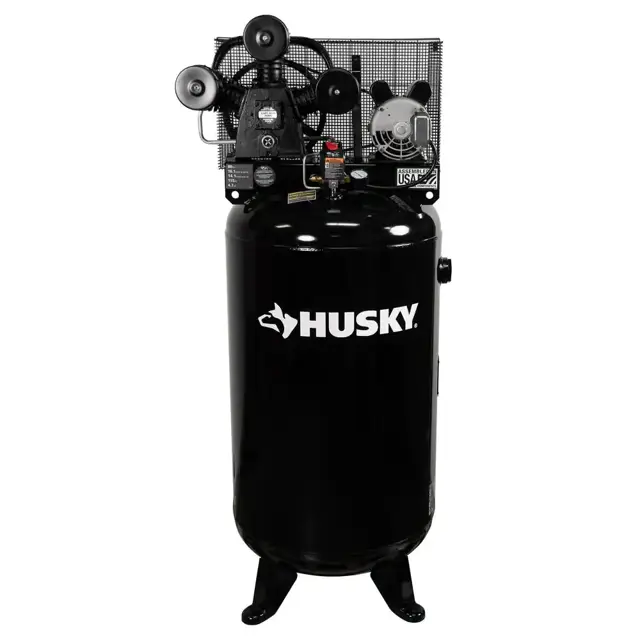
The Husky 80-Gallon Stationary Air Compressor C801H is a robust and reliable industrial air compressor designed for heavy-duty applications. With its powerful performance and efficient operation, it is ideal for workshops and manufacturing environments requiring consistent air supply.
Turn manuals into instant answers
with your AI-powered assistantTurn manuals into instant answers
with your AI-powered assistant
Manual for Husky 80-Gallon Stationary Air Compressor C801H
Complete asset maintenance, one click away
Get instant access to all the maintenance information you need. Empower technicians to perform preventive maintenance with asset packages, ready to use right out of the box.

Documents & Manuals
Find all the essential guides in one place.
 Tensioning Guide
- Belt-diagram
- C-120 pulleys
+ 13 more

Work Order Templates
Pre-built workflows to keep your asset running smoothly.
- Daily Electrical System Inspection
- Replace Roller and Pulley
- Install Engine B-120
+ 29 more

Procedures
Integrate maintenance plans directly into your work orders.
- Motion Industries
- Applied Industrial Technologies
- Electrical Brothers
+ 5 more

Parts
Access the parts list for your equipment in MaintainX.
- Drive Motor
- B2 Rollers
- Tensioning System
+ 40 more
Husky 80-Gallon Stationary Air Compressor C801H
Create an account to install this asset package.
Maintenance Plans for Husky 80-Gallon Stationary Air Compressor Model C801H
Integrate maintenance plans directly into your work orders in MaintainX.
Air Lines and Fittings Inspection
Turn air compressor off, lock out the power supply, and relieve all air pressure from the air tank.
Apply a soap solution to all air line fittings and connections/piping.
Any leaks found?
Correct any leaks found.
NOTICE: Even minor leaks can cause the air compressor to overwork, resulting in premature breakdown or inadequate performance.
Sign off on the air lines and fittings inspection

Oil Replacement
WARNING: Drain tank to release air pressure before removing the oil fill cap or oil drain plug.
CAUTION: Overfilling with oil will cause premature air compressor failure. Do not overfill.
Remove the oil fill plug.
Remove the oil drain plug and drain oil into a suitable container.
Replace the oil drain plug and tighten securely.
Slowly add compressor oil until it reaches the middle of the sight glass.
NOTE: When filling the crankcase, the oil flows very slowly into the pump. If the oil is added too quickly, it will overflow and appear to be full.
Replace oil fill plug and tighten securely.
Sign off on the oil replacement
Oil Check
NOTICE: Risk of property damage. Use air compressor oil only. Multi-weight automotive engine oils like 10W30 should not be use in air compressors. They leave carbon deposits on critical components, thus reducing performance and compressor life.
NOTE: Use 30W compressor oil or a heavy duty SAE 30W, non-detergent, SF grade or better oil. DO NOT use multi-weight automotive engine oils, they will reduce compressor life. Under extreme winter condition use SAE-10 weight oil.
NOTE: Crankcase oil capacity is approximately 29 fluid ounces (857,6 ml).
Check the oil level. It should be to the middle of the sight glass.
Is the oil level to the middle of the sight glass?
If needed remove oil fill plug and slowly add oil until it reaches the middle of the sight glass.
Sign off on the oil check
Air Filter Replacement
WARNING: Hot surfaces. Risk of burn. Compressor heads are exposed when filter cover is removed. Allow compressor to cool prior to servicing.
CAUTION: Keep the air filter clean at all times. Do not operate the air compressor with the air filter removed. A dirty air filter will not allow the air compressor to operate at full capacity. Keep the air filter clean at all times.
Remove the air filter cover.
Remove the air filter from filter cover.
Place new air filter into filter cover.
Replace air filter cover to pump.
Sign off on the air filter replacement
Belt Replacement
WARNING: Serious injury or damage may occur if parts of the body or loose items get caught in moving parts. Never operate the outfit with the belt guard removed. The belt guard should be removed only when the air compressor power is disconnected.
Turn air compressor off, lock out the power supply, and relieve all air pressure from the air tank.
Remove the belt guard.
Mark pump position on saddle.
Loosen the motor mounting screws and slide the motor toward the air compressor.
Remove the belt and replace with a new one.
See the Adjust Belt Tension before tightening motor mounting screws.
Sign off on the belt replacement
Parts for Husky 80-Gallon Stationary Air Compressor C801H
Access the parts list for your equipment in MaintainX.
Filter Canister Assembly
019-0222
Beltguard
E106014
Element, Filter Replacement
019-0221
Oil Fill Plug
056-0070
Belt
E106019
Filter Canister Assembly
019-0222
Beltguard
E106014
Element, Filter Replacement
019-0221
Oil Fill Plug
056-0070
Belt
E106019
Filter Canister Assembly
019-0222
Beltguard
E106014
Element, Filter Replacement
019-0221
Oil Fill Plug
056-0070
Belt
E106019
Unlock efficiency
with MaintainX CoPilot
MaintainX CoPilot is your expert colleague, on call 24/7, helping your team find the answers they need to keep equipment running.
Reduce Unplanned Downtime
Ensure your team follows consistent procedures to minimize equipment failures and costly delays.
Maximize Asset Availability
Keep your assets running longer and more reliably, with standardized maintenance workflows from OEM manuals.
Lower Maintenance Costs
Turn any technician into an expert to streamline operations, maintain more assets, and reduce overall costs.
Thousands of companies manage their assets with MaintainX

'%3e%3cpath%20fill='url(%23b)'%20d='M66.008%2080.068c-5.084-.786-9.763-3.834-12.442-8.68a16.942%2016.942%200%200%201-1.87-5.18c1.096.19%202.203.476%203.298.87%206.525%202.333%2010.836%207.68%2011.014%2012.99ZM51.47%2061.576c.488-5.524%203.62-10.716%208.847-13.597a17.132%2017.132%200%200%201%2011.335-1.882c-.798%208.145-7.43%2014.848-16.038%2015.599-1.417.119-2.799.07-4.144-.12Zm28.564-11.478a17.513%2017.513%200%200%201%203.727%204.62c4.608%208.335%201.584%2018.813-6.75%2023.409a16.988%2016.988%200%200%201-4.359%201.679%2019.624%2019.624%200%200%201-3.977-12.776c.346-7.561%204.942-13.931%2011.36-16.932Z'/%3e%3cpath%20fill='%23110F0D'%20fill-rule='evenodd'%20d='M142.831%2048.324h4.977V77.03h-4.977V48.324Zm27.278%2013.002c.322%201.048.453%202.263.453%203.62v12.073h-4.787V66.208c0-.75-.047-1.572-.154-2.143-.453-2.382-1.822-3.572-4.215-3.572-2.31%200-3.882%201.274-4.43%203.476-.143.596-.226%201.405-.226%202.25v10.8h-4.787V56.623h4.477v2.989c1.536-2.5%203.906-3.43%206.371-3.43%203.488%200%206.263%201.68%207.298%205.144Zm24.636%207.323c0%203.882-2.358%206.525-5.763%207.727-1.298.453-2.632.643-4.62.643h-10.169V48.324h9.085c1.691%200%203.156.143%204.049.38%203.465.93%205.727%203.68%205.727%207.335%200%202.441-.81%204.156-2.762%205.644%202.905%201.417%204.453%203.727%204.453%206.966Zm-15.634-8.656h4.584c1.024%200%201.917-.143%202.536-.417%201.215-.548%201.905-1.608%201.905-3.167%200-1.548-.643-2.572-1.845-3.132-.691-.31-1.762-.452-2.763-.452h-4.417v7.168Zm10.716%208.465c0-1.536-.893-3.37-3.227-3.893-.428-.095-1.036-.143-1.571-.143h-5.918v8.085h5.501c.56%200%201.429-.048%201.953-.167%201.94-.453%203.262-1.846%203.262-3.882Zm47.747-11.847-8.097%2020.408h-4.429l-8.109-20.408h5.191l5.192%2014.574%205.108-14.574h5.144Zm-20.218%2010.002c0%20.69-.036%201.262-.155%201.94h-15.943c.631%202.87%202.714%204.728%205.882%204.728%202.131%200%203.607-.882%204.703-2.525h4.87c-1.762%204.144-5.204%206.692-9.657%206.692-6.084%200-10.537-4.858-10.537-10.49%200-6.108%204.524-10.776%2010.335-10.776%206.239%200%2010.442%204.954%2010.502%2010.43Zm-4.763-1.405c-.333-2.846-2.643-4.858-5.691-4.858-2.894%200-5.287%201.929-5.621%204.858h11.312Zm-72.667%203.44c0%204.787-3.287%208.371-9.419%208.371H119.363V64.66c-1.917.274-3.87.69-5.811%201.238l4.537%2011.121h-5.418l-3.596-9.585c-5.144%202.084-10.085%205.216-14.217%209.585h-4.786L101.8%2048.312h4.56l5.68%2013.883a44.112%2044.112%200%200%201%207.323-1.774V48.312h9.084c1.703%200%203.156.143%204.061.393%203.453.929%205.727%203.667%205.727%207.323%200%201.917-.738%204.179-2.81%205.691%203.06%201.56%204.501%204.025%204.501%206.93Zm-15.634-8.667a62.664%2062.664%200%200%201%202.06-.036c1.703.012%203.239.131%204.608.37%201.441-.549%202.357-1.727%202.357-3.537%200-1.941-.881-3.144-2.488-3.667-.548-.18-1.358-.286-2.322-.286h-4.215v7.156Zm-16.55%203.905-3.715-9.894-6.394%2016.502c2.833-2.595%206.263-4.858%2010.109-6.608Zm27.254%204.74c0-2.775-3.131-4.347-8.513-4.418-.715%200-1.441.011-2.191.047v8.252h5.918c2.548%200%204.786-1.37%204.786-3.882Z'%20clip-rule='evenodd'/%3e%3c/g%3e%3cdefs%3e%3clinearGradient%20id='b'%20x1='51.47'%20x2='85.916'%20y1='62.946'%20y2='62.946'%20gradientUnits='userSpaceOnUse'%3e%3cstop%20stop-color='%23CD9F28'/%3e%3cstop%20offset='1'%20stop-color='%23ECD80B'/%3e%3c/linearGradient%3e%3cclipPath%20id='a'%3e%3cpath%20fill='%23fff'%20d='M51.47%2045.728h186.104V80.14H51.47z'/%3e%3c/clipPath%3e%3c/defs%3e%3c/svg%3e)


More from Husky


Explore Other Assets


© 2026 MaintainX. All rights reserved.