


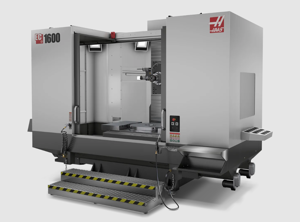
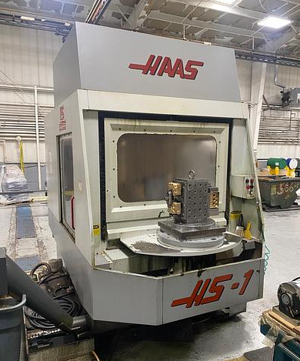
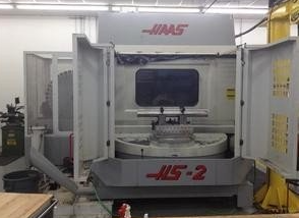
Haas Automation Rotary TRT160
Need answers fast?
Explore the manual using AI.
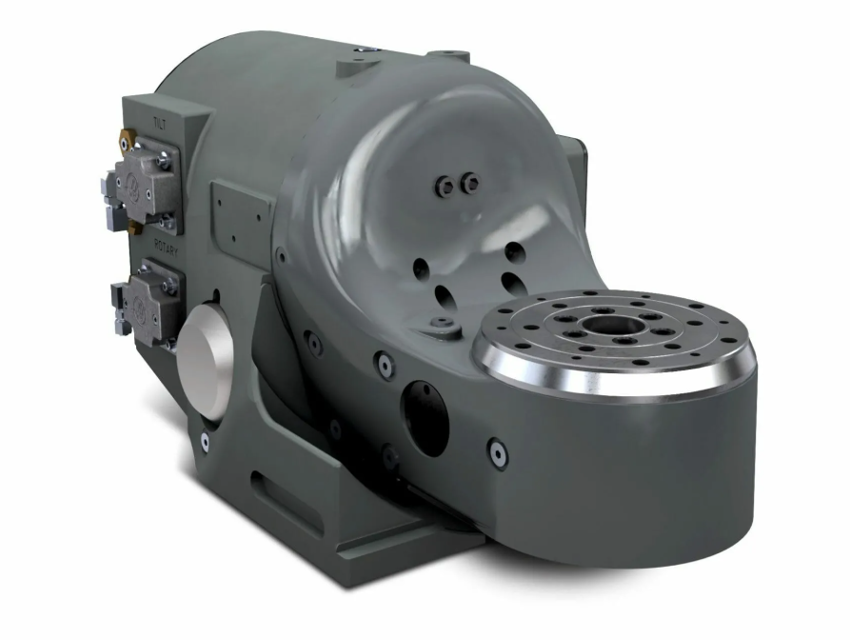
The Haas Automation Rotary TRT160 is a high-precision rotary table designed for CNC machining applications. This versatile asset enhances productivity and accuracy, making it ideal for complex machining tasks. Regular maintenance ensures optimal performance and longevity of the TRT160, supporting efficient operations in industrial environments.
Turn manuals into instant answers
with your AI-powered assistantTurn manuals into instant answers
with your AI-powered assistant
Manual for Haas Automation Rotary TRT160
Complete asset maintenance, one click away
Get instant access to all the maintenance information you need. Empower technicians to perform preventive maintenance with asset packages, ready to use right out of the box.

Documents & Manuals
Find all the essential guides in one place.
 Tensioning Guide
- Belt-diagram
- C-120 pulleys
+ 13 more

Work Order Templates
Pre-built workflows to keep your asset running smoothly.
- Daily Electrical System Inspection
- Replace Roller and Pulley
- Install Engine B-120
+ 29 more

Procedures
Integrate maintenance plans directly into your work orders.
- Motion Industries
- Applied Industrial Technologies
- Electrical Brothers
+ 5 more

Parts
Access the parts list for your equipment in MaintainX.
- Drive Motor
- B2 Rollers
- Tensioning System
+ 40 more
Haas Automation Rotary TRT160
Create an account to install this asset package.
Maintenance Plans for Haas Automation Rotary Model TRT160
Integrate maintenance plans directly into your work orders in MaintainX.
Rotary Maintenance
9.2 ADJUSTMENTS TO THE TILTING ROTARY TABLE
The platter face, I.D. runout, backlash between worm and gear, and the popout are set at the factory and are not field serviceable. If any of these specifications are out of tolerance, contact your HAAS dealer for more information.
Backlash In The System: The backlash in the system can be compensated for by the use of Parameter 15. Contact HAAS service department for details.
9.4 LUBRICATION:
The table is lubricated with MOBIL SHC 630. The oil level must not drop below the sight glass level. If the level is low, fill the table through the pipe plug in the middle-top of the body. Fill to the top of the sight glass. Do not over fill! If the oil is dirty, drain and refill with fresh oil (SHC-630). If the rotary axis needs to be refilled with oil, please contact HAAS for information. Do not attempt to refill!
9.5 CLEAN UP
After use, it is important to clean the rotary table. Remove all metal chips from the unit since the surfaces of the unit are precisely ground for accurate positioning and metal chips could damage those surfaces. Apply a coat of rust preventative.;

Rotary Alignment
Tilt the A axis to 90 degrees.
Put the magnetic base of a dial indicator [1] on the spindle head.
Jog the X axis to center the platter [2] on the spindle. Jog the Y and Z axis until the indicator is in front of the platter, near the edge. Make sure you can indicate the full diameter from left to right.
Set the indicator to zero.
Indicate the platter or collet face along the X Axis. If the error is more than 0.0003\ (0.008mm) use a rubber or plastic mallet to adjust the position of the rotary. On the side near the front doors
Repeat this step until the error is less than 0.0003\ (0.008mm)."
If the error is within range tighten all of the screws. Indicate along the X axis to make sure the rotary did not move. If the error is more than 0.0003\ (0.008mm) lossen the screws. Adjust the position of the rotary."
Watch the indicator while making adjustments. Repeat this step until the error is less than 0.0003\ (0.008mm)."
If the error is within range the installation is complete.
Table Inspection
To ensure that the table will perform accurately, there are a few points of inspection that should be performed occasionally. There are basically four points of interest when inspecting the table: the platter face and I.D., runout, backlash and popout.
Platter Face Runout: To check the platter runout, mount an indicator to the body of the table. Position the stylus on the face of the platter and index the table 360 degrees (3600). The runout should be 0.0005" or less.
Platter I.D. Runout: To check the platter I.D. runnout, mount the indicator to the body of the table. Position the stylus on the through-hole in the platter and index the table 360 degrees (3600). The runout should be 0.0005" or less.
Backlash Between Worm And Gear: To check the backlash between the worm and gear, the air supply must first be disconnected. Place a magnet on the face of the platter at a radius of 4". Mount an indicator on the body of the table and position the stylus on the magnet. Use an aluminum bar to rock the platter back and forth (apply approximately 10 ft-lb while testing). Backlash should be between 0.0001" and 0.0006".
Popout: To check popout, first disconnect the air supply from the unit. Then, index the table 360 degrees. Mount an indicator to the body of the table. Position the stylus on the face of the platter and zero the dial. Connect the air supply and read the popout from the indicator dial. Popout should be between 0.0001" and 0.0005";
Rotary Horizontal Adjustment
STEP 1
Push ZERO RETURN. Push A.
Put the magnetic base of a dial indicator on the spindle head.
Jog the X axis to center the platter on the spindle.
Jog the Y and Z axis until the indicator is above the platter edge.
Set the indicator to zero.
Indicate the platter or collet face along the Y Axis.
Adjust Parameter 212 if the error is more than 0.0003\ (0.008mm)."
Push ZERO RETURN. Push A.
Parts for Haas Automation Rotary TRT160
Access the parts list for your equipment in MaintainX.
Housing Nut 160Mm
20-4157
Solenoid Assy (30-1039)
36-30675
Worm Shaft
20-4155
Motor System Assy 160Mm
35-4165
Standoff Motor 160Mm
20-4160
Housing Nut 160Mm
20-4157
Solenoid Assy (30-1039)
36-30675
Worm Shaft
20-4155
Motor System Assy 160Mm
35-4165
Standoff Motor 160Mm
20-4160
Housing Nut 160Mm
20-4157
Solenoid Assy (30-1039)
36-30675
Worm Shaft
20-4155
Motor System Assy 160Mm
35-4165
Standoff Motor 160Mm
20-4160
Unlock efficiency
with MaintainX CoPilot
MaintainX CoPilot is your expert colleague, on call 24/7, helping your team find the answers they need to keep equipment running.
Reduce Unplanned Downtime
Ensure your team follows consistent procedures to minimize equipment failures and costly delays.
Maximize Asset Availability
Keep your assets running longer and more reliably, with standardized maintenance workflows from OEM manuals.
Lower Maintenance Costs
Turn any technician into an expert to streamline operations, maintain more assets, and reduce overall costs.
Thousands of companies manage their assets with MaintainX

'%3e%3cpath%20fill='url(%23b)'%20d='M66.008%2080.068c-5.084-.786-9.763-3.834-12.442-8.68a16.942%2016.942%200%200%201-1.87-5.18c1.096.19%202.203.476%203.298.87%206.525%202.333%2010.836%207.68%2011.014%2012.99ZM51.47%2061.576c.488-5.524%203.62-10.716%208.847-13.597a17.132%2017.132%200%200%201%2011.335-1.882c-.798%208.145-7.43%2014.848-16.038%2015.599-1.417.119-2.799.07-4.144-.12Zm28.564-11.478a17.513%2017.513%200%200%201%203.727%204.62c4.608%208.335%201.584%2018.813-6.75%2023.409a16.988%2016.988%200%200%201-4.359%201.679%2019.624%2019.624%200%200%201-3.977-12.776c.346-7.561%204.942-13.931%2011.36-16.932Z'/%3e%3cpath%20fill='%23110F0D'%20fill-rule='evenodd'%20d='M142.831%2048.324h4.977V77.03h-4.977V48.324Zm27.278%2013.002c.322%201.048.453%202.263.453%203.62v12.073h-4.787V66.208c0-.75-.047-1.572-.154-2.143-.453-2.382-1.822-3.572-4.215-3.572-2.31%200-3.882%201.274-4.43%203.476-.143.596-.226%201.405-.226%202.25v10.8h-4.787V56.623h4.477v2.989c1.536-2.5%203.906-3.43%206.371-3.43%203.488%200%206.263%201.68%207.298%205.144Zm24.636%207.323c0%203.882-2.358%206.525-5.763%207.727-1.298.453-2.632.643-4.62.643h-10.169V48.324h9.085c1.691%200%203.156.143%204.049.38%203.465.93%205.727%203.68%205.727%207.335%200%202.441-.81%204.156-2.762%205.644%202.905%201.417%204.453%203.727%204.453%206.966Zm-15.634-8.656h4.584c1.024%200%201.917-.143%202.536-.417%201.215-.548%201.905-1.608%201.905-3.167%200-1.548-.643-2.572-1.845-3.132-.691-.31-1.762-.452-2.763-.452h-4.417v7.168Zm10.716%208.465c0-1.536-.893-3.37-3.227-3.893-.428-.095-1.036-.143-1.571-.143h-5.918v8.085h5.501c.56%200%201.429-.048%201.953-.167%201.94-.453%203.262-1.846%203.262-3.882Zm47.747-11.847-8.097%2020.408h-4.429l-8.109-20.408h5.191l5.192%2014.574%205.108-14.574h5.144Zm-20.218%2010.002c0%20.69-.036%201.262-.155%201.94h-15.943c.631%202.87%202.714%204.728%205.882%204.728%202.131%200%203.607-.882%204.703-2.525h4.87c-1.762%204.144-5.204%206.692-9.657%206.692-6.084%200-10.537-4.858-10.537-10.49%200-6.108%204.524-10.776%2010.335-10.776%206.239%200%2010.442%204.954%2010.502%2010.43Zm-4.763-1.405c-.333-2.846-2.643-4.858-5.691-4.858-2.894%200-5.287%201.929-5.621%204.858h11.312Zm-72.667%203.44c0%204.787-3.287%208.371-9.419%208.371H119.363V64.66c-1.917.274-3.87.69-5.811%201.238l4.537%2011.121h-5.418l-3.596-9.585c-5.144%202.084-10.085%205.216-14.217%209.585h-4.786L101.8%2048.312h4.56l5.68%2013.883a44.112%2044.112%200%200%201%207.323-1.774V48.312h9.084c1.703%200%203.156.143%204.061.393%203.453.929%205.727%203.667%205.727%207.323%200%201.917-.738%204.179-2.81%205.691%203.06%201.56%204.501%204.025%204.501%206.93Zm-15.634-8.667a62.664%2062.664%200%200%201%202.06-.036c1.703.012%203.239.131%204.608.37%201.441-.549%202.357-1.727%202.357-3.537%200-1.941-.881-3.144-2.488-3.667-.548-.18-1.358-.286-2.322-.286h-4.215v7.156Zm-16.55%203.905-3.715-9.894-6.394%2016.502c2.833-2.595%206.263-4.858%2010.109-6.608Zm27.254%204.74c0-2.775-3.131-4.347-8.513-4.418-.715%200-1.441.011-2.191.047v8.252h5.918c2.548%200%204.786-1.37%204.786-3.882Z'%20clip-rule='evenodd'/%3e%3c/g%3e%3cdefs%3e%3clinearGradient%20id='b'%20x1='51.47'%20x2='85.916'%20y1='62.946'%20y2='62.946'%20gradientUnits='userSpaceOnUse'%3e%3cstop%20stop-color='%23CD9F28'/%3e%3cstop%20offset='1'%20stop-color='%23ECD80B'/%3e%3c/linearGradient%3e%3cclipPath%20id='a'%3e%3cpath%20fill='%23fff'%20d='M51.47%2045.728h186.104V80.14H51.47z'/%3e%3c/clipPath%3e%3c/defs%3e%3c/svg%3e)


More from Haas Automation


Explore Other Assets


© 2026 MaintainX. All rights reserved.