


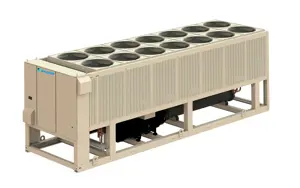
Daikin Screw Chiller AWV010
Need answers fast?
Explore the manual using AI.

Turn manuals into instant answers
with your AI-powered assistantTurn manuals into instant answers
with your AI-powered assistant
Manual for Daikin Screw Chiller AWV010
Complete asset maintenance, one click away
Get instant access to all the maintenance information you need. Empower technicians to perform preventive maintenance with asset packages, ready to use right out of the box.

Documents & Manuals
Find all the essential guides in one place.
 Tensioning Guide
- Belt-diagram
- C-120 pulleys
+ 13 more

Work Order Templates
Pre-built workflows to keep your asset running smoothly.
- Daily Electrical System Inspection
- Replace Roller and Pulley
- Install Engine B-120
+ 29 more

Procedures
Integrate maintenance plans directly into your work orders.
- Motion Industries
- Applied Industrial Technologies
- Electrical Brothers
+ 5 more

Parts
Access the parts list for your equipment in MaintainX.
- Drive Motor
- B2 Rollers
- Tensioning System
+ 40 more
Daikin Screw Chiller AWV010
Create an account to install this asset package.
Maintenance Plans for Daikin Screw Chiller Model AWV010
Integrate maintenance plans directly into your work orders in MaintainX.
1 Yearly Screw Chiller Maintenance
Annual (or spring startup) operations include all weekly and monthly operations.
General:
- Inspect thermal insulation for integrity
- Clean and paint as required
Electrical ( * including the VFDs):
- Sequence test controls
- Check contactors for pitting, replace as required
- Check terminals for tightness, tighten as necessary
- Clean control panel interior

Electrical Terminals Check
DANGER: Electric equipment can cause electric shock which will cause severe personal injury or death. Turn off, lock out and tag all power before continuing with following service. Panels can have more than one power source.
CAUTION: Periodically check electrical terminals for tightness and tighten as required. Always use a backup wrench when tightening electrical terminals.
Power turned off, locked out and tagged?
Electrical terminals checked for tightness
Backup wrench used when tightening electrical terminals
Sign off on the electrical terminals check
Oil Sump Check
Enter the Discharge Temperature
Enter the Saturated Oil Temperature
Oil sump check is set to Ready when: Discharge Temperature > Saturated Oil Temperature + 5°C
Oil sump check is set to Not Ready when: Discharge Temperature < Saturated Oil Temperature + 4.5°C
Is the oil sump check ready?
Sign off on the oil sump check
Oil Filter Assembling
WARNING: After the compressor has been pumped down and isolated, the oil contained inside the filter housing will remain hot enough to cause burns for some time afterwards. Always allow sufficient time for the oil to cool down so that it is cool enough not to be a danger when drained off (less than 35°C is recommended). Severe injury from burns can result.
Before reassembly, remove any paint from joint faces. Inspect parts individually for damage and ensure they are completely clean before laying them out on a clean surface in a logical order ready for reassembly.
Use fresh refrigerant oil to lubricate parts during reassembly.
Install new O-rings on the oil filter housing cover.
Insert new oil filter into the housing, ensuring the filter sits tightly on the sealing spigot.
Replace the oil filter housing cover.
Evacuate air and non-condensibles before valving refrigerant back into the compressor.
Sign off on the oil filter assembly
Screw Chiller Lubrication
Warning: The fan motor bearings are permanently lubricated. No further lubrication is required.
Warning: Excessive fan motor bearing noise is an indication of a potential bearing failure.
CAUTION: POE oil must be handled carefully using proper protective equipment (gloves, eye protection, etc.).
CAUTION: The oil must not come into contact with certain polymers (e.g. PVC) as it may absorb moisture from this material.
CAUTION: Do not use oil or refrigerant additives to the system.
Select the type of POE oil used
Compressor oil heater functional?
Sign off on the screw chiller lubrication
Parts for Daikin Screw Chiller AWV010
Access the parts list for your equipment in MaintainX.
AWG Wire Gauge
83754
AWG Wire
83804
Enviro-Coil Concentrate, Hydro-Balance Corp P.O. Box 730 Prosper, TX 75078 800-527-5166
H-EC01
Chloride Remover, Chlor*Rid Int’l, Inc. P.O. Box 908 Chandler, AZ 85244 800-422-3217
Chlor*Rid DTS
AWG Wire Gauge
83754
AWG Wire
83804
Enviro-Coil Concentrate, Hydro-Balance Corp P.O. Box 730 Prosper, TX 75078 800-527-5166
H-EC01
Chloride Remover, Chlor*Rid Int’l, Inc. P.O. Box 908 Chandler, AZ 85244 800-422-3217
Chlor*Rid DTS
AWG Wire Gauge
83754
AWG Wire
83804
Enviro-Coil Concentrate, Hydro-Balance Corp P.O. Box 730 Prosper, TX 75078 800-527-5166
H-EC01
Chloride Remover, Chlor*Rid Int’l, Inc. P.O. Box 908 Chandler, AZ 85244 800-422-3217
Chlor*Rid DTS
Unlock efficiency
with MaintainX CoPilot
MaintainX CoPilot is your expert colleague, on call 24/7, helping your team find the answers they need to keep equipment running.
Reduce Unplanned Downtime
Ensure your team follows consistent procedures to minimize equipment failures and costly delays.
Maximize Asset Availability
Keep your assets running longer and more reliably, with standardized maintenance workflows from OEM manuals.
Lower Maintenance Costs
Turn any technician into an expert to streamline operations, maintain more assets, and reduce overall costs.
Thousands of companies manage their assets with MaintainX

'%3e%3cpath%20fill='url(%23b)'%20d='M66.008%2080.068c-5.084-.786-9.763-3.834-12.442-8.68a16.942%2016.942%200%200%201-1.87-5.18c1.096.19%202.203.476%203.298.87%206.525%202.333%2010.836%207.68%2011.014%2012.99ZM51.47%2061.576c.488-5.524%203.62-10.716%208.847-13.597a17.132%2017.132%200%200%201%2011.335-1.882c-.798%208.145-7.43%2014.848-16.038%2015.599-1.417.119-2.799.07-4.144-.12Zm28.564-11.478a17.513%2017.513%200%200%201%203.727%204.62c4.608%208.335%201.584%2018.813-6.75%2023.409a16.988%2016.988%200%200%201-4.359%201.679%2019.624%2019.624%200%200%201-3.977-12.776c.346-7.561%204.942-13.931%2011.36-16.932Z'/%3e%3cpath%20fill='%23110F0D'%20fill-rule='evenodd'%20d='M142.831%2048.324h4.977V77.03h-4.977V48.324Zm27.278%2013.002c.322%201.048.453%202.263.453%203.62v12.073h-4.787V66.208c0-.75-.047-1.572-.154-2.143-.453-2.382-1.822-3.572-4.215-3.572-2.31%200-3.882%201.274-4.43%203.476-.143.596-.226%201.405-.226%202.25v10.8h-4.787V56.623h4.477v2.989c1.536-2.5%203.906-3.43%206.371-3.43%203.488%200%206.263%201.68%207.298%205.144Zm24.636%207.323c0%203.882-2.358%206.525-5.763%207.727-1.298.453-2.632.643-4.62.643h-10.169V48.324h9.085c1.691%200%203.156.143%204.049.38%203.465.93%205.727%203.68%205.727%207.335%200%202.441-.81%204.156-2.762%205.644%202.905%201.417%204.453%203.727%204.453%206.966Zm-15.634-8.656h4.584c1.024%200%201.917-.143%202.536-.417%201.215-.548%201.905-1.608%201.905-3.167%200-1.548-.643-2.572-1.845-3.132-.691-.31-1.762-.452-2.763-.452h-4.417v7.168Zm10.716%208.465c0-1.536-.893-3.37-3.227-3.893-.428-.095-1.036-.143-1.571-.143h-5.918v8.085h5.501c.56%200%201.429-.048%201.953-.167%201.94-.453%203.262-1.846%203.262-3.882Zm47.747-11.847-8.097%2020.408h-4.429l-8.109-20.408h5.191l5.192%2014.574%205.108-14.574h5.144Zm-20.218%2010.002c0%20.69-.036%201.262-.155%201.94h-15.943c.631%202.87%202.714%204.728%205.882%204.728%202.131%200%203.607-.882%204.703-2.525h4.87c-1.762%204.144-5.204%206.692-9.657%206.692-6.084%200-10.537-4.858-10.537-10.49%200-6.108%204.524-10.776%2010.335-10.776%206.239%200%2010.442%204.954%2010.502%2010.43Zm-4.763-1.405c-.333-2.846-2.643-4.858-5.691-4.858-2.894%200-5.287%201.929-5.621%204.858h11.312Zm-72.667%203.44c0%204.787-3.287%208.371-9.419%208.371H119.363V64.66c-1.917.274-3.87.69-5.811%201.238l4.537%2011.121h-5.418l-3.596-9.585c-5.144%202.084-10.085%205.216-14.217%209.585h-4.786L101.8%2048.312h4.56l5.68%2013.883a44.112%2044.112%200%200%201%207.323-1.774V48.312h9.084c1.703%200%203.156.143%204.061.393%203.453.929%205.727%203.667%205.727%207.323%200%201.917-.738%204.179-2.81%205.691%203.06%201.56%204.501%204.025%204.501%206.93Zm-15.634-8.667a62.664%2062.664%200%200%201%202.06-.036c1.703.012%203.239.131%204.608.37%201.441-.549%202.357-1.727%202.357-3.537%200-1.941-.881-3.144-2.488-3.667-.548-.18-1.358-.286-2.322-.286h-4.215v7.156Zm-16.55%203.905-3.715-9.894-6.394%2016.502c2.833-2.595%206.263-4.858%2010.109-6.608Zm27.254%204.74c0-2.775-3.131-4.347-8.513-4.418-.715%200-1.441.011-2.191.047v8.252h5.918c2.548%200%204.786-1.37%204.786-3.882Z'%20clip-rule='evenodd'/%3e%3c/g%3e%3cdefs%3e%3clinearGradient%20id='b'%20x1='51.47'%20x2='85.916'%20y1='62.946'%20y2='62.946'%20gradientUnits='userSpaceOnUse'%3e%3cstop%20stop-color='%23CD9F28'/%3e%3cstop%20offset='1'%20stop-color='%23ECD80B'/%3e%3c/linearGradient%3e%3cclipPath%20id='a'%3e%3cpath%20fill='%23fff'%20d='M51.47%2045.728h186.104V80.14H51.47z'/%3e%3c/clipPath%3e%3c/defs%3e%3c/svg%3e)


More from Daikin


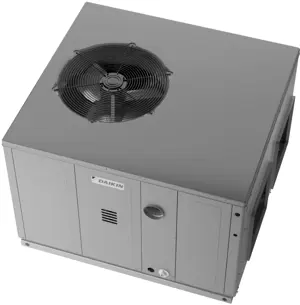


Explore Other Assets


© 2026 MaintainX. All rights reserved.