


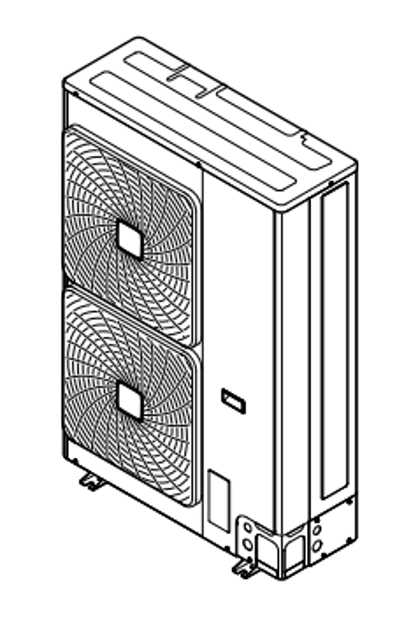
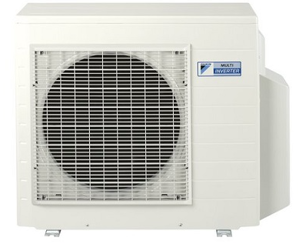
Daikin Outdoor Inverter Heat Pump Unit RZAG125M7V1B
Need answers fast?
Explore the manual using AI.
Turn manuals into instant answers
with your AI-powered assistantTurn manuals into instant answers
with your AI-powered assistant
Manual for Daikin Outdoor Inverter Heat Pump Unit RZAG125M7V1B
Complete asset maintenance, one click away
Get instant access to all the maintenance information you need. Empower technicians to perform preventive maintenance with asset packages, ready to use right out of the box.

Documents & Manuals
Find all the essential guides in one place.
 Tensioning Guide
- Belt-diagram
- C-120 pulleys
+ 13 more

Work Order Templates
Pre-built workflows to keep your asset running smoothly.
- Daily Electrical System Inspection
- Replace Roller and Pulley
- Install Engine B-120
+ 29 more

Procedures
Integrate maintenance plans directly into your work orders.
- Motion Industries
- Applied Industrial Technologies
- Electrical Brothers
+ 5 more

Parts
Access the parts list for your equipment in MaintainX.
- Drive Motor
- B2 Rollers
- Tensioning System
+ 40 more
Daikin Outdoor Inverter Heat Pump Unit RZAG125M7V1B
Create an account to install this asset package.
Maintenance Plans for Daikin Outdoor Inverter Heat Pump Unit Model RZAG125M7V1B
Integrate maintenance plans directly into your work orders in MaintainX.
Refrigerant Recharging
NOTICE: Before completely recharging, perform vacuum drying on the outdoor unit's internal refrigerant piping as well
NOTICE: To perform vacuum drying or a complete recharge of the outdoor unit’s internal refrigerant piping it is necessary to activate the vacuum mode
WARNING: Some sections of the refrigerant circuit may be isolated from other sections caused by components with specific functions (e.g. valves)
WARNING: FLAMMABLE MATERIAL - The refrigerant inside this unit is mildly flammable
WARNING: The appliance shall be stored in a room without continuously operating ignition sources (example: open flames, an operating gas appliance or an operating electric heater)
WARNING: Do NOT pierce or burn refrigerant cycle parts
WARNING: The refrigerant inside the unit is mildly flammable, but normally does not leak
To activate/deactivate the vacuum mode field setting
WARNING: Only use R32 as refrigerant

Refrigerant Charging
WARNING: Only use R32 as refrigerant. Other substances may cause explosions and accidents. R32 contains fluorinated greenhouse gases. Its global warming potential (GWP) value is 675. Do NOT vent these gases into the atmosphere. When charging refrigerant, always use protective gloves and safety glasses.
CAUTION: To avoid compressor breakdown, do NOT charge more than the specified amount of refrigerant.
Outdoor unit's external refrigerant piping checked (leak test, vacuum drying)
Electrical wiring connected if necessary
Refrigerant piping is connected and checked (leak test and vacuum drying)
To charge additional refrigerant, follow these steps:
Connect the refrigerant cylinder to both the service port of the gas stop valve and the service port of the liquid stop valve
Enter the additional refrigerant amount charged
Open the stop valves
Unit Pump Down
DANGER: RISK OF EXPLOSION - Pump down – Refrigerant leakage
Do NOT use the unit's automatic pump down function to collect all refrigerant into the outdoor unit if there is a leakage in the refrigerant circuit. Use a separate recovery system so that the unit's compressor does NOT have to operate.
CAUTION: Do not use the unit's automatic pump down function if the total piping length exceeds the chargeless length. A fraction of the refrigerant could be left in the circuit.
Is the main power supply switch turned ON?
Are the liquid stop valve and the gas stop valve open?
Press the pump down button (BS2) for at least 8 seconds. Did the compressor and outdoor unit fan start automatically?
±2 minutes after the compressor started, did you close the liquid stop valve?
Once the compressor stops (after 2~5 minutes), did you close the gas stop valve within 3 minutes after the compressor has stopped?
Did the user interface display ' '?
1 Yearly Outdoor Unit Maintenance
NOTICE: Maintenance must be done by an authorised installer or service agent. We recommend to do maintenance at least once a year. However, applicable legislation might require shorter maintenance intervals.
NOTICE: In Europe, the greenhouse gas emissions of the total refrigerant charge in the system (expressed as tonnes CO2-equivalent) is used to determine the maintenance intervals. Follow the applicable legislation.
DANGER: RISK OF ELECTROCUTION. DANGER: RISK OF BURNING. NOTICE: Risk of electrostatic discharge. Before performing any maintenance or service work, touch a metal part of the unit in order to eliminate static electricity and to protect the PCB.
Did you wait for 10 minutes after turning off the power supply before opening the electrical component box cover?
Did you measure the voltage between terminals on the terminal block for power supply with a tester and confirm that the power supply is shut off?
Did you touch a non-coated metal part to eliminate static electricity before pulling out or plugging in connectors?
Did you pull out junction connectors for the fan motors in the outdoor unit before starting service operation on the inverter equipment?
Did you plug the junction connector back in after the service is finished?
Did you avoid directly connecting power supply cables to compressors (U, V, W)?
Parts for Daikin Outdoor Inverter Heat Pump Unit RZAG125M7V1B
Access the parts list for your equipment in MaintainX.
Bottom Plate Heater
EKBPH140L7
Demand Adaptor Kit
SB.KRP58M52
Additional Mounting Plate
EKMKSA2
Bottom Plate Heater
EKBPH140L7
Demand Adaptor Kit
SB.KRP58M52
Additional Mounting Plate
EKMKSA2
Bottom Plate Heater
EKBPH140L7
Demand Adaptor Kit
SB.KRP58M52
Additional Mounting Plate
EKMKSA2
Unlock efficiency
with MaintainX CoPilot
MaintainX CoPilot is your expert colleague, on call 24/7, helping your team find the answers they need to keep equipment running.
Reduce Unplanned Downtime
Ensure your team follows consistent procedures to minimize equipment failures and costly delays.
Maximize Asset Availability
Keep your assets running longer and more reliably, with standardized maintenance workflows from OEM manuals.
Lower Maintenance Costs
Turn any technician into an expert to streamline operations, maintain more assets, and reduce overall costs.
Thousands of companies manage their assets with MaintainX

'%3e%3cpath%20fill='url(%23b)'%20d='M66.008%2080.068c-5.084-.786-9.763-3.834-12.442-8.68a16.942%2016.942%200%200%201-1.87-5.18c1.096.19%202.203.476%203.298.87%206.525%202.333%2010.836%207.68%2011.014%2012.99ZM51.47%2061.576c.488-5.524%203.62-10.716%208.847-13.597a17.132%2017.132%200%200%201%2011.335-1.882c-.798%208.145-7.43%2014.848-16.038%2015.599-1.417.119-2.799.07-4.144-.12Zm28.564-11.478a17.513%2017.513%200%200%201%203.727%204.62c4.608%208.335%201.584%2018.813-6.75%2023.409a16.988%2016.988%200%200%201-4.359%201.679%2019.624%2019.624%200%200%201-3.977-12.776c.346-7.561%204.942-13.931%2011.36-16.932Z'/%3e%3cpath%20fill='%23110F0D'%20fill-rule='evenodd'%20d='M142.831%2048.324h4.977V77.03h-4.977V48.324Zm27.278%2013.002c.322%201.048.453%202.263.453%203.62v12.073h-4.787V66.208c0-.75-.047-1.572-.154-2.143-.453-2.382-1.822-3.572-4.215-3.572-2.31%200-3.882%201.274-4.43%203.476-.143.596-.226%201.405-.226%202.25v10.8h-4.787V56.623h4.477v2.989c1.536-2.5%203.906-3.43%206.371-3.43%203.488%200%206.263%201.68%207.298%205.144Zm24.636%207.323c0%203.882-2.358%206.525-5.763%207.727-1.298.453-2.632.643-4.62.643h-10.169V48.324h9.085c1.691%200%203.156.143%204.049.38%203.465.93%205.727%203.68%205.727%207.335%200%202.441-.81%204.156-2.762%205.644%202.905%201.417%204.453%203.727%204.453%206.966Zm-15.634-8.656h4.584c1.024%200%201.917-.143%202.536-.417%201.215-.548%201.905-1.608%201.905-3.167%200-1.548-.643-2.572-1.845-3.132-.691-.31-1.762-.452-2.763-.452h-4.417v7.168Zm10.716%208.465c0-1.536-.893-3.37-3.227-3.893-.428-.095-1.036-.143-1.571-.143h-5.918v8.085h5.501c.56%200%201.429-.048%201.953-.167%201.94-.453%203.262-1.846%203.262-3.882Zm47.747-11.847-8.097%2020.408h-4.429l-8.109-20.408h5.191l5.192%2014.574%205.108-14.574h5.144Zm-20.218%2010.002c0%20.69-.036%201.262-.155%201.94h-15.943c.631%202.87%202.714%204.728%205.882%204.728%202.131%200%203.607-.882%204.703-2.525h4.87c-1.762%204.144-5.204%206.692-9.657%206.692-6.084%200-10.537-4.858-10.537-10.49%200-6.108%204.524-10.776%2010.335-10.776%206.239%200%2010.442%204.954%2010.502%2010.43Zm-4.763-1.405c-.333-2.846-2.643-4.858-5.691-4.858-2.894%200-5.287%201.929-5.621%204.858h11.312Zm-72.667%203.44c0%204.787-3.287%208.371-9.419%208.371H119.363V64.66c-1.917.274-3.87.69-5.811%201.238l4.537%2011.121h-5.418l-3.596-9.585c-5.144%202.084-10.085%205.216-14.217%209.585h-4.786L101.8%2048.312h4.56l5.68%2013.883a44.112%2044.112%200%200%201%207.323-1.774V48.312h9.084c1.703%200%203.156.143%204.061.393%203.453.929%205.727%203.667%205.727%207.323%200%201.917-.738%204.179-2.81%205.691%203.06%201.56%204.501%204.025%204.501%206.93Zm-15.634-8.667a62.664%2062.664%200%200%201%202.06-.036c1.703.012%203.239.131%204.608.37%201.441-.549%202.357-1.727%202.357-3.537%200-1.941-.881-3.144-2.488-3.667-.548-.18-1.358-.286-2.322-.286h-4.215v7.156Zm-16.55%203.905-3.715-9.894-6.394%2016.502c2.833-2.595%206.263-4.858%2010.109-6.608Zm27.254%204.74c0-2.775-3.131-4.347-8.513-4.418-.715%200-1.441.011-2.191.047v8.252h5.918c2.548%200%204.786-1.37%204.786-3.882Z'%20clip-rule='evenodd'/%3e%3c/g%3e%3cdefs%3e%3clinearGradient%20id='b'%20x1='51.47'%20x2='85.916'%20y1='62.946'%20y2='62.946'%20gradientUnits='userSpaceOnUse'%3e%3cstop%20stop-color='%23CD9F28'/%3e%3cstop%20offset='1'%20stop-color='%23ECD80B'/%3e%3c/linearGradient%3e%3cclipPath%20id='a'%3e%3cpath%20fill='%23fff'%20d='M51.47%2045.728h186.104V80.14H51.47z'/%3e%3c/clipPath%3e%3c/defs%3e%3c/svg%3e)


More from Daikin


Explore Other Assets


© 2026 MaintainX. All rights reserved.