


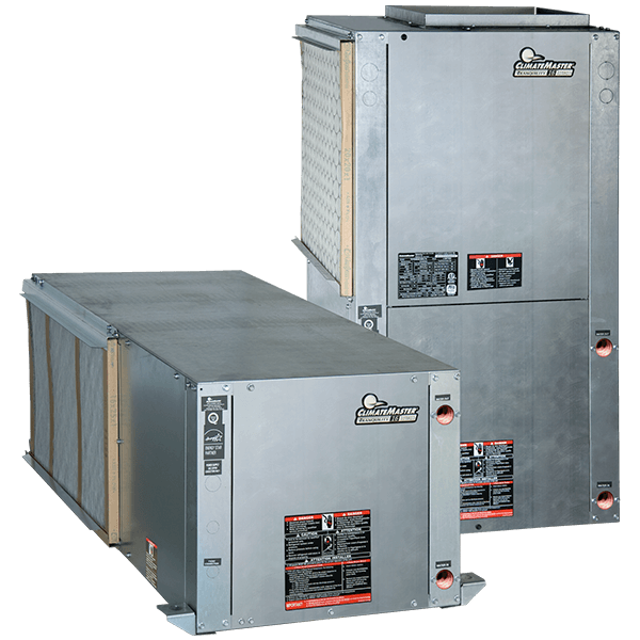
Climate Master Heat Pump TCV024AGC30APBS
Need answers fast?
Explore the manual using AI.
Turn manuals into instant answers
with your AI-powered assistantTurn manuals into instant answers
with your AI-powered assistant
Manual for Climate Master Heat Pump TCV024AGC30APBS
Complete asset maintenance, one click away
Get instant access to all the maintenance information you need. Empower technicians to perform preventive maintenance with asset packages, ready to use right out of the box.

Documents & Manuals
Find all the essential guides in one place.
 Tensioning Guide
- Belt-diagram
- C-120 pulleys
+ 13 more

Work Order Templates
Pre-built workflows to keep your asset running smoothly.
- Daily Electrical System Inspection
- Replace Roller and Pulley
- Install Engine B-120
+ 29 more

Procedures
Integrate maintenance plans directly into your work orders.
- Motion Industries
- Applied Industrial Technologies
- Electrical Brothers
+ 5 more

Parts
Access the parts list for your equipment in MaintainX.
- Drive Motor
- B2 Rollers
- Tensioning System
+ 40 more
Climate Master Heat Pump TCV024AGC30APBS
Create an account to install this asset package.
Maintenance Plans for Climate Master Heat Pump Model TCV024AGC30APBS
Integrate maintenance plans directly into your work orders in MaintainX.
1 Yearly Air Coil Cleaning
CAUTION: Fin edges are sharp. Care must be taken not to damage the aluminum fins while cleaning.
Check the air coil under normal operating conditions.
Is the air coil dirty?
If the air coil is dirty, proceed to the next step. If not, skip the cleaning.
Brush or vacuum clean the air coil.
Check the aluminum fins for any damage.
Sign off on the air coil cleaning

Initial Equipment Inspection
Upon receipt of the equipment, carefully check the shipment against the bill of lading.
All units received?
Packaging of each unit inspected?
Each unit inspected for damage?
Ensure that the carrier makes proper notation of any shortages or damage on all copies of the freight bill and completes a common carrier inspection report.
Concealed damage not discovered during unloading must be reported to the carrier within 15 days of receipt of shipment. If not filed within 15 days, the freight company can deny the claim without recourse.
NOTE: It is the responsibility of the purchaser to file all necessary claims with the carrier. Notify your equipment supplier of all damage within fifteen (15) days of shipment.
Sign here to confirm the inspection
Piping System Maintenance
CAUTION! DO NOT use “Stop Leak” or similar chemical agent in this system. Addition of chemicals of this type to the loop water will foul the heat exchanger and inhibit unit operation.
NOTE: The manufacturer strongly recommends all piping connections, both internal and external to the unit, be pressure tested by an appropriate method prior to any finishing of the interior space or before access to all connections is limited. Test pressure may not exceed the maximum allowable pressure for the unit and all components within the water system.
The manufacturer will not be responsible or liable for damages from water leaks due to inadequate or lack of a pressurized leak test, or damages caused by exceeding the maximum pressure rating during installation.
Ensure that electrical power to the unit is disconnected.
Install the system with the supply hose connected directly to the return riser valve. Use a single length of flexible hose.
Open all air vents. Fill the system with water. DO NOT allow system to overflow. Bleed all air from the system. Pressurize and check the system for leaks and repair as appropriate.
Verify that all strainers are in place (ClimateMaster recommends a strainer with a #20 stainless steel wire mesh). Start the pumps, and systematically check each vent to ensure that all air is bled from the system.
Verify that make-up water is available. Adjust makeup water as required to replace the air which was bled from the system. Check and adjust the water/air level in the expansion tank.
Set the boiler to raise the loop temperature to approximately 85°F [29°C]. Open a drain at the lowest point in the system. Adjust the make-up water replacement rate to equal the rate of bleed.
Cabinet Cleaning
Warning: Do not allow water to stay in contact with the cabinet for long periods of time to prevent corrosion of the cabinet sheet metal.
Note: Generally, vertical cabinets are set up from the floor a few inches [7 - 8 cm] to prevent water from entering the cabinet.
Is the cabinet set up from the floor a few inches [7 - 8 cm]?
Enter the type of detergent used for cleaning
Was the cabinet cleaned using a mild detergent?
Sign off on the cabinet cleaning
Water Coil Maintenance
Direct ground water applications only
If the system is installed in an area with a known high mineral content (125 P.P.M. or greater) in the water, it is best to establish a periodic maintenance schedule with the owner so the coil can be checked regularly.
Coil Cleaning Procedures
Enter the water flow rate through the unit. Minimum flow rate for entering water temperatures below 50°F [10°C] is 2.0 gpm per ton [2.2 l/m per kW].
All other water loop applications
Generally water coil maintenance is not needed for closed loop systems. However, if the piping is known to have high dirt or debris content, it is best to establish a periodic maintenance schedule with the owner so the water coil can be checked regularly.
Dirty Installations
Open Cooling Towers
Coil Cleaning Procedures
Unlock efficiency
with MaintainX CoPilot
MaintainX CoPilot is your expert colleague, on call 24/7, helping your team find the answers they need to keep equipment running.
Reduce Unplanned Downtime
Ensure your team follows consistent procedures to minimize equipment failures and costly delays.
Maximize Asset Availability
Keep your assets running longer and more reliably, with standardized maintenance workflows from OEM manuals.
Lower Maintenance Costs
Turn any technician into an expert to streamline operations, maintain more assets, and reduce overall costs.
Thousands of companies manage their assets with MaintainX

'%3e%3cpath%20fill='url(%23b)'%20d='M66.008%2080.068c-5.084-.786-9.763-3.834-12.442-8.68a16.942%2016.942%200%200%201-1.87-5.18c1.096.19%202.203.476%203.298.87%206.525%202.333%2010.836%207.68%2011.014%2012.99ZM51.47%2061.576c.488-5.524%203.62-10.716%208.847-13.597a17.132%2017.132%200%200%201%2011.335-1.882c-.798%208.145-7.43%2014.848-16.038%2015.599-1.417.119-2.799.07-4.144-.12Zm28.564-11.478a17.513%2017.513%200%200%201%203.727%204.62c4.608%208.335%201.584%2018.813-6.75%2023.409a16.988%2016.988%200%200%201-4.359%201.679%2019.624%2019.624%200%200%201-3.977-12.776c.346-7.561%204.942-13.931%2011.36-16.932Z'/%3e%3cpath%20fill='%23110F0D'%20fill-rule='evenodd'%20d='M142.831%2048.324h4.977V77.03h-4.977V48.324Zm27.278%2013.002c.322%201.048.453%202.263.453%203.62v12.073h-4.787V66.208c0-.75-.047-1.572-.154-2.143-.453-2.382-1.822-3.572-4.215-3.572-2.31%200-3.882%201.274-4.43%203.476-.143.596-.226%201.405-.226%202.25v10.8h-4.787V56.623h4.477v2.989c1.536-2.5%203.906-3.43%206.371-3.43%203.488%200%206.263%201.68%207.298%205.144Zm24.636%207.323c0%203.882-2.358%206.525-5.763%207.727-1.298.453-2.632.643-4.62.643h-10.169V48.324h9.085c1.691%200%203.156.143%204.049.38%203.465.93%205.727%203.68%205.727%207.335%200%202.441-.81%204.156-2.762%205.644%202.905%201.417%204.453%203.727%204.453%206.966Zm-15.634-8.656h4.584c1.024%200%201.917-.143%202.536-.417%201.215-.548%201.905-1.608%201.905-3.167%200-1.548-.643-2.572-1.845-3.132-.691-.31-1.762-.452-2.763-.452h-4.417v7.168Zm10.716%208.465c0-1.536-.893-3.37-3.227-3.893-.428-.095-1.036-.143-1.571-.143h-5.918v8.085h5.501c.56%200%201.429-.048%201.953-.167%201.94-.453%203.262-1.846%203.262-3.882Zm47.747-11.847-8.097%2020.408h-4.429l-8.109-20.408h5.191l5.192%2014.574%205.108-14.574h5.144Zm-20.218%2010.002c0%20.69-.036%201.262-.155%201.94h-15.943c.631%202.87%202.714%204.728%205.882%204.728%202.131%200%203.607-.882%204.703-2.525h4.87c-1.762%204.144-5.204%206.692-9.657%206.692-6.084%200-10.537-4.858-10.537-10.49%200-6.108%204.524-10.776%2010.335-10.776%206.239%200%2010.442%204.954%2010.502%2010.43Zm-4.763-1.405c-.333-2.846-2.643-4.858-5.691-4.858-2.894%200-5.287%201.929-5.621%204.858h11.312Zm-72.667%203.44c0%204.787-3.287%208.371-9.419%208.371H119.363V64.66c-1.917.274-3.87.69-5.811%201.238l4.537%2011.121h-5.418l-3.596-9.585c-5.144%202.084-10.085%205.216-14.217%209.585h-4.786L101.8%2048.312h4.56l5.68%2013.883a44.112%2044.112%200%200%201%207.323-1.774V48.312h9.084c1.703%200%203.156.143%204.061.393%203.453.929%205.727%203.667%205.727%207.323%200%201.917-.738%204.179-2.81%205.691%203.06%201.56%204.501%204.025%204.501%206.93Zm-15.634-8.667a62.664%2062.664%200%200%201%202.06-.036c1.703.012%203.239.131%204.608.37%201.441-.549%202.357-1.727%202.357-3.537%200-1.941-.881-3.144-2.488-3.667-.548-.18-1.358-.286-2.322-.286h-4.215v7.156Zm-16.55%203.905-3.715-9.894-6.394%2016.502c2.833-2.595%206.263-4.858%2010.109-6.608Zm27.254%204.74c0-2.775-3.131-4.347-8.513-4.418-.715%200-1.441.011-2.191.047v8.252h5.918c2.548%200%204.786-1.37%204.786-3.882Z'%20clip-rule='evenodd'/%3e%3c/g%3e%3cdefs%3e%3clinearGradient%20id='b'%20x1='51.47'%20x2='85.916'%20y1='62.946'%20y2='62.946'%20gradientUnits='userSpaceOnUse'%3e%3cstop%20stop-color='%23CD9F28'/%3e%3cstop%20offset='1'%20stop-color='%23ECD80B'/%3e%3c/linearGradient%3e%3cclipPath%20id='a'%3e%3cpath%20fill='%23fff'%20d='M51.47%2045.728h186.104V80.14H51.47z'/%3e%3c/clipPath%3e%3c/defs%3e%3c/svg%3e)


More from Climate Master


Explore Other Assets


© 2026 MaintainX. All rights reserved.