


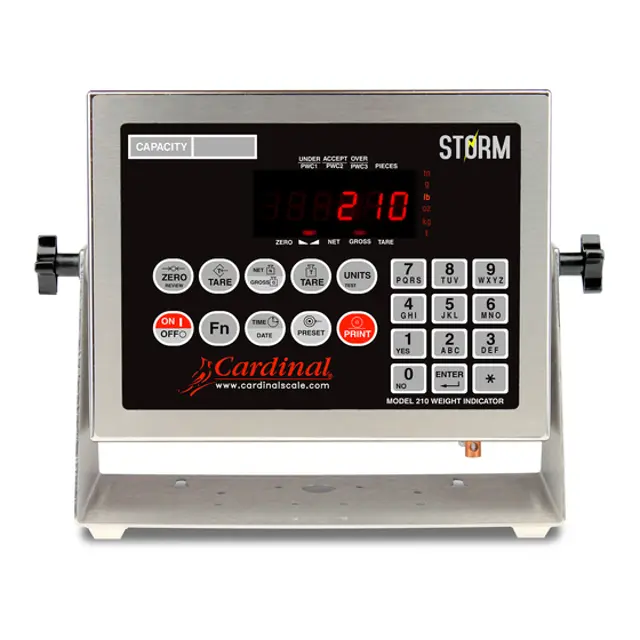
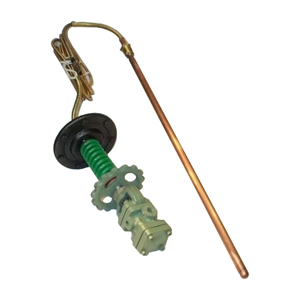
Cardinal Scale Manufacturing Weight Indicator 210
Need answers fast?
Explore the manual using AI.
Turn manuals into instant answers
with your AI-powered assistantTurn manuals into instant answers
with your AI-powered assistant
Manual for Cardinal Scale Manufacturing Weight Indicator 210
Complete asset maintenance, one click away
Get instant access to all the maintenance information you need. Empower technicians to perform preventive maintenance with asset packages, ready to use right out of the box.

Documents & Manuals
Find all the essential guides in one place.
 Tensioning Guide
- Belt-diagram
- C-120 pulleys
+ 13 more

Work Order Templates
Pre-built workflows to keep your asset running smoothly.
- Daily Electrical System Inspection
- Replace Roller and Pulley
- Install Engine B-120
+ 29 more

Procedures
Integrate maintenance plans directly into your work orders.
- Motion Industries
- Applied Industrial Technologies
- Electrical Brothers
+ 5 more

Parts
Access the parts list for your equipment in MaintainX.
- Drive Motor
- B2 Rollers
- Tensioning System
+ 40 more
Cardinal Scale Manufacturing Weight Indicator 210
Create an account to install this asset package.
Maintenance Plans for Cardinal Scale Manufacturing Weight Indicator Model 210
Integrate maintenance plans directly into your work orders in MaintainX.
Battery Performance Optimization
Warning: Follow these steps to optimize the performance and life of the battery.
Auto Shut-Off feature enabled
Refer to the Setup and Calibration section for an explanation of the Auto Shut-Off feature
AC power cord plugged into a wall outlet after each work shift
Avoid charging and discharging the battery in extreme cold
Note: Low temperatures decrease the capacity of the battery significantly
Battery charged before storage
The optimum environment for batteries is to charge while stored
Sign off on the battery performance optimization

Rear Panel Reinstallation
Warning: Do not use tools! Finger tighten only!
Excess cable removed from the instrument enclosure
Cable gland connectors securely tightened
Unused gland connectors are plugged
No cables or wires exposed between the main housing and rear panel
Rear panel placed onto the main housing
Note: Follow a diagonal pattern when tightening the acorn nuts.
Acorn nuts securely tightened following a diagonal pattern
Sign off on the rear panel reinstallation
Battery Charge Instruction
The battery can be recharged with the indicator’s built-in charger.
Note that the battery can be left connected to the charger indefinitely, without risk of damage. Cyclic Operation
When operating the indicator totally from battery power and only recharging when the batteries are low, place the Battery Charge Mode jumper(J1) in the FULL position.
For the location of the Battery Charge Mode jumper(J1), refer to Figure No. 6.
Back-Up Operation
When operating the indicator from commercial power and using the battery to supply power only in the event of a power loss, place the Battery Charge Mode jumper(J1) in the TRICKLE position.
For the location of the Battery Charge Mode jumper(J1), refer to Figure No. 6.
When the battery installed in a indicator needs to be charged, simply plug the AC power cord into a wall outlet and charging will begin.
Note that operating the indicator during charging only minimally affects the charge time of the battery. The indicator can operate at a 100% duty cycle and will only prolong the charge time by less than 20%.
Battery Remove Instruction
AC power to the indicator removed
Three acorn nuts securing the Battery Access Cover removed
Battery Access Cover removed
Battery removed from the opening
Battery Access Cover replaced
Three acorn nuts installed
Sign off on the battery removal
Battery Installation
AC power to the indicator removed
Three acorn nuts securing the Battery Access Cover removed
Battery Access Cover removed
Negative polarity markings of the battery positioned facing up
Alignment notch in the battery is to the left
Battery slid into the opening, compressing the battery ejector spring, until you feel resistance and the battery is almost flush with the bottom of the indicator
Battery Access Cover replaced
Three acorn nuts installed, securing the battery in place
Parts for Cardinal Scale Manufacturing Weight Indicator 210
Access the parts list for your equipment in MaintainX.
Hex Nut #6-32
6013-0039
Hex Nut #4-40
6013-0245
Scw Pan Head #6-32 X .250 Pdms
6021-0654
Scw Fillister Machine-Scw #10-32 X .375 S.S.
6021-1108
Washer Lock Int. Tooth #4 S.S.
6024-0081
Hex Nut #6-32
6013-0039
Hex Nut #4-40
6013-0245
Scw Pan Head #6-32 X .250 Pdms
6021-0654
Scw Fillister Machine-Scw #10-32 X .375 S.S.
6021-1108
Washer Lock Int. Tooth #4 S.S.
6024-0081
Hex Nut #6-32
6013-0039
Hex Nut #4-40
6013-0245
Scw Pan Head #6-32 X .250 Pdms
6021-0654
Scw Fillister Machine-Scw #10-32 X .375 S.S.
6021-1108
Washer Lock Int. Tooth #4 S.S.
6024-0081
Unlock efficiency
with MaintainX CoPilot
MaintainX CoPilot is your expert colleague, on call 24/7, helping your team find the answers they need to keep equipment running.
Reduce Unplanned Downtime
Ensure your team follows consistent procedures to minimize equipment failures and costly delays.
Maximize Asset Availability
Keep your assets running longer and more reliably, with standardized maintenance workflows from OEM manuals.
Lower Maintenance Costs
Turn any technician into an expert to streamline operations, maintain more assets, and reduce overall costs.
Thousands of companies manage their assets with MaintainX

'%3e%3cpath%20fill='url(%23b)'%20d='M66.008%2080.068c-5.084-.786-9.763-3.834-12.442-8.68a16.942%2016.942%200%200%201-1.87-5.18c1.096.19%202.203.476%203.298.87%206.525%202.333%2010.836%207.68%2011.014%2012.99ZM51.47%2061.576c.488-5.524%203.62-10.716%208.847-13.597a17.132%2017.132%200%200%201%2011.335-1.882c-.798%208.145-7.43%2014.848-16.038%2015.599-1.417.119-2.799.07-4.144-.12Zm28.564-11.478a17.513%2017.513%200%200%201%203.727%204.62c4.608%208.335%201.584%2018.813-6.75%2023.409a16.988%2016.988%200%200%201-4.359%201.679%2019.624%2019.624%200%200%201-3.977-12.776c.346-7.561%204.942-13.931%2011.36-16.932Z'/%3e%3cpath%20fill='%23110F0D'%20fill-rule='evenodd'%20d='M142.831%2048.324h4.977V77.03h-4.977V48.324Zm27.278%2013.002c.322%201.048.453%202.263.453%203.62v12.073h-4.787V66.208c0-.75-.047-1.572-.154-2.143-.453-2.382-1.822-3.572-4.215-3.572-2.31%200-3.882%201.274-4.43%203.476-.143.596-.226%201.405-.226%202.25v10.8h-4.787V56.623h4.477v2.989c1.536-2.5%203.906-3.43%206.371-3.43%203.488%200%206.263%201.68%207.298%205.144Zm24.636%207.323c0%203.882-2.358%206.525-5.763%207.727-1.298.453-2.632.643-4.62.643h-10.169V48.324h9.085c1.691%200%203.156.143%204.049.38%203.465.93%205.727%203.68%205.727%207.335%200%202.441-.81%204.156-2.762%205.644%202.905%201.417%204.453%203.727%204.453%206.966Zm-15.634-8.656h4.584c1.024%200%201.917-.143%202.536-.417%201.215-.548%201.905-1.608%201.905-3.167%200-1.548-.643-2.572-1.845-3.132-.691-.31-1.762-.452-2.763-.452h-4.417v7.168Zm10.716%208.465c0-1.536-.893-3.37-3.227-3.893-.428-.095-1.036-.143-1.571-.143h-5.918v8.085h5.501c.56%200%201.429-.048%201.953-.167%201.94-.453%203.262-1.846%203.262-3.882Zm47.747-11.847-8.097%2020.408h-4.429l-8.109-20.408h5.191l5.192%2014.574%205.108-14.574h5.144Zm-20.218%2010.002c0%20.69-.036%201.262-.155%201.94h-15.943c.631%202.87%202.714%204.728%205.882%204.728%202.131%200%203.607-.882%204.703-2.525h4.87c-1.762%204.144-5.204%206.692-9.657%206.692-6.084%200-10.537-4.858-10.537-10.49%200-6.108%204.524-10.776%2010.335-10.776%206.239%200%2010.442%204.954%2010.502%2010.43Zm-4.763-1.405c-.333-2.846-2.643-4.858-5.691-4.858-2.894%200-5.287%201.929-5.621%204.858h11.312Zm-72.667%203.44c0%204.787-3.287%208.371-9.419%208.371H119.363V64.66c-1.917.274-3.87.69-5.811%201.238l4.537%2011.121h-5.418l-3.596-9.585c-5.144%202.084-10.085%205.216-14.217%209.585h-4.786L101.8%2048.312h4.56l5.68%2013.883a44.112%2044.112%200%200%201%207.323-1.774V48.312h9.084c1.703%200%203.156.143%204.061.393%203.453.929%205.727%203.667%205.727%207.323%200%201.917-.738%204.179-2.81%205.691%203.06%201.56%204.501%204.025%204.501%206.93Zm-15.634-8.667a62.664%2062.664%200%200%201%202.06-.036c1.703.012%203.239.131%204.608.37%201.441-.549%202.357-1.727%202.357-3.537%200-1.941-.881-3.144-2.488-3.667-.548-.18-1.358-.286-2.322-.286h-4.215v7.156Zm-16.55%203.905-3.715-9.894-6.394%2016.502c2.833-2.595%206.263-4.858%2010.109-6.608Zm27.254%204.74c0-2.775-3.131-4.347-8.513-4.418-.715%200-1.441.011-2.191.047v8.252h5.918c2.548%200%204.786-1.37%204.786-3.882Z'%20clip-rule='evenodd'/%3e%3c/g%3e%3cdefs%3e%3clinearGradient%20id='b'%20x1='51.47'%20x2='85.916'%20y1='62.946'%20y2='62.946'%20gradientUnits='userSpaceOnUse'%3e%3cstop%20stop-color='%23CD9F28'/%3e%3cstop%20offset='1'%20stop-color='%23ECD80B'/%3e%3c/linearGradient%3e%3cclipPath%20id='a'%3e%3cpath%20fill='%23fff'%20d='M51.47%2045.728h186.104V80.14H51.47z'/%3e%3c/clipPath%3e%3c/defs%3e%3c/svg%3e)


More from Cardinal Scale Manufacturing
Explore Other Assets


© 2026 MaintainX. All rights reserved.