


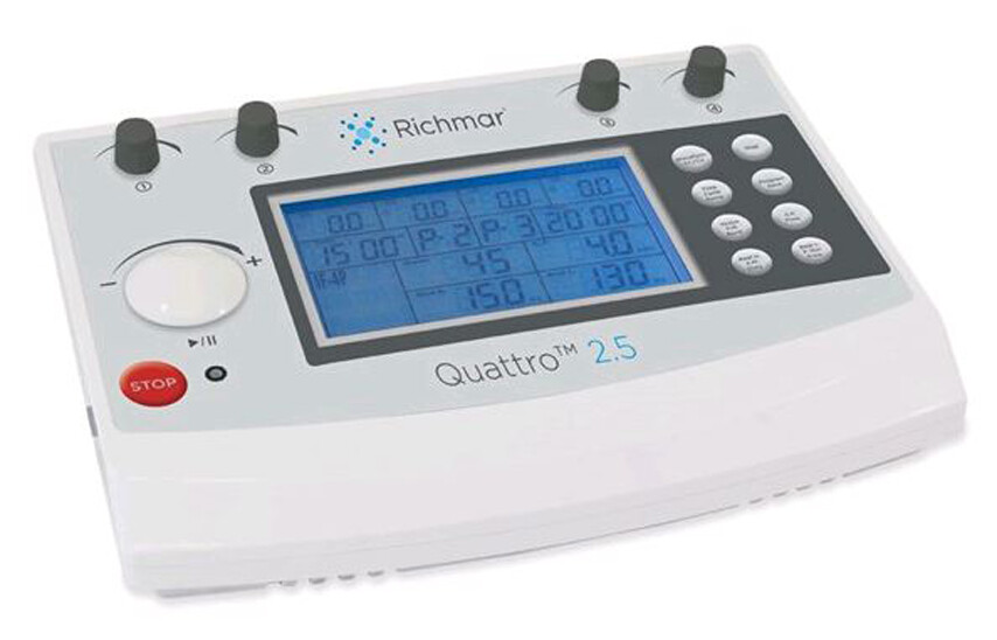
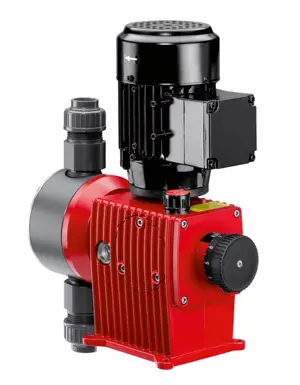
Richmar Electrotherapy Device QUATTRO 2.5
Need answers fast?
Explore the manual using AI.
Turn manuals into instant answers
with your AI-powered assistantTurn manuals into instant answers
with your AI-powered assistant
Complete asset maintenance, one click away
Get instant access to all the maintenance information you need. Empower technicians to perform preventive maintenance with asset packages, ready to use right out of the box.

Documents & Manuals
Find all the essential guides in one place.
 Tensioning Guide
- Belt-diagram
- C-120 pulleys
+ 13 more

Work Order Templates
Pre-built workflows to keep your asset running smoothly.
- Daily Electrical System Inspection
- Replace Roller and Pulley
- Install Engine B-120
+ 29 more

Procedures
Integrate maintenance plans directly into your work orders.
- Motion Industries
- Applied Industrial Technologies
- Electrical Brothers
+ 5 more

Parts
Access the parts list for your equipment in MaintainX.
- Drive Motor
- B2 Rollers
- Tensioning System
+ 40 more
Richmar Electrotherapy Device QUATTRO 2.5
Create an account to install this asset package.
Maintenance Plans for Richmar Electrotherapy Device Model QUATTRO 2.5
Integrate maintenance plans directly into your work orders in MaintainX.
Electrotherapy Device Electrodes Placement
Warning: For trained personnel only
Examine the skin for any wounds and clean the skin.
When using self-adhesive electrodes, remove the electrode from plastic backing.
Apply the electrodes to or around the treatment area. Electrode should be placed at least 2” but no more than 6” apart, per channel.
Ensure that the electrodes are applied securely to the skin.
Ensure good contact between each electrode and the skin.
Check the electrode contact regularly during the treatment.
Examine the skin again after the treatment.
Choose electrodes to properly fit the anatomy.

Electrotherapy Device Lead Wires and Cables Cleaning
Warning: Use of rubbing alcohol on the lead wires will damage the insulation and dramatically shorten their life.
Lead wires wiped clean with a cloth dampened in a mild soap solution?
Lead wires gently wiped dry?
Date of last lead wire replacement
Is it time to replace the lead wires (every six months)?
Sign off on the cleaning and maintenance of lead wires and cables
Electrotherapy Device Check
Check Before Treatment
Are there any contraindications to treatment?
Inspect the skin treatment area for any abrasions, inflammation, surface veins etc.
Clean the skin treatment area with soap or alcohol (70%).
Shaving or clipping excessive hair on the skin treatment area can provide optimal treatment.
Test the heat sensitivity of the treatment area.
Sign off on the electrotherapy device check
Electrotherapy Device Electrodes Cleaning
Skin Care Tips
Clean the treatment area with mild soap and water. Rinse thoroughly and dry area completely before placing electrodes on or around the treatment area.
Excess hair may be clipped with scissors; DO NOT shave stimulation area.
Cleaning the Electrodes
Apply the protective backing to the tacky side of the electrode before storing.
Improve repeated application by spreading a few drops of cold water over the adhesive on the electrode and turn the surface up to air dry. Over-saturation of the electrode with water will reduce the adhesive properties.
If any electrodes are not sticking completely to the skin (no edges lifting) replace with new electrodes, to avoid possible injury.
The rubber electrodes should be cleaned with lukewarm water. To disinfect the electrodes or to remove stubborn stains of dirt, use a 70% alcohol solution.
Ensure electrode is completely dry before using the treatment. Check with patient to ensure the patient is not allergic to any cleaning solution used to clean the rubber electrodes, prior to administering treatment.
Electrotherapy Device Cleaning
Tips for Skin Care:
Follow these suggestions to avoid skin irritation, especially if you have sensitive skin:
1. Clean the treatment area with mild soap and water. Rinse thoroughly and dry area completely before placing electrodes on or around the treatment area.
2. Excess hair may be clipped with scissors; DO NOT shave stimulation area.
Cleaning the Device:
1. Unplug the device before you clean the device.
2. Clean the device after use with a soft, slightly moistened cloth.
For hard to clean situations, you can also moisten the cloth with mild soapy water.
3. DO NOT use any chemical cleaners or abrasive agents for cleaning.
Parts for Richmar Electrotherapy Device QUATTRO 2.5
Access the parts list for your equipment in MaintainX.
Rubber Electrodes, Size - 2.5”×3.5”
ER2535B2
Rubber Electrodes, Size - 2.75”×4.3”
ER2743B2
Electrode Sponges, Size - 2.75”×4”
ES2740Y2
Electrode Sponges, Size - 3.0”×4.75”
ES3047Y2
Self-Adhesive Electrodes, Size - 2”×2”
E1P2020WC2
Rubber Electrodes, Size - 2.5”×3.5”
ER2535B2
Rubber Electrodes, Size - 2.75”×4.3”
ER2743B2
Electrode Sponges, Size - 2.75”×4”
ES2740Y2
Electrode Sponges, Size - 3.0”×4.75”
ES3047Y2
Self-Adhesive Electrodes, Size - 2”×2”
E1P2020WC2
Rubber Electrodes, Size - 2.5”×3.5”
ER2535B2
Rubber Electrodes, Size - 2.75”×4.3”
ER2743B2
Electrode Sponges, Size - 2.75”×4”
ES2740Y2
Electrode Sponges, Size - 3.0”×4.75”
ES3047Y2
Self-Adhesive Electrodes, Size - 2”×2”
E1P2020WC2
Unlock efficiency
with MaintainX CoPilot
MaintainX CoPilot is your expert colleague, on call 24/7, helping your team find the answers they need to keep equipment running.
Reduce Unplanned Downtime
Ensure your team follows consistent procedures to minimize equipment failures and costly delays.
Maximize Asset Availability
Keep your assets running longer and more reliably, with standardized maintenance workflows from OEM manuals.
Lower Maintenance Costs
Turn any technician into an expert to streamline operations, maintain more assets, and reduce overall costs.
Thousands of companies manage their assets with MaintainX

'%3e%3cpath%20fill='url(%23b)'%20d='M66.008%2080.068c-5.084-.786-9.763-3.834-12.442-8.68a16.942%2016.942%200%200%201-1.87-5.18c1.096.19%202.203.476%203.298.87%206.525%202.333%2010.836%207.68%2011.014%2012.99ZM51.47%2061.576c.488-5.524%203.62-10.716%208.847-13.597a17.132%2017.132%200%200%201%2011.335-1.882c-.798%208.145-7.43%2014.848-16.038%2015.599-1.417.119-2.799.07-4.144-.12Zm28.564-11.478a17.513%2017.513%200%200%201%203.727%204.62c4.608%208.335%201.584%2018.813-6.75%2023.409a16.988%2016.988%200%200%201-4.359%201.679%2019.624%2019.624%200%200%201-3.977-12.776c.346-7.561%204.942-13.931%2011.36-16.932Z'/%3e%3cpath%20fill='%23110F0D'%20fill-rule='evenodd'%20d='M142.831%2048.324h4.977V77.03h-4.977V48.324Zm27.278%2013.002c.322%201.048.453%202.263.453%203.62v12.073h-4.787V66.208c0-.75-.047-1.572-.154-2.143-.453-2.382-1.822-3.572-4.215-3.572-2.31%200-3.882%201.274-4.43%203.476-.143.596-.226%201.405-.226%202.25v10.8h-4.787V56.623h4.477v2.989c1.536-2.5%203.906-3.43%206.371-3.43%203.488%200%206.263%201.68%207.298%205.144Zm24.636%207.323c0%203.882-2.358%206.525-5.763%207.727-1.298.453-2.632.643-4.62.643h-10.169V48.324h9.085c1.691%200%203.156.143%204.049.38%203.465.93%205.727%203.68%205.727%207.335%200%202.441-.81%204.156-2.762%205.644%202.905%201.417%204.453%203.727%204.453%206.966Zm-15.634-8.656h4.584c1.024%200%201.917-.143%202.536-.417%201.215-.548%201.905-1.608%201.905-3.167%200-1.548-.643-2.572-1.845-3.132-.691-.31-1.762-.452-2.763-.452h-4.417v7.168Zm10.716%208.465c0-1.536-.893-3.37-3.227-3.893-.428-.095-1.036-.143-1.571-.143h-5.918v8.085h5.501c.56%200%201.429-.048%201.953-.167%201.94-.453%203.262-1.846%203.262-3.882Zm47.747-11.847-8.097%2020.408h-4.429l-8.109-20.408h5.191l5.192%2014.574%205.108-14.574h5.144Zm-20.218%2010.002c0%20.69-.036%201.262-.155%201.94h-15.943c.631%202.87%202.714%204.728%205.882%204.728%202.131%200%203.607-.882%204.703-2.525h4.87c-1.762%204.144-5.204%206.692-9.657%206.692-6.084%200-10.537-4.858-10.537-10.49%200-6.108%204.524-10.776%2010.335-10.776%206.239%200%2010.442%204.954%2010.502%2010.43Zm-4.763-1.405c-.333-2.846-2.643-4.858-5.691-4.858-2.894%200-5.287%201.929-5.621%204.858h11.312Zm-72.667%203.44c0%204.787-3.287%208.371-9.419%208.371H119.363V64.66c-1.917.274-3.87.69-5.811%201.238l4.537%2011.121h-5.418l-3.596-9.585c-5.144%202.084-10.085%205.216-14.217%209.585h-4.786L101.8%2048.312h4.56l5.68%2013.883a44.112%2044.112%200%200%201%207.323-1.774V48.312h9.084c1.703%200%203.156.143%204.061.393%203.453.929%205.727%203.667%205.727%207.323%200%201.917-.738%204.179-2.81%205.691%203.06%201.56%204.501%204.025%204.501%206.93Zm-15.634-8.667a62.664%2062.664%200%200%201%202.06-.036c1.703.012%203.239.131%204.608.37%201.441-.549%202.357-1.727%202.357-3.537%200-1.941-.881-3.144-2.488-3.667-.548-.18-1.358-.286-2.322-.286h-4.215v7.156Zm-16.55%203.905-3.715-9.894-6.394%2016.502c2.833-2.595%206.263-4.858%2010.109-6.608Zm27.254%204.74c0-2.775-3.131-4.347-8.513-4.418-.715%200-1.441.011-2.191.047v8.252h5.918c2.548%200%204.786-1.37%204.786-3.882Z'%20clip-rule='evenodd'/%3e%3c/g%3e%3cdefs%3e%3clinearGradient%20id='b'%20x1='51.47'%20x2='85.916'%20y1='62.946'%20y2='62.946'%20gradientUnits='userSpaceOnUse'%3e%3cstop%20stop-color='%23CD9F28'/%3e%3cstop%20offset='1'%20stop-color='%23ECD80B'/%3e%3c/linearGradient%3e%3cclipPath%20id='a'%3e%3cpath%20fill='%23fff'%20d='M51.47%2045.728h186.104V80.14H51.47z'/%3e%3c/clipPath%3e%3c/defs%3e%3c/svg%3e)


Explore Other Assets


© 2026 MaintainX. All rights reserved.